Scene / Dope Editor - Dope Sheet
Introduction
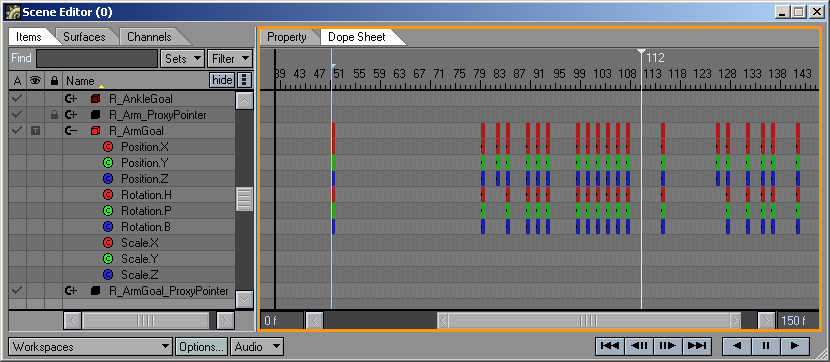
The Dope Sheet is a form of scratch sheet with which the animation of channel data (position, rotation, scale, etc.) can be manipulated without going into the details of what the exact channel values are. This gives an overview of the scene animation and is useful when the multiple items need to be viewed simultaneously so that their relative timing is correct. This view also allows easy manipulation of a large number of channels in one operation. It allows time offsetting and time scaling of channel data.
It can also accelerate the process of cutting out portions of motion or transferring motion from an item or channel to other items or channels. This view basically offers a method of manipulating key frame existence without worrying about the exact value of each key frame; one of Graph Editor’s purposes in Layout.
The Dope Sheet does not modify key frame values.
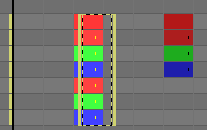
The Dope Sheet is a grid, or 2D array, in appearance. The horizontal dimension is time measured in blocks. Each block represents a range of time, which is user adjustable in the Options Panel. The horizontal block visible width has a pixel width, which can be adjusted to see more time blocks or fewer within the visible portion of the sheet.
There is a minimum pixel width of three pixels for each block.
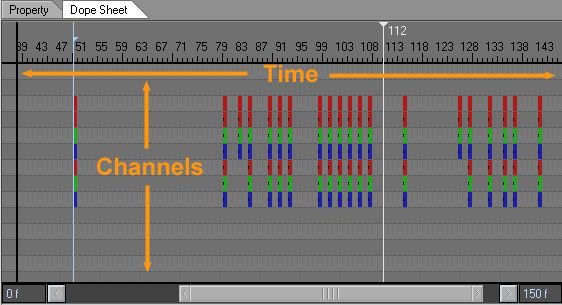
The vertical dimension is measured in rows. Each row represents a single channel of key frame data, a group of channels, or nothing. The height of each row is predetermined and matches the row height of the Item List View rows and Surface List View rows. Each channel that contains at least one key frame will have its appropriate block colored differently. Similarly, an item that contains one or more channels (i.e. a channel group, but may be any row that has channel children) with a colored block will have its own block colored, differently from the color of the channel block.
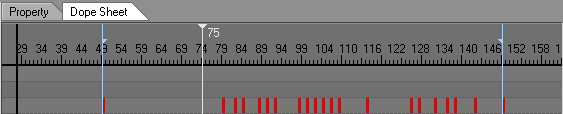
The range of time that the dope sheet will allow viewing of is determined by the preview first and last endpoints set within Layout. The scrollbar will then allow viewing within that frame range. There are numeric controls within the dope sheet at the bottom, which also allow setting the preview first and last frames. These endpoints are shared with the ones in Layout.

The scrollbar has sizing handles on both sides. These are used to adjust the block pixel width so that more or fewer blocks are visible at once. Minimum and maximum pixel widths exist as well.
The horizontal scrollbar has a size limit so that it does not get too small to grab hold of’.
At the top of the sheet is a timeline tick marker display showing what each block represents. A time code is displayed for each block for which there is room to display a time code.
Selecting Blocks
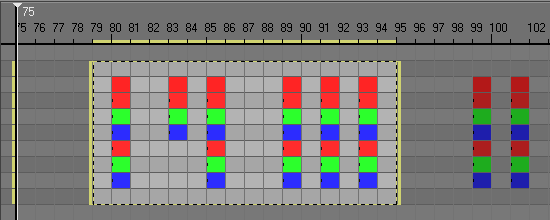
Blocks may be selected by using the Left mouse to drag a selection box around the blocks of interest. The selection box starts in one corner of a block and ends in a corner of a block. The box will snap to the nearest block boundaries and will indicate a selection of contiguous time and contiguous rows.
During selection, the box may extend beyond the visible portions of the sheet; this will cause the dope sheet to scroll hidden areas into view.
The left edge of the dope sheet contains an empty area to show which rows (items) are selected in the dope sheet. Rows that contain some selected blocks appear differently. The top of the dope sheet shows which columns have selected blocks. The selection box itself is an outline of the selected blocks. The left and right edges of this box have thin vertical handles used for time scaling operations.

Clicking the LMB in the left edge of the Dope Sheet will select the entire row for all columns. It is important to note that the dope sheet block selection is independent of an item list selection or surface list selection.

Clicking the LMB in the top of the dope sheet (where the time line tick marks are) will select the blocks in that column for all rows shown. This does not include hidden rows or filtered items.

Clicking the LMB inside a single block will select that one block.

To add to an existing selection use the Shift + LMB.
A new selection always overwrites an existing selection.
Manipulating Selections
Once a selection box has been formed, the contents may be manipulated. If a channel group is manipulated, all channels contained within (that are not filtered out) are manipulated even if the group is not expanded. When a range of time is manipulated, only the keys originally selected will be manipulated, even if the selection box now has moved as a result of an operation.
LMB and drag is used to move the time offset of a selection. Time offsets are applied block by block. If finer time resolution is needed, using the control-key modifier while dragging allows the keys to move in time with smaller increments.
LMB and dragging the left or right Scale Handles will allow time scaling. Using the left edge will use the selection box end time as a scale reference time. Using the right edge will use the selection box start time as a scale reference time.
The control key can be held down while mouse left-clicking. Doing so will allow the precise location of a key in time to be manipulated instead of whole block manipulations. This can be done when creating the selection box, moving a selection, and scaling a selection.
Holding the Shift key down while dragging, will ‘reacquire’ the keys to be manipulated. This means any key blocks that are currently highlighted AND inside the manipulation box
When you highlight some blocks and offset them so that now those original blocks are moved, only some keys may exist that are inside the highlighted blocks and the manipulation box. Hitting Shift while manipulating further will only affect those blocks that are both highlighted and inside that manipulation box.
Selection Right Click Menu
Clicking the RMB inside the selection box will popup a context menu:

Sheet:
- Select all - select all blocks that the dope sheet will allow (all tracks all times within preview range)
- Unselect all - unselect all blocks currently selected
- View all - set the block pixel size such that the preview range can be seen in full.
- Select Highlighted Tracks - This will move the manipulation box to the highlighted blocks.
Time:
- Set time here - set current time to the nearest frame to the current mouse position.
Selection:
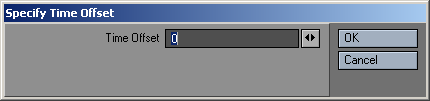
- Numeric offset… - present dialog to offset the current selection in time.
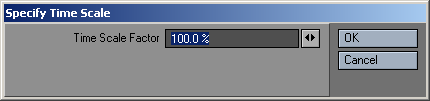
- Numeric time scale… - present dialog to scale the current selection in time.
- Erase - Delete all keys within original selection. No keys After the selection will be shifted.
- Insert Gap - Make the selection box a blank gap. Shift left edge to be right of right edge
- Delete - destroys all keys within selection regardless of originally selected keys and shifts all keys after the selection right edge to the left.
- Cut - Stores keys from original selection into a temporary buffer. Those keys are deleted. The selection box remains. Key times are stored relative to the selection left edge time. The time range is also stored so that the right edge of the buffer is not determined by the last key.
- Copy - Works like cut without deleting the original keys.
- Paste Over - Only available if there are keys stored in the temporary buffer. Places keys into the selection box starting with the left edge as a reference point. The selection box remains. Keys will not be pasted beyond the right edge of the selection box. Tracks are processed top to bottom regardless of where the stored keys came from. Existing keys in the selection box are left alone. Keys with the same time value will be overwritten. When pasting, it is possible that the number of rows copied will differ from the number of rows pasted to. When copy row count is less than the past row count, the copied rows are applied row by row and will cycle around again when the end is reached. In other words a copy count of two rows paste count of five will result in source row 1 being applied to target rows 1, 3, and 5; and source row 2 being applied to target rows 2 and 4. When the copy row count is greater than the paste row count, the excess copy rows will not be used.
- Paste insert - like Paste Over except that all time from the left edge of the selection is moved forward in time in order to make room for the stored keys first. Then, the paste occurs ignoring the selection box left/right, but it does consider the top/bottom selection.
- Edit in graph editor - opens the Graph Editor with the current selection box selected. This includes time range and tracks that may be selected.
- Zoom - set the block pixel size such that the selection box time range occupies the visible portion of the sheet.
- Quantize - This useful operation will make all keys move in time to the start of the block period they are contained within. This can help fix slight offset errors that may have crept in.