Scene / Dope Editor - Properties
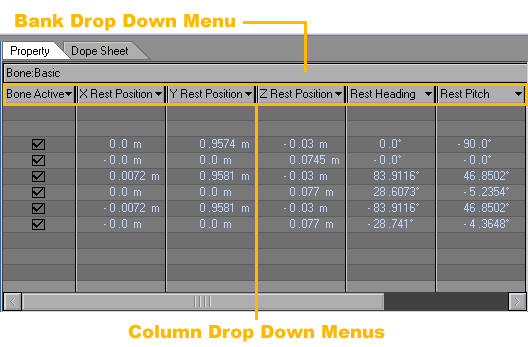
Spread Sheet Property Panel
Often you want to edit certain properties of an item, and luckily, changing the values and properties of items is simple in Layout. But what if you need to change the properties for 20 objects? The Property Panel organizes these properties and lets you edit a wide range of values quickly and easily.
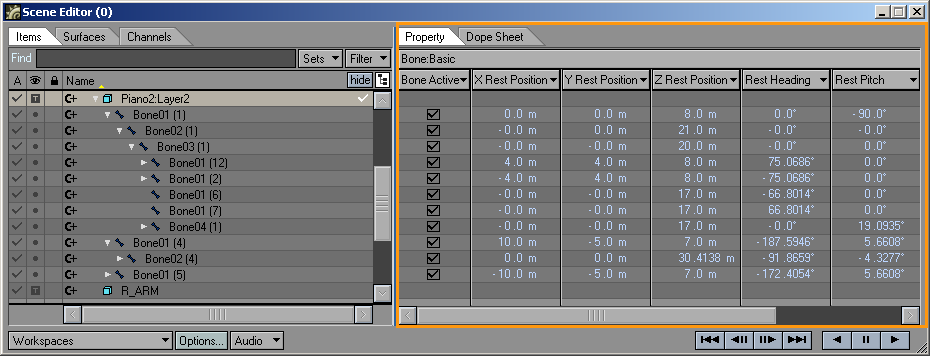
The Spread Sheet Property Panel consists of two sections, The Bank section and the Column section.

Property Panel Banks
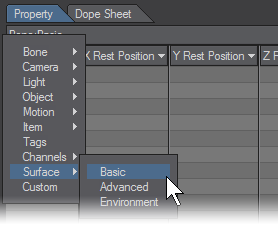
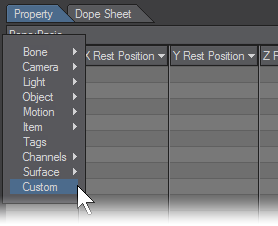
A collection of columns is called a Bank; and each bank can hold any number of columns. Some predefined banks exist that help to organize the vast multitude of properties available. Custom banks, which allow you to define which columns make up the bank, are also supported.
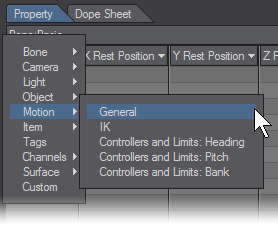
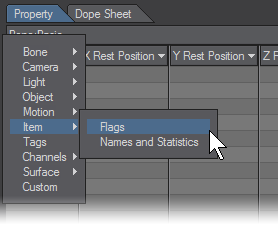
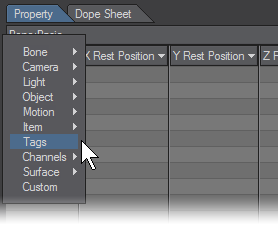
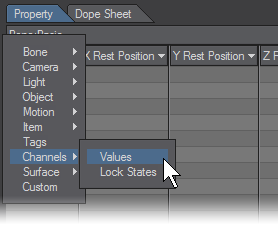
LightWave ships with a large collection of Bank Presets listed below:

Bank Options Menu
Right clicking on the Bank drop down menu will bring up the Bank Options Menu.
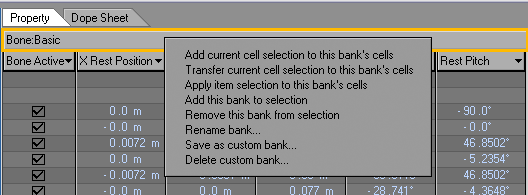
- Add current cell selection to this bank’s cells - This will use any selected cell position and apply it to the other columns in that bank for that same row. Only cells of matching type as already selected cells will be selected.
- Transfer current cell selection to this bank’s cells - this works like the ‘add current cell...’ except that transfer, clears out the current selection, so that the first type of cell encountered in the bank will be used.
- Apply item selection to this bank’s cells - This looks at highlighted items on the left side and tries to select cells in the same rows as those items in all the columns of the bank.
However, only columns that are of similar types can have cells selected. For example, a check box type cell and a numeric type cell cannot be edited at the same time.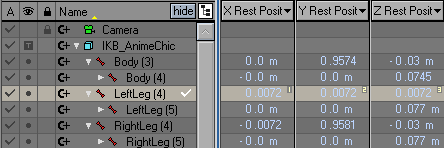
- Add this bank from selection - attempts to select all cells in the bank.
The cell types must match.
- Remove this bank from selection - Deselects all cells in the bank
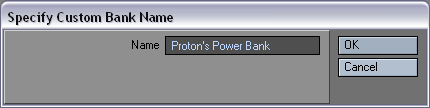
- Rename bank - This will rename the current bank for this instance of bank existence.
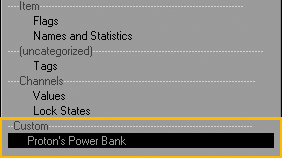
- Save as custom bank - once any arrangement of columns (including resizing) are made, this ‘custom’ bank can be named and saved for future use.
- Delete custom bank - deletes the custom bank preset. It will not remove a bank instance based off that custom preset, just the preset so that it will not show up as a bank preset.
Sizing Banks
A bank can be resized using the right-most vertical line. In addition, using the upper portion of the vertical line (the part where the bank name row is) will proportionally size the columns in the bank, while it would normally just affect the last column.
Adding and Removing Banks
To add a bank, simply click the Add Bank button (+) located at the end of the bank name. To remove a bank, click the Remove Bank button (-) located under the Add Bank button.

Use the slider-bar at the bottom of the Property Cells to adjust which bank(s) are currently displayed in the viewing area.
Property Panel Columns
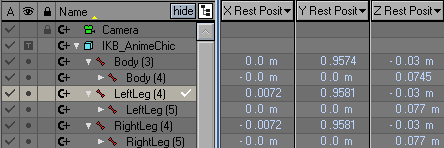
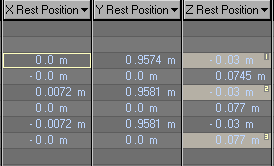
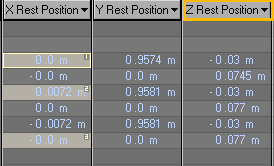
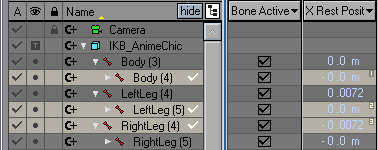
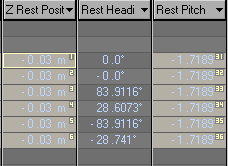
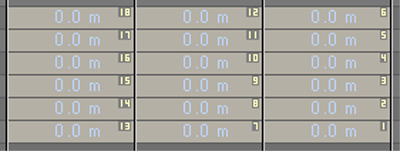
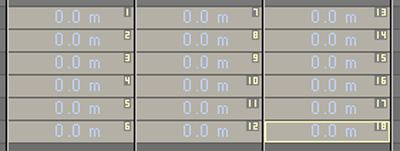
A Column consists of Cells. Each column in the Scene Editor is a property instance having a specific cell type. The Property cells contain the values for each of the properties, for all items. The values range from numerical values to file names, depending on which property you are editing. 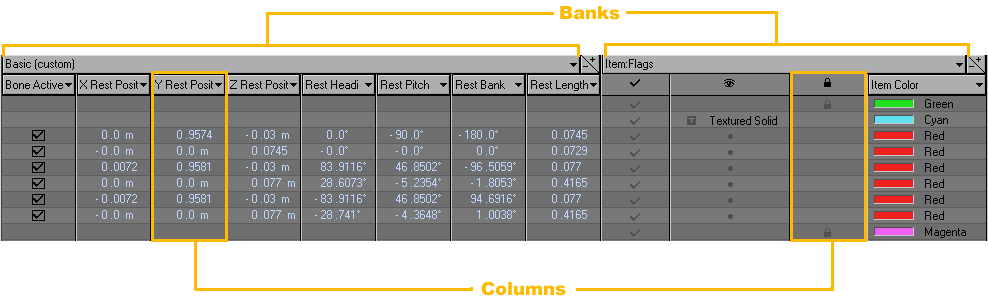
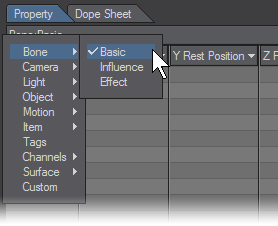
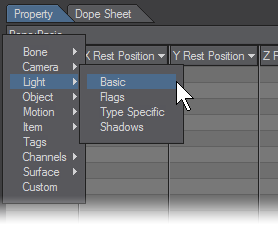
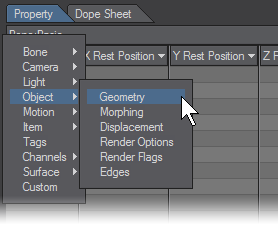
There are many column types available to choose from. Left click on the column header to select the Cell Type for that column.
Column Options Menu
Right clicking on a Column drop down menu will bring up the Column Options Menu.
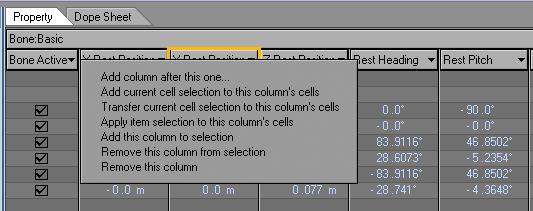
- Add column after this one - This will create a new column to the right of the selected column.
- Add current cell selection to this column’s cells - This will select the same cells that are currently selected in another column and apply that selection to the selected column.
- Transfer current cell selection to this column’s cells - This will select the same cells that are currently selected in another column and apply that selection to the selected column. It will then remove the selected cells in the previous column.
- Apply item selection to this column’s cells - This will select the cells in the selected column based on the items selected.

- Add this column to selection - This will select the cells that make up this column to add them to the selection.


- Remove this column from selection - This will unselect the cells from the selected column.
- Remove this column - This will delete the selected column from the bank.
Sizing Columns
Left click on the vertical dividers between columns to size a column.
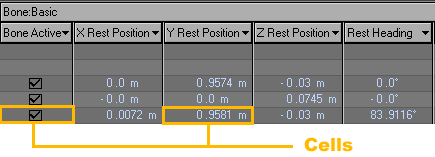
Property Panel Cells
Each property has a cell and cell type depending on the type of data being manipulated. Each column in the Scene Editor is a property instance having a specific cell type. The rows are the items shown in the list view. Cells may be edited via a property editing panel, which allows greater manipulation flexibility when it comes to changing multiple cells at the same time.
Cell Types
Each cell type has its own unique Adjust Properties Panel, but they all share the Preview, Apply, and Revert options.

- Preview - This option allows you to see updates to the Scene Editor in real time.
This is a preview for the Scene Editor Only.
- Apply - This will apply any changes made to the cell property.
- Revert - This will undo the last change applied to a cell property.
Unique Cell Type Adjust Properties:
- Toggle - Check Box

- Check - This will activate the option.
- Uncheck - This will deactivate the option.
- Toggle - This will toggle between active and deactive.
- Numeric - Subtypes of integer, percent, distance, angle, time, float.

- Change Value To - Value that will be applied to the cell property.
- Change Value Effect - Determines how the value will be applied.
The Replace edit mode lets you make absolute changes to the cell’s values. That is, when you apply the edit to the selected cells, the new value will replace the current values. For example, you select ten cells with various values in each cell, and in the Change Value To field you enter a value of 2.0. When the edit is Previewed or Applied, the cells will now all read 2.0.
The Add, Subtract, Multiply, and Divide functions are all relative editing modes. They adjust the cell’s values relative to their original values.
- Use Step - This will add the Step value to the primary value incrementally according to the order in which the cells have been selected.
- Step Effect - Determines how the Step Value will be applied.
- List - Array of items like a drop down menu.

- Change To - This will replace the cell property with the chosen option.
- String - Strings used for item tag properties.

- Mode - Determines how the string will be applied to the cell property.
- String - The text or comment to be applied to the cell property.
- Color - RGB color values where each component is 8 bits (not used for high dynamic lighting).

- Change Color To - RGB value that will be applied to the cell property.
- Change Color Effect - Determines how the RGB value will be applied.
The Replace edit mode lets you make absolute changes to the cell’s values. That is, when you apply the edit to the selected cells, the new value will replace the current values. For example, you select ten cells with various values in each cell, and in the Change Value To field you enter a value of 2.0. When the edit is Previewed or Applied, the cells will now all read 2.0.
The Add, Subtract, Multiply, and Divide functions are all relative editing modes. They adjust the cell’s values relative to their original values.
- Use Step - This will add the Step value to the primary value incrementally according to the order in which the cells have been selected
- Step Effect - Determines how the Step Value will be applied.
- Item - layout item that is used for parent item, target item, etc…

- Change Item To - The item that will be applied to the cell property.
- Enable Item Filter - For scenes with many items, use the filter option to limit your selection options.
- Image - Images used for items like Projection image.

- Change Image To - The image that will be applied to the cell property.
- Enable Item Filter - For scenes with many images , use the filter option to limit your selection options.
- Vertex Map - Vertex Maps used for items like Bone Weights.

- Change Vertex Map To - The VMap that will be applied to the cell property.
- Enable Item Filter - For scenes with many VMaps , use the filter option to limit your selection options.
Cell Options Menu
Right clicking on a cell brings up the Cell Options Menu.
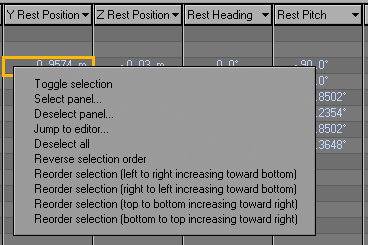
- Toggle Selection - This will select and deselect the cell.
Ctrl + LMB will toggle selection as well.
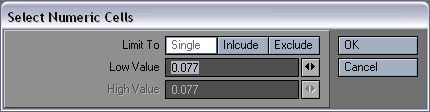
- Select Panel - This panel gives you the ability to numerically select cells.
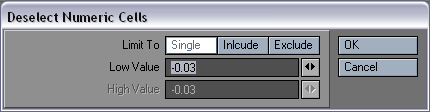
- Deselect Panel - This panel gives you the ability to numerically deselect cells.
- Jump to Editor - It is possible for a property cell to open a custom editor. The standard properties don’t use this function but it is possible for third party tools to add properties that do.
- Deselect all - This will deselect all cells.
- Reverse selection order - This function will reverse the selection order of the cells that are currently selected.
Other reorder options are Reorder selection (left to right increasing toward bottom), Reorder selection (right to left increasing toward bottom), Reorder selection (top to bottom increasing toward bottom), and Reorder selection (bottom to top increasing toward bottom).
Selection Zone
When a cell is available for multi-selection, it will be divided in two parts: on the left will be the Selection Zone and on the right is the Value Zone. Left clicking and dragging in the Selection Zone of a cell will add the cell to the selection set.
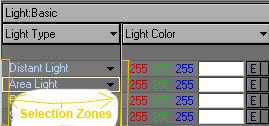
Shift-left clicking while selecting a cell will mark the corner of a selection box, expanding the selection box further out the more cells are selected. Control-left clicking will toggle on or off the selected cell. The cells are numbered in the order they are selected.
If you are using the stepping features in the “Adjust Properties” panel, order of selection will be important. Also, Adjust Properties is defaulted with Preview off to allow you to manipulate the values before seeing their effect on the cells. The Preview button will also be turned off after clicking the Apply button
Selection Zone Right Click Menu
Right clicking in the Selection Zone will bring up a new menu. This menu has options for changing the selection order. The Adjust Properties panel is also accessible from this menu.
String values cannot be added directly in the cell, but must be entered in the Adjust Properties Panel.
You can hide the Scene Editor by hitting the Tab key.
If you have a Bank and Column selection that does not apply to the item type, the cell will not be selectable at all. The Bank and Column sections will now change the selected choice a different color instead of hiding it when the menu is activated.
If you have multiple cells selected and would like to only change a value for one, hold the Ctrl key while changing the value.