Smoothing Groups
 Introduction
Smoothing Groups (SG) is a concept that was introduced in 3d studio DOS to create areas of smoothing over polygon groups. It has become one of the standards for smoothing in the 3D industry, and LightWave now supports it. Smoothing Groups allow for a different kind of smoothing to our traditional surface-oriented vertex-based smoothing. Here is an example of why smoothing groups are useful. A client gives you a model of his excellent radio mast that he wants you to render. Here it is:
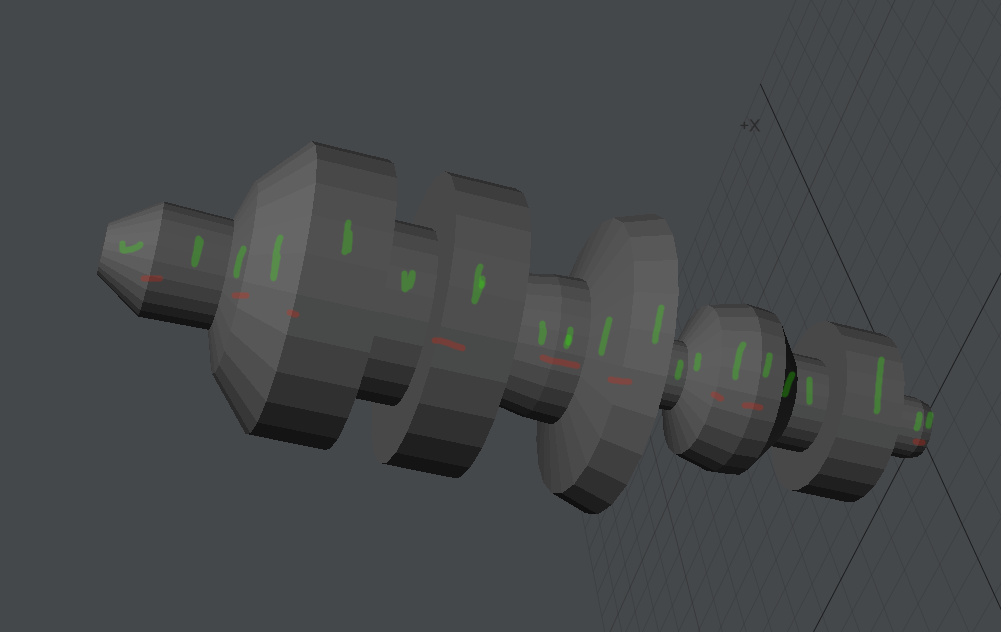
Yup that looks fine, you say to the client, but what are all the marks? The client replies that the polygons around the mast, marked with green, need to be smoothed. The ones marked with red need to be hard edges. Traditionally, a shape like this would be more laborious to model / surface in LightWave than it needs to be. An old-school way of doing it might be to break the model up and put it back together but not merge, you could use subpatch weight maps, extra poly flow to tighten curves, multiple surfaces with different smoothing angles and more, but it gets complex fast and worse if the model needs to be exported to a different package. Now, Smoothing Groups can make easy work of this challenging task.
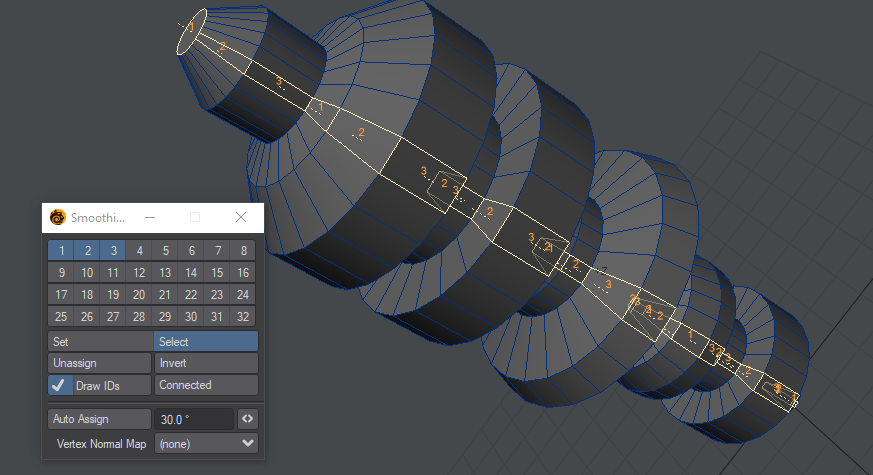
You can go through the rings, adding them to different smoothing groups, or you can just hit Auto Assign as shown below...
Should I Replace my Smoothing Method?
Smoothing Groups are now the third method of smoothing in LightWave and there is an order of precedence with the different methods. At the bottom of the list is LightWave-native smoothing, which is perfectly-suited for organic modeling. When dealing with hard surface modeling, objects will often be imported into LightWave with vertex normal maps (Modeler can only create vertex normal maps in version 2019 through exporting an object in OBJ format with smoothing groups unchecked in the OBJ Export options). At the top of the hierarchy is the new Smoothing Groups functionality, which supersedes both vertex normal mapping and LightWave's original smoothing.
How Smoothing Groups Work
Smoothing groups are a polygon tag indicating a group of polygons that should have shared (continuous) vertex normals. In this way, it is similar to the native LightWave method for smoothing, except where LightWave has one Smoothing option per polygon because there can only be one surface per polygon, you can have as many as 32 smoothing groups for a single polygon using the SG method, with discontinuous polygons going in different smoothing groups. This means that a specific group can have several different non-adjacent polygons in it as shown below.
Each ring will be in a specific group, and three groups are sufficient to create smoothing for this whole mast
Smoothing Groups Options
Smoothing Groups are managed in one of three places and not with the Smoothing Threshold in the Surface Editor at all. This does not need to be checked to make use of any smoothing groups you may have set.
The first is the Smoothing Info window, the second is the Polygon Info window, and thirdly, for selecting polygons in a smoothing group, you can use the Statistics window.
Smoothing Info Window

The Smoothing Info window, default keyboard shortcut U and found in Editors > More Windows, is the heart of SG workflow. With it, you can assign sg for polygons manually, or with Auto Assign based on the Angle field next to the button. This field will examine the angle between adjacent polygons and create smoothing groups accordingly. Selections are taken into account, but this button also adheres to the LightWave rule of "If nothing is selected, everything is selected." The groups are numbered from 1 to 32 and can be used in any order
You need to be in Polygon Mode for the Smoothing Info window to be active
The contents of this window are:
- Smoothing Groups 1-32 - The available smoothing groups. If you are in Set mode, clicking on one of these buttons will assign selected polygons to the named group. If the polygons selected cannot all be in the same group, shading errors will be apparent. The cure is to assign polygons with shading errors to a different smoothing group
- Set / Select - These are the two modes for the window. In Set mode, clicking on an SG number will assign selected polygons to the number clicked. In Select mode, clicking on an SG number will select the polygons associated with the SG clicked. Holding down Shift while clicking a smoothing group that has been assigned will select all polygons on the object with the same SG number. Holding down Ctrl and clicking on a smoothing group number will select polygons that have been assigned to multiple smoothing groups including the one you Ctrl-clicked on
- Unassign - Clicking this button will remove the smoothing groups assigned to selected polygons. A warning will be posted to prevent accidental SG removal
- Invert - Inverts the polygon selection. If nothing is selected, clicking this button will ensure that all polygons in the object become selected
- Draw IDs - This toggle enables the display of smoothing groups assigned to selected polygons
- Connected- If you click on one or more polygons in your object, clicking this button will selected all polygons connected in the same smoothing group
- Auto-Assign - Automatically assigns selected polygons to smoothing groups based on the Angle field's contents
Vertex Normal Map - List of Vertex Normal maps on object that can be assigned to smoothing groups using the Auto-Assign button. Once assigned to smoothing groups, the vertex normal maps can be deleted.
Smoothing Groups are a new feature in LightWave 2019 and thus not available in LightWave 2018 or before. If your object might be used in a previous version of LightWave you will need to preserve the Vertex Normal map.
Polygon Info Window

Hitting I in Modeler (or going to Editors > More Windows > Selection Info Open/Close) will bring up the Info window, and if you are in polygon mode, you will see additions to the readout of each polygon and a block of 32 numbers underneath. You can see what smoothing groups polygons are currently assigned to and can add new or remove groups by clicking
Statistics Window

The Statistics window is opened with W (or going to Editors > More Windows > Statistics Open/Close) and has a new entry in Polygon mode at the end of the list. The Sm Gp group contains all the smoothing groups you have made for the current layer.
Vertex Normal Maps
Objects imported from other 3D software with smoothing groups assigned should come into LightWave already working. If you only have vertex normal maps assigned, smoothing groups can, and should, be substituted in Modeler. Vertex normal maps don't respect rotation. As an example, let's say you have an imported object, maybe a car, oriented vertically. If the car came from 3ds Max the vertical orientation is because in Max the Z axis is vertical, X and Y are the horizontal axes. If you rotate it to be correct for Modeler you would break the vertex normals.


The car on the left has just been imported. It has a vertex normal map. If we rotate it 180° around the Y axis, the shading is completely wrong
To replace Vertex Normal maps on an object, open the Smoothing Info window (U) and make sure the Vertex Normal map is selected then hit Auto-Assign. Once done, the vertex normal map can be deleted.

Because they are not surface- but geometry-based, smoothing groups work well with deforming geometry in Layout.