Getting Started with Modeler
Introduction to Modeling
LightWave Modeler lets you create objects from scratch or edit existing objects. Object Modeling is the design and creation of wireframe objects from a simple shape, like an apple, to a complex shape, like a finely-detailed sports car. In Layout, you are the interior designer moving furniture and putting up pictures. In Modeler, you are the furniture maker and the builder of the house.
Components of a 3D Object
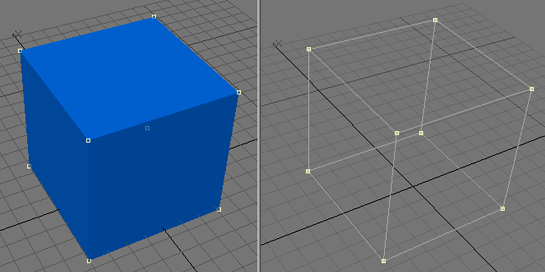
What makes up a 3D object? It has two traits: its physical shape and its visual appearance. The physical shape of an object comprises points joined by lines to form faces that we call polygons. The form that the polygons present to us makes up an object’s shape.
The visual appearance of an object consists of color and texture qualities that connote realism to the eye, which are called surface attributes or material properties. When you enter a room and look at your chair you see a certain shape (that of a chair) and a certain surface (maybe wood or metal), so you think, “chair”. In LightWave 3D you have the tools to create simple or complex objects and define their surface qualities with great precision and detail.
Modeling in 3D
How would you make a mug? It depends; if you were a sculptor, you would mould a lump of clay. If you were a designer, you would draft it with paper and a mechanical pencil. If you were an artist, you would probably sketch it. But suppose you were using a computer. How would you make a mug? What tools would you use?
You want to portray the mug with realistic color, depth, and shading. You need drawing tools, yes, but also power tools! With the computer, you can create the mug in a variety of ways. LightWave recreates drafting and workshop tools on screen so that people who are neither sculptors nor traditional artists can use them just as easily. In fact, LightWave’s tools do more than their real-life counterparts. There are several bonuses to computer design also. You can undo a mistake, something that is difficult to do in many of the arts. And there’s no mess to clean up.
Points, Polygons, and Edges
Generally, 3D Modeling is based on two simple elements: the point and the polygon. A point is a location in space, just as a point in a dot-to-dot coloring book represents a location on the page. Points are used as anchors to create polygons. Since points alone do not have height, width, or depth, they cannot be seen or rendered. However, you can load them into Layout and use points as invisible influences on other objects: as a center of rotation, or to play an invisible role of influence in an object hierarchy, for example. A third, in-between, mode is the edge mode. Edges are the lines which connect the individual points and form the outline of a polygon.
The process of creating 3D objects is a lot like drawing in dot-to-dot coloring books - of course, with 3D Modeling, the dots can also be placed in a third dimension (i.e., depth). Once placed, the dots can be connected with lines to form polygons. That collection of polygons, also referred to as an object, forms a recognizable shape that the computer can draw and animate. Polygons are usually three-sided triangles or four-sided quadrangles (although they can consist of more sides).
You create or edit all objects using the same XYZ coordinate system used in Layout. The difference is that in Layout you are usually positioning an entire object, whereas in Modeler you are positioning the points that make up an object. Modeler also uses the XYZ coordinates 0, 0, 0 as the Origin.
Left: Points that make up a head, Right: Polygons that make up the same head
The Origin is the default rotation center (called the pivot point) for objects in Layout. Keeping this in mind as you model your objects will make the objects load into Layout properly without having to move the pivot point.
Next...
Introduction to Modeler
Modeler User Interface Overview
Working with Modeler
Modeler User Preferences
Working with Modeler Viewports
Working with Objects


