User Interface Conventions
Introduction
In no time, you’ll find yourself mastering LightWave’s intuitive interface. LightWave uses very few graphical icons. Instead, most functions are listed on the interface panels in plain text. Listed below are a few other conventions involved with the LightWave interface:
Throughout
LightWave Panels and Dialogs
LightWave’s panels and requesters are generally non-modal and can be left open even while you interact, say, with the Layout window and its controls.
Math in Input Fields
Numeric input fields support basic math operations (+, -, *, /, and ^) and algebraic equations. You can even mix units. Here is an example: (12ft+14m)^2+(3/5). The result, 312.3908 m, would appear after you press the Enter key. Note that the result is shown using the default unit; here, it is meters. Also, since we didn’t specify the unit of measure for the 3 and 5, the default is used.
Enter/Tab Keys with Input Fields
When you enter values into dialogs that have multiple input fields, the Tab and Enter keys have special functions to save you time. Pressing the Tab key stores the entered/current value and automatically advances you to the next input field. Shift + Tab moves to the previous field. The Enter key also stores value, dismisses the dialog, if appropriate.
Yes and No
Whenever a requester asks you a Yes or No question, pressing the Enter key is the same as selecting Yes, while pressing the Esc key is the same as selecting No. Likewise, an Error, Warning, or Reminder requester with a choice of Continue or Cancel can use Esc for Cancel and Enter for Continue. For those requesters with only a Continue, pressing either Esc or Enter will close the panel.
Mini-Sliders
The mini-sliders to the right of numeric entry fields have particular properties. If a field is for a percentage percent steps are made in half-percent increments. For a field in Degrees, angles are in half-degrees, and the scalar and distance modes use a sliding scale so that as the value gets larger, so does the step size.
There is a soft-limit on the numerical edit fields when in Percent mode. When the number is in the range of 0%-100%, the mini-slider will stay within that range. Manually entering a number outside that range (if a hard limit has not been set) will allow the mini-slider to slide outside the 0%-100% range.
Shift-Clicking
Holding down the Shift key and clicking the left mouse button (LMB) on an E, or T icon in LightWave's user interface removes an Envelope or Texture, respectively.
Menu Navigation
LightWave's internal menus can be filtered, navigated rapidly and scrolled up and down. Filtering works as soon as you start typing and is based on the localized name. To remove filtering without clicking away from the menu, you can use Backspace.
This scene has almost 2,000 objects, but typing narrows that down
The Additional menu always has a large number of entries. Scrolling through them is easier than having to go to the base of the menu to initiate a scroll
Keyboard Navigation/Selection
The keyboard shortcuts for navigation and selection are as follows:
- Home - Goes to the top
- End - Goes to the bottom
- Page Up - Goes one page up (towards the top of the menu)
- Page Down - Goes down one page (towards the bottom of the menu)
- Up/Down Arrow keys - Change the selection (highlighted entry)
- Right Arrow key - Opens the submenu if the current entry has one
- Left Arrow key - Closes the active submenu
- Enter/Return key - Accepts the highlighted entry
If you have deep hierarchies then sometimes there isn't the room onscreen to fit the item names. Hitting Shift-Left or Shift-Right will navigate inside such hierarchies
Regular expressions can also be used to filter menus. Start typing and hit TAB to switch into and out of regexp mode. (Go here for a tutorial on how to get started with regex)
As an example, to find all the numbered spoons in the Ratatouille kitchen scene with 2,000 objects, open the objects list, type . and hit tab (and you'll see (.*) instead of the magnifying glass indicating you are in regexp mode). Now you are in Regep mode, you can type spoons\d to find just the objects containing the word "spoons" followed by a number.
Flat Menu
You can now call up a flattened version of every entry that exists in the main menu with the keyboard shortcut CTRL Space. Doing so presents a list of all available commands in Layout or Modeler (with their associated keyboard shortcuts). As with other LightWave menus, you can type to narrow down your selection and the cursor keys and Enter can be used to choose the command you require.
New Panel Hierarchies
New panels (like the Surface Editor, Render Properties, Scene Editor, Scene/Dope Editor and others) have collapsible hierarchies. Holding down the Ctrl key when clicking the expander arrow will open or close all children, holding down Shift will affect all siblings and holding down the Alt key when clicking a closed hierarchy will open that group and shut others. Holding Alt when there are several hierarchies open will maintain the one clicked on and close the others. All of the modifiers can be combined, they are not mutually exclusive.
Node Editors
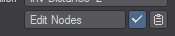
Edit Nodes buttons in panels are accompanied by a check to activate nodal options and a clipboard icon that allows copying and pasting of node flows between node editors.
Dragging and Dropping
Many files can be loaded simply by dragging and dropping them onto LightWave's interface, including scene files, objects, images, and animations.
Color Selection
Where you must select a certain color (e.g., surface color), there will be a three-number color component display and a color swatch box. You can also drag your mouse on each color component to change its value. By default, the standard RGB color space is displayed; however, if you right-click on the display, you may also use the Hue, Saturation, and Value (HSV) color space, if that is more familiar to you. HSV is based on the artist’s concepts of tint, shade, and tone. There are over 16.7 million possible color combinations.


Left: RGB, Right: HSV
Colors can be copied and pasted by clicking Ctrl RMB on the swatch, then Alt-clicking RMB on the target swatch. (On the Mac, use Option for Alt)
Ctrl right-clicking on the blue swatch, then Alt right-clicking on the green replaces it with blue.
Color Picker

LightWave’s default color picker has been renewed and given powerful new features. The color picker’s features are fully explained in the Surface and Render guide - Color Picker.
Standard List Windows
Windows that contain lists of items (surfaces, scene items, menu items, etc.) all have a slider bar to scroll through the list. If the list is hierarchical in nature, there will be arrowheads to the left of item names. If the arrowhead is facing to the right, then they are subordinate items to this parent item. Clicking the arrowhead will make it point downwards and also reveal the subordinate items.
Clicking the arrowhead expands and contracts hierarchies
If selection is appropriate, you can click on an item to select it. Ctrl + click will select non-contiguous items, and Shift + Click will select a range of items.
List windows that are hierarchical in nature can be reorganized by dragging items around in the list. Where appropriate, multiple selection is supported.
Reorganizing Lists
In some list windows (e.g., menu configuration), you can reorganize entries by just dragging them in the window. Place your pointer over the entry and drag it up or down. You will see a thin line appear as you drag. This is the insert point. Releasing the mouse button will drop the entry here.
Now, if your pointer is at a position where the dropped item could be, say, a sub-item of an entry, the same level as the entry, or even the same level as the next entry, the length of the line would change as you drag. The position of the left end of the line determines the level of the drop.
Finding Assignments and Commands
If you have a command selected in the left window and click Find, the command, if any, on the right will become selected. Selecting a command in the right window and clicking Find will select the matching command in the left window.
Since a command can be assigned to more than one menu location, successive Find clicks will show the next assignment, if more than one exists.
Clicking Search allows you to type in a search phrase to find a command. Note that this will only find the first instance, and it is case-sensitive.
Deleting Menu Items
To delete a command/group, select it, and click the Delete button.
Window Pop-up
The Window pop-up menu lets you select different menus to edit (e.g., Graph Editor), if available.
Maintaining Menu Sets
The Load and Save buttons let you retrieve and store menu sets that you develop. To restore the default menu configuration, choose Default from the Presets pop-up menu. If you’d like to have a menu set for Layout similar to previous versions, these are also available, but tools newer than the version chosen will not be available in the menus. In Modeler’s Configure Menus tool you have similar options.
Arranging Menu Tabs
You can reorganize the main menu tabs by simply dragging them left or right on the main interface. Before you release the mouse button you will see an insertion point marker appear.
Keyboard Shortcuts
In the LightWave user interface, keyboard shortcuts are displayed on the right side of buttons, if applicable. Keystrokes that need the Shift key are displayed in uppercase if they are letters. (e.g., +A) Unshifted keystrokes are displayed in lowercase. (e.g., a) For example, +M is Shift + M and & would be Shift + 7 on a US keyboard.
If a keyboard shortcut needs a modifier it is presented in the interface by one of three symbols:
- ^ = Ctrl
- + = Shift
- * = Alt
This manual, however, always explicitly indicates when the Shift key should be used, and upper case will always be used for shortcut letters.
You need to be aware of the state of your Caps Lock. If this is active, it can affect upper and lowercase keyboard shortcuts.
Panel-Specific Shortcuts
Some panels have special keyboard shortcuts. To use them, you must have that panel active. (Click on it if it isn’t already active.) If the panel is not active and that shortcut has another meaning for LightWave in general, the general function will run. Moreover, if the panel is active, but doesn’t use the keyboard shortcut, it will be passed to the main interface.
Context Pop-up Menus
Both Layout and Modeler have special "context" pop-up menus that you display by holding Ctrl + Shift and clicking your LMB, MMB, or RMB with your mouse pointer over a viewport - there are different menus for each mouse button. This keyboard shortcut is hardcoded.
You can type in any of these context menus to find the command you need
Left Mouse Button Menu
This menu contains commands for Loading and basic creation tools.
Middle Mouse Button Menu
In Layout, the MMB menu is used for character rigging and animation. In Modeler, the context menu for the middle mouse button exactly mirrors the group structure for commands, as found in the menu and key editing dialogs - including any plug-in commands added to the system. If you know where a command is located in the master groupings, you can find it in the middle button menu.
Right Mouse Button Menu
Contains settings tools and utility windows. For example, the Layout RMB menu contains commands to launch the Scene / Dope Editor, Graph Editor, and Preferences windows.