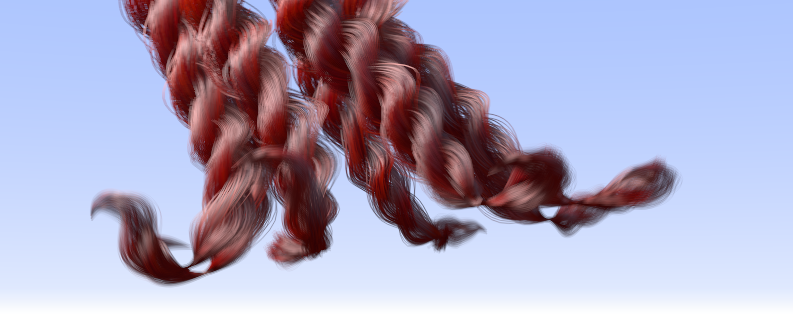
Bullet and FiberFX
To create hair and fur that is affected by Bullet, you should first set FiberFX Dynamic Gravity to Off and set Gravity to 0% so they do not interfere with Bullet’s calculations.
Fibers need to be polygonized by right-clicking on the item in your FiberFX window and choosing Polygonized Mixed.
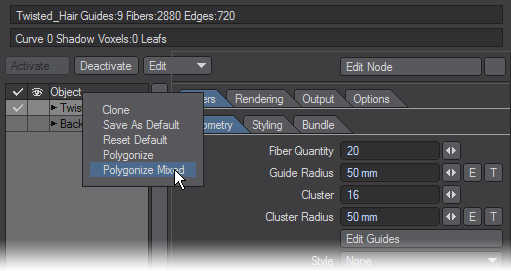
This will create guides in geometry that are automatically weighted from end to tip with 0 % weight at the root and 100 % weight at the tip. Make sure you save your fiber object after it has been polygonized.
If you want the hair to deform but not the object it’s attached to, use a Mesh Filter in the Bullet window set to the fiber weight map that was created when you polygonized the hair. If you want it all to deform set the Mesh Filter to none. 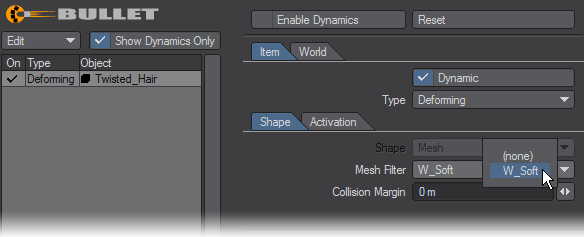
Bear in mind that if you don’t want the object to deform you will need to animate it to get the hair to flow. Bullet won’t react to the object at all because objects that have no weight map are ignored by Bullet and the hair will merely hang down unless you move the object around.
In Bullet set Mass Distribution to Vertices if you have a polychain-only object (or you are animating only the polychains of a mixed object).
Styles in FiberFX are morph maps that need to be activated in the scene by choosing Morph Mixer from the Object Properties window. Nothing needs to be done in Morph Mixer but by opening the window you are telling LightWave that it should remember you have a style on your fibers. Dynamics won’t work with styles though and when you use Morph Mixer it turns off the style. If you want to animated your FiberFX styles you can use Morph Mixer and Bullet will react to the changed style.
Speed up calculation of dynamics by turning off the display of fibers when calculating.
FiberFX requires multiple passes to work with LightWave’s photoreal motion blur. Since this adds a considerable overhead to rendering time you may prefer to motion blur as a post-process.