User Interface Overview
LightWave’s Layout has been designed to provide the most efficient interface possible for your 3D animation work. Layout’s viewports provide visual feedback about the virtual world you are creating. By default, a single large viewport is displayed, but you can add more viewports showing different aspects of the project when that would be helpful. The display can be a highly detailed representation, or - depending on the scene’s complexity, your machine’s capabilities, and other factors - you can choose other modes that range from bounding box stand-ins to wireframe representations of the scene, or perhaps textured or solid-shaded renditions. At the highest fidelity, you can use LightWave's render engine VPR to render an image directly in the viewport (as shown below).
1. Top Toolbar, 2. Layout Tabs, 3. Modeler Access, 4. Toolbar, 5. Workspace, 6. Numeric Adjustment Controls, 7. Grid Display, 8. Start Frame, 9. Timeline, 10. Tooltips, 11. Current Item, 12. Item Picker, 13. Edit Mode, 14. Properties, 15. Selected, 16. Key Section, 17. End Frame, 18. Transport Controls, 19. Preview, 20. Undo/Redo, 21. Rate/Step
1. Top ToolBar
The Top Tool Bar buttons will appear no matter which Tab is selected and contains elements that are always required, such as File and Edit menus. You can completely hide (or unhide) the toolbar by pressing Alt +F2 (or choosing Edit > Display Options > Hide Toolbar On/Off).
2. Layout Tabs
The tabs located at the top of the interface will determine which tools appear in the Tool Bar. Generally, menu group names that are verbs contain commands based on the type of action they perform. Menu group names that are nouns contain commands based on the type of object they affect. The menu tab names are all intended to be read as verbs.
- Items - Things to add to your scene, such as objects, lights or cameras
- Modify - Animating scene items
- Setup - Rigging and related tools
- FX Tools - Simulation, Flocking and Fiber FX
- Render - Setting up and starting scene or image renders
- View - Tools for organizing viewports
- Model - Creating quick geometry inside Layout
- I/O - Working with other applications such as After Effects, ZBrush and others
- Utilities - Plugins and scripting
Note also that when in VPR mode there is an additional dropdown listing buffers to render.
3. Modeler Access
This command will switch to your Modeler window if it is open or opens Modeler if you do not already have it open.
4. Toolbar
The buttons presented in this toolbar will depend on which menu tab you select along the top.
5. Workspace
The Workspace consists of Viewports. By default, there is a single large viewport, but you can display multiple viewports if you desire (using the F3 and F4 keyboard shortcuts or visiting Options > Display). A viewport provides you with visual feedback about the virtual world you are creating.
Viewport Titlebar
You can change the View Type and Rendering Style of a viewport without going to the Display Options Panel by using the pop-up menus on the left side of each viewport titlebar. The third dropdown arrow gives more Viewport Options.
The buttons on the right side of a viewport affect centering, panning, rotating, zooming, and minimizing/maximizing your view.
6. Numeric Adjustment Controls
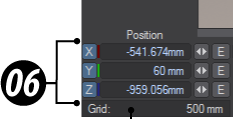
As we’ll see shortly, you can alter the position, orientation, and scale of items in your scene interactively; at times, though, you’ll need greater precision. Three number fields, labeled either X, Y, and Z, or H (Heading), P (Pitch), and B (Bank) according to the current edit mode, let you use direct entry to control the corresponding values.
Constraining Modifications
Whether you are moving, rotating, or stretching an item, or moving its pivot point, Layout lets you independently deactivate any of the three components used for those settings. You deactivate the components by clicking on them on the information display in the lower-left corner of the screen. This protects the deactivated component(s) from changing as you move your mouse.
The Y channel won’t be affected when moving the currently-selected item
7. Grid Display
The grid serves as a visual reference when you move items around, but it will never render in a final image (no matter how much you wish it to). The grid lines are darker every tenth square for visual reference. The Origin is located at the center of the grid.
You can find the current size of the grid squares in the information field at the very lower-left corner of the screen. The size of each grid square is adjustable as is its overall size on the Display Options Tab of the Preferences Panel (Edit > Display Options). Note that adjusting the size of the grid squares also affects the relative size of the representative camera and light icons within the scene.
8. Start Frame
9. Timeline and Dope Track
The Timeline, located beneath the viewport area, hosts a Frame Slider that you can drag horizontally to change the current frame or shuttle through your scene. The input field left of the timeline is the scene’s first frame. The last frame is shown at right. Both first and last frames can be edited by simply typing a new value.
Another time related feature, the Dope Track, appears just above the Timeline (if the Dope Track is not visible, un-hide it by clicking the thick bar above the timeline; click again to close it). The Dope track plays an important role in connection with animation. Until now, we’ve mostly discussed 3D space, but of course animation involves a fourth dimension – time. Broadly speaking, animation involves changing an item’s position, orientation, or other properties over time.
The timing of animation is governed by "Keyframes", or simply "Keys". Keys are fixed points in time where you have assigned specific values to the item’s properties. You might place a Sun object in your virtual sky a frame 1, and set a keyframe there, storing its X, Y, Z coordinates and other properties at that point in time. Your sun will happily sit there all day long. But if you advance the current frame to a later point in time, then move the sun some distance and set another keyframe, the Sun will now gradually move to this new position as the animation progresses.
We explain this here because, while the regular Timeline lets you see where keys exist, the Dope Track lets you set, move, and define keys. In addition, it lets you add (passive) markers to help you navigate quickly in a scene, and also 'bake' ranges of keys to make your animation concrete.
10. Tooltip
This line of the interface shows information about tool actions or potential actions, and the render time for VPR as shown.
11. Current Item
The various items you can edit in LightWave all fall into one of four categories: Objects (including dynamics), Lights, Cameras, and Bones (which are contained within objects; choose the object first, then switch to Bone edit mode). You can only select one type of item to edit at a time; you cannot, for example, select a camera and an object together.
There are several ways to designate which type of item you wish to work with. You might simply click an item in a viewport to select it; the Current Item and Edit Mode will update accordingly. Or you can choose an Edit Mode button directly (13), then select the desired entry in the Current Item dropdown menu.
To simplify item selection, the Current Item dropdown menu only lists items in the same category as your current Edit Mode.
12. Item Picker
The Item Picker window allows you to quickly select one or more objects and to set up selection sets of objects for faster use.
13. Edit Mode
As mentioned above you can only choose items from one of LightWave’s four groups at the same time. You can switch between the groups with these four buttons.
14. Properties
This button brings up a Properties window for the four item types. There’s a window for Objects, one for Bones and Lights and Cameras share a window.
15. Selection Info
The Selection Info displays how many items are selected.
16. Keyframe options
We discussed the role of keys (keyframes) earlier. The Create Key and Delete Key commands create or delete a key at the current frame (note that the button labels also show shortcut keystrokes, which will make your work much faster as you become familiar with them).
The Auto Key options just above are able to automate key creation, by automatically generating a key whenever you change an item’s animatable properties. The menu associated menu provides a number of alternative automation methods, discussed in detail later.
To automatically create or modify keys you must activate the Auto Key option on the main interface. This is the global on/off switch for automatically creating keyframes. It works in conjunction with the Auto Key Create setting (General Options Tab of the Preferences Panel).
Use the Create Key and Delete Key commands to add and remove keyframes.
17. End Frame
This displays the last frame of the scene. It can be raised or lowered. This number remains in frames, even if you should set the timeline to be displayed in one of the other options (SMPTE, Film Key, Seconds) in the Options window.
18. Transport Controls
Besides dragging the frame slider to navigate through your scene, you can also use the transport controls described here.
19. Preview
You can render a previsualization of your scene for when playback in Layout is not fast enough. A rendered preview will play at full speed regardless of how complicated your scene gets.
20. Undo/Redo
The Undo and Redo functions have been completely overhauled in 2019. They will now not only reverse motion changes (Move, Rotate, Size, or Stretch tool) that you have made, but now you can revert changes made in Dopetrack, the Scene Editors, the Graph Editor and server panes throughout LightWave. The Redo function will re-execute a sequence of actions that have been undone, beginning with the action most recently undone. You can set the number of undo levels that you wish to have available in the General Options tab of the Preferences Panel, discussed later, in the Edit Menu section. If there are no actions available to undo, the Undo button will be ghosted, the Redo button is ghosted if there are no actions available to redo.
21. Rate/Step
This value sets the speed of playback. If you have the option Play at Exact Rate checked in Options then this field will be labeled Rate. If not, it will be labeled Step. Rate is a percentage of real time, while Step is what frames will be played - 1 indicates every frame, 2 indicates every other frame, 3 indicates every third frame and so on.


