Example - Setting up a QuickTime VR Scene
To set up a basic QTVR scene:
- Add two null objects to an empty scene, named Pan and Tilt.
- Set the scene length to 400 frames.
- Parent Tilt to Pan and parent the camera and light to Tilt.
- Deselect the Camera's X and Y motion channels, as well as all the rotation channels. Moving the camera on Z will determine its distance from the actual object necessary for proper framing. All other camera motion is done with the Pan and Tilt nulls.
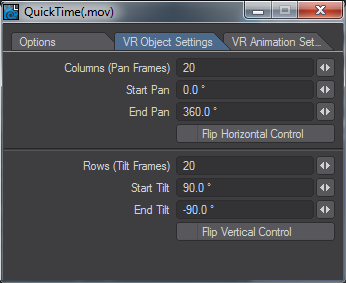
At this point, you should decide how many rows, columns, view states, and animation loop frames you want. Here, we will use the defaults presented in the VR Object Settings tab.
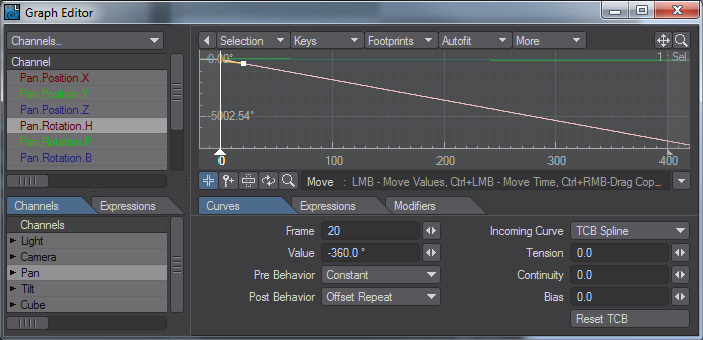
It is best to start on the innermost loop first. Since we’re using the defaults of 20 Pan frames and 20 Tilt frames, with no extra animation loop frames (Frames Per View is 1), the inner loop is the pan motion.- To start this inner loop, create a keyframe for the Pan object at frame 20, with the Heading at -360 degrees. Set the Post Behavior to Offset Repeat to continue the rotation to the end of our scene.
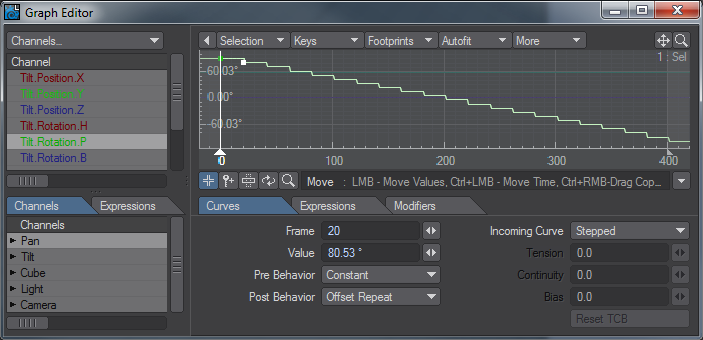
- Our Tilt motion curve should look more like stairsteps than the perfect line of the Pan Heading curve. To be more specific, Tilt’s Pitch Angle curve should be stairs of a height of 9.47 degrees, and a width of 20 frames, going from 90 to -90 degrees. Fortunately for us, this is easily achieved.
- In the Graph Editor, set the key at frame 0 in Tilt’s Pitch channel to a value of 90 degrees and create a key at frame 20, with a value of 80.53 degrees (90-9.47). Set the Incoming Curve to Stepped, and the Post Behavior to Offset Repeat.
The camera motion is now complete. You can save the scene as a basic QTVR template that can be used with any object. If the object is off-center, it should be moved. The object should fit in the frame of all the views, so it is important to check the ends and middle of the animation, but only set the Z keyframe position at frame 0.
Try adding an object and follow the preceding steps to create your own QTVR animation.


