Example - Realtime Visualization with Game Engines
![]() LightChal17_Museum.7z (4.49 MB)
LightChal17_Museum.7z (4.49 MB)
Introduction
One of the frequent requests we have is for some aspect of realtime visualization for architectural scenes. Unity, and Unreal, in their free versions, are very capable of not only providing a standalone executable to give to your clients but also a web player version so you can share using the web. Obviously, this tutorial is not to give you a full understanding of either Unity or Unreal, but rather a taste of what is possible.

For our example, we’re using the Lighting Challenge scene British Natural History Museum, modeled by Alvaro Luna Bautista and Joel Anderson. The archive is just a single object so we have put it in a scene with a series of spherical lights for the interior.
Unity
The texturing is not set up for LightWave (or Unity) but if we just wanted to get the scene into Unity quickly, the steps we need to take are as follows:
- Once you have set up the scene for your Natural History museum in LightWave, we will create a new 3D project inside Unity. Once you have chosen a path for your Unity project and hit OK, the Editor will appear and assets will be written to the path you've chosen. In the Assets menu, choose Import Package > Custom Package... and navigate to your LightWave support folder. In there go to the 3rdparty_support folder, then into Unity3D, and choose the LightWaveAppLink.unitypackage. Accept to apply it to your scene and multiple things will be copied to the folder you set up. At that point, you will notice that there's a new LightWave menu in the Unity Editor. In this menu, click Choose LightWave install path and navigate to the directory where LightWave is installed.
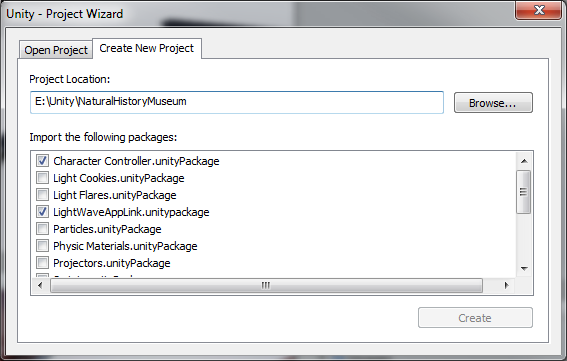
Tick Character Controller.UnityPackage . This will give us FPS-style navigation, and also tick LightWaveApplink.UnityPackage . This will give us our LightWave automatic updating. Hit Create. Once Unity is loaded, you will see that there is an Assets folder inside your project directory. As an additional touch you can add the Skyboxes .UnityPackage package to create a sky for around the museum. - Copy your LightWave content directory into the Assets folder. From now on, only load your scene from this directory for any modifications you do to the scene in LightWave.
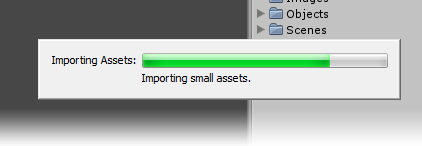
- If this is your first use of Unity, it will ask for the path to LightWave. Once you have set that, start Layout and load your scene from the Unity project Assets folder. Whenever you save the scene in LightWave now, it will be updated in Unity. Right now we need to make an initial save so that we have something we can position in Unity. If you switch to Unity as soon as you have saved your LightWave scene you will see Unity is waiting for something and you may see progress bars like this appear:
- Once it has finished you will see a new item in the Project tab. In our Scenes folder there will be a new file with the same name as your scene with a different icon. Click on this file so it appears in your project’s Inspector pane, like so:
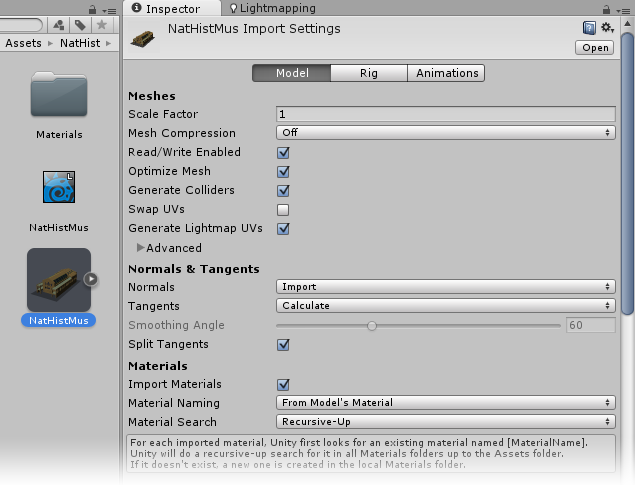
The Scale Factor needs to be set to 1. If you tick Generate Colliders and Generate LightMap UVs , which would be good, the initial import will take a long time. Also change Material Naming to Use Model’s Materials Once you’ve done this, drag the FBX file up into the Hierarchy tab. Unity will ask if you want to apply settings, do so and your model will appear in Unity’s viewport.
The GlobalScale variable was set to 1 in Unity to make LightWave objects come in at the right scale since the script is LightWave-specific. However, it meant that all objects brought into a Unity project after that would also be set at 1, which could cause problems if you wanted to bring in OBJs or Max files into a project you created with LightWave assets. Thus the global scaling has been reset to 0.01 for safety and you will need to apply a scaling of 1 to your LightWave objects inside Unity.
- In your Hierarchy view, select the Main Camera and in its Inspector pane choose Add Component. You will need to do this three times to add:
- Character > Character Motor
- Character > FPS Input Controller
- Camera Control > Mouse Look
- Our original LightWave scene had several lights, so we will now recreate them in Unity. Select the first light in Unity and select Add Component in its Inspector pane. Add Rendering > Light and make this light Directional in the Inspector. Now select the other lights you placed in your LightWave scene and choose Add Component and Rendering > Light again, but make them Point lights and increase their range.
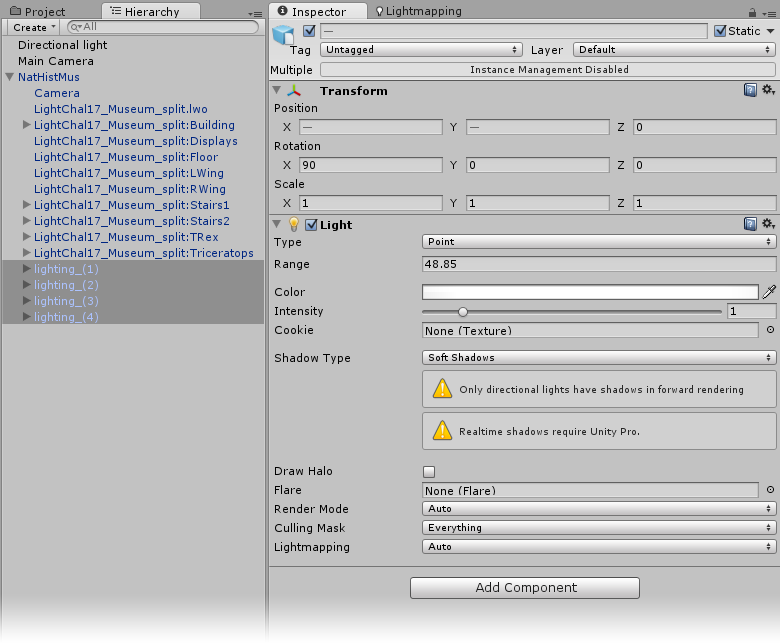
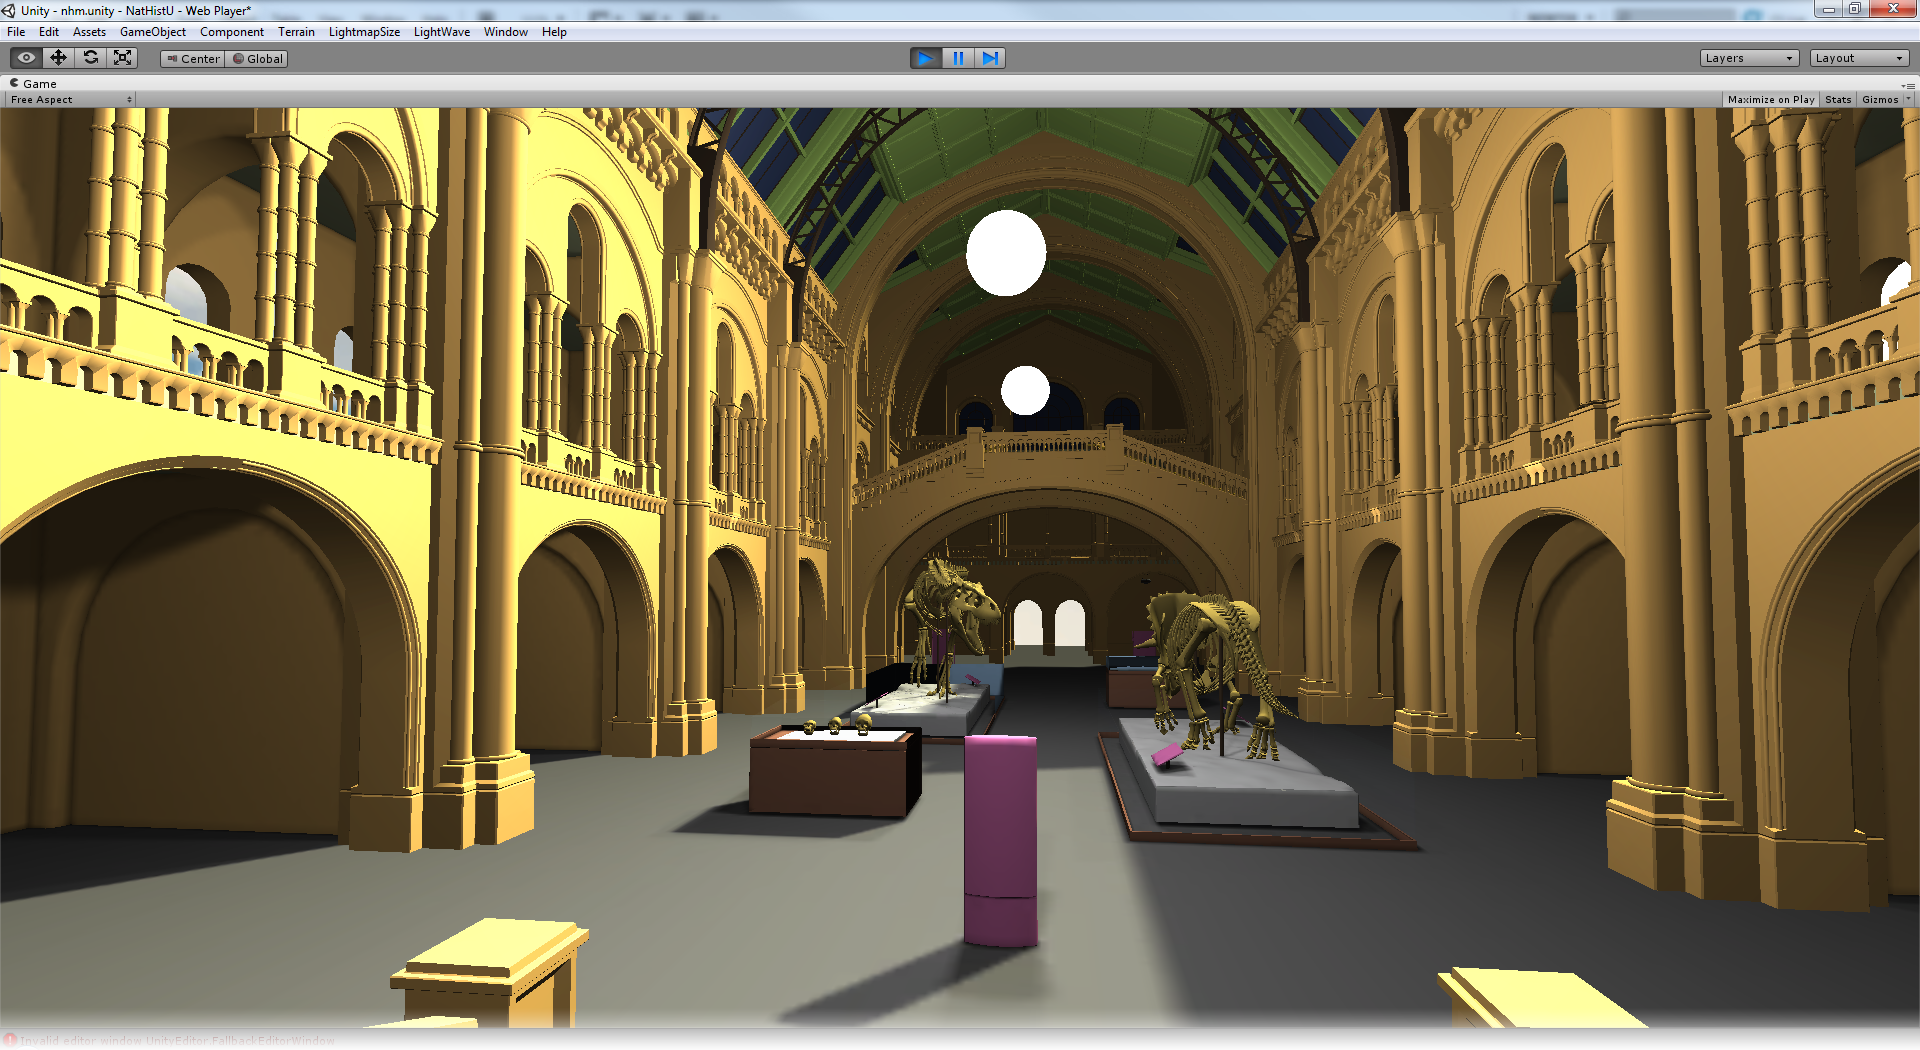
- We have added a sphere GameObject to each of the lights so they show up in the “game” as glowing globes. Note also that we have set each of the lights to cast soft shadows. We are using the free version of Unity so it rightly warns us that we can only use realtime shadows with Unity Pro, however the aim here is to bake a lightmap.
- Select all objects and lights in your scene and open the Lightmapping window.
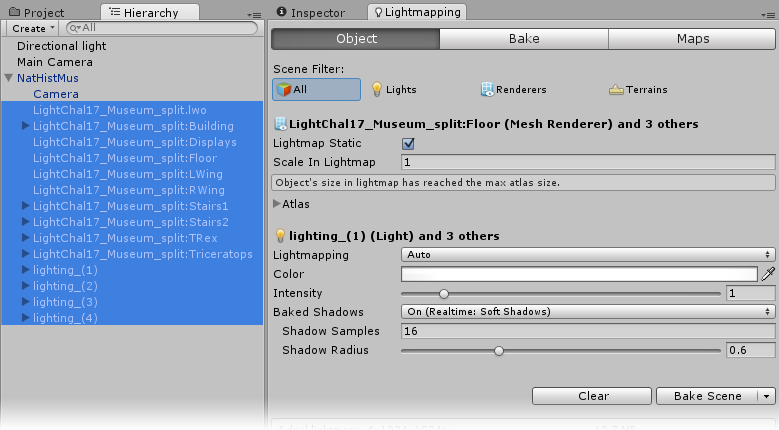
Tick the Lightmap Static box and up the number of Shadow Samples and the Shadow Radius to get better quality shadows. Now hit Bake Scene . It won’t take long to bake and apply the lightmaps and you will have shadows applied to your scene. Be aware that if you move something in LightWave or Unity, you will need to bake again. - Now you can hit the Play button at the top of Unity’s interface to go into your realtime version of the scene. You can navigate by using the traditional FPS controls of WASD on a QWERTY keyboard or the cursor keys while your mouse dictates the view.
You can now use the Build Settings item in the File menu to create an executable file for Windows, Mac OSX or Linux, or make a web player version for your clients to look at.
If you make changes to your LightWave scene, the changes will be propagated to Unity. Remember that since LightWave saves objects separately to scenes you will need to save both to get any changes you make to surfacing update in Unity.
If you follow along with this tutorial you may note you need to jump to get up the stairs and wonder why. This is because Unity splits the single Natural History Museum object into 27 parts to fit within the maximum of 65k vertices in a single object and that means that the steps get carved up too. To keep the stairs in a single piece that can be climbed without jumping you will need to separate them from the main object manually.