Example - Inside RayCast

With Inside you can create an intersection between geometry and instances where only the instances inside the geometry render. To make things clearer, we will refer to the geometry object as the Host and the instanced object as the Block. The Inside output is binary in nature and based on the pivot point of the Block - if the pivot point is inside the Host, the Block will appear. If the pivot point of the Block is outside the Host , the instance is not visible. It is very easy to set up as this example will now show.
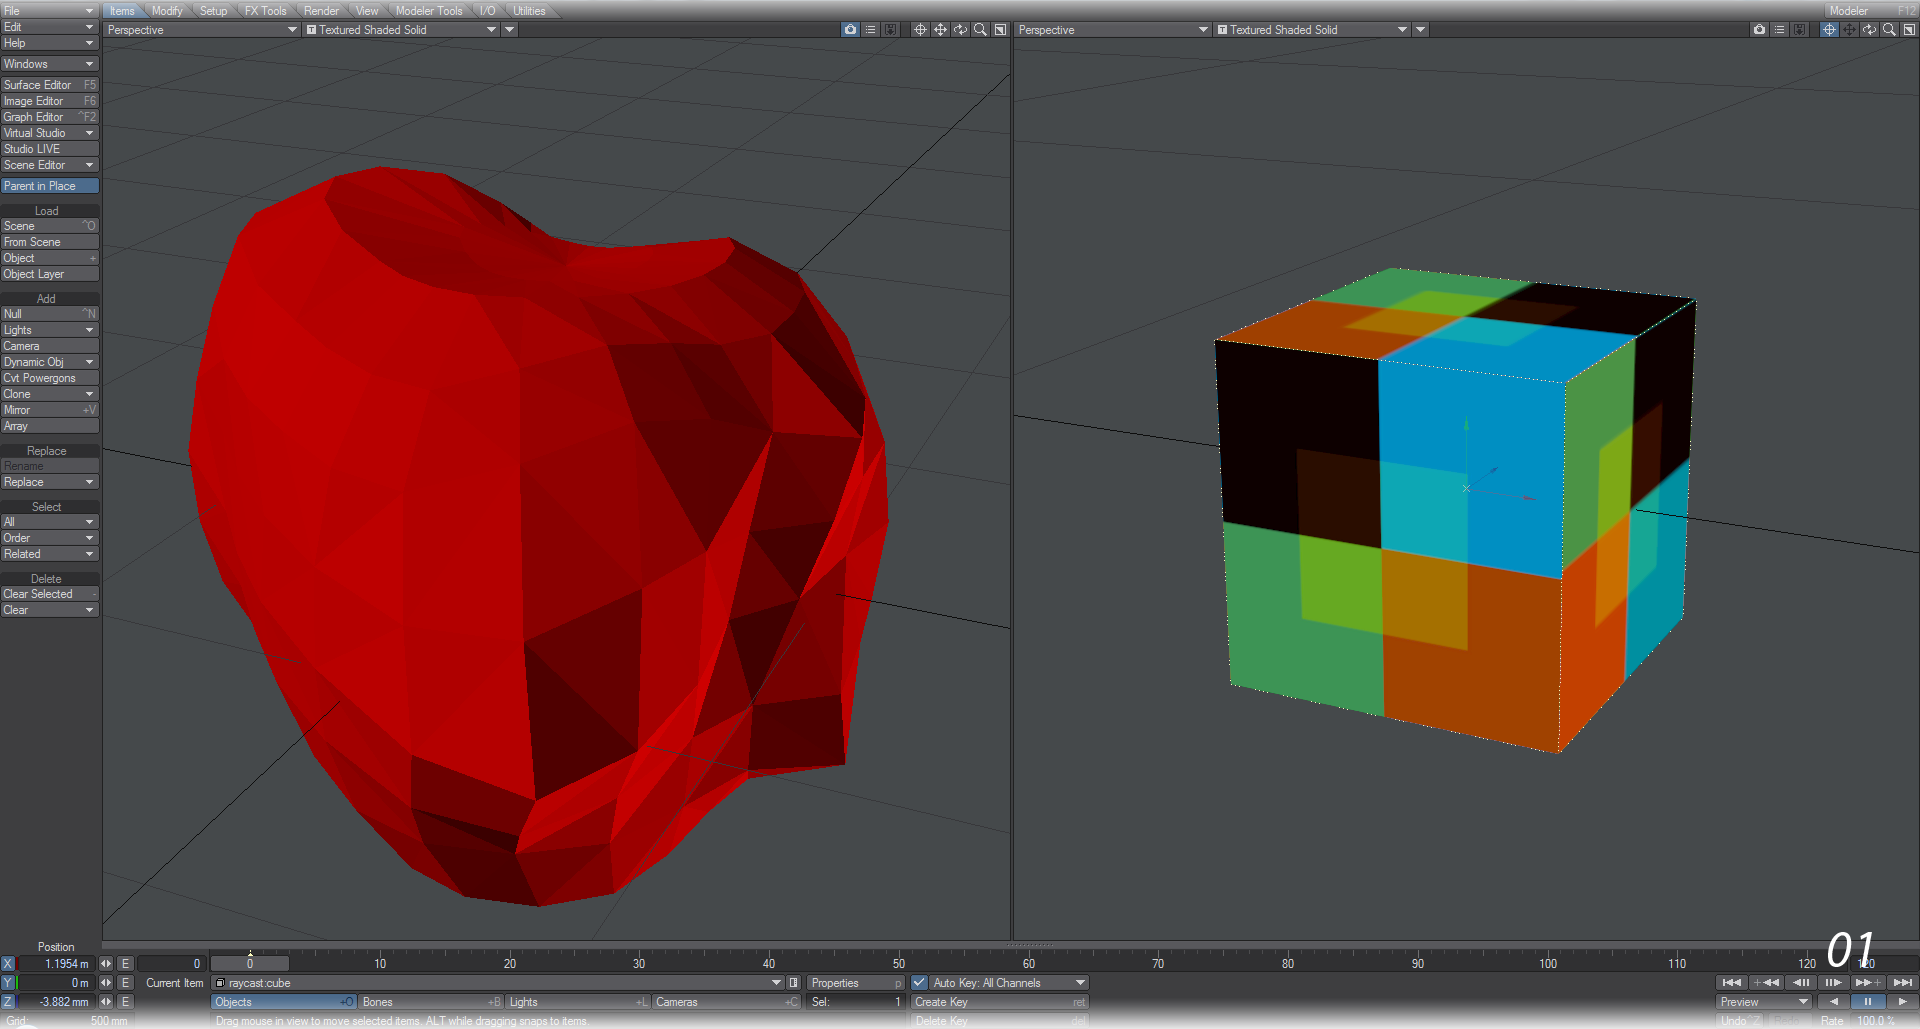
- Our example starts with two objects as shown in the image. Our Host is an abstract heart object called Squishy, the Block is a simple cube. We’ve visited the Edges tab in Object Properties and ticked Other Edges and set the color to white so that when the cube is repeated you can still see the individual cubes.
The first thing we’ll do is add a pair of objects to our scene. These will be the host object and the block that will recreate the host. There is no restriction of how your objects should be, but the host should definitely be much bigger than the block.
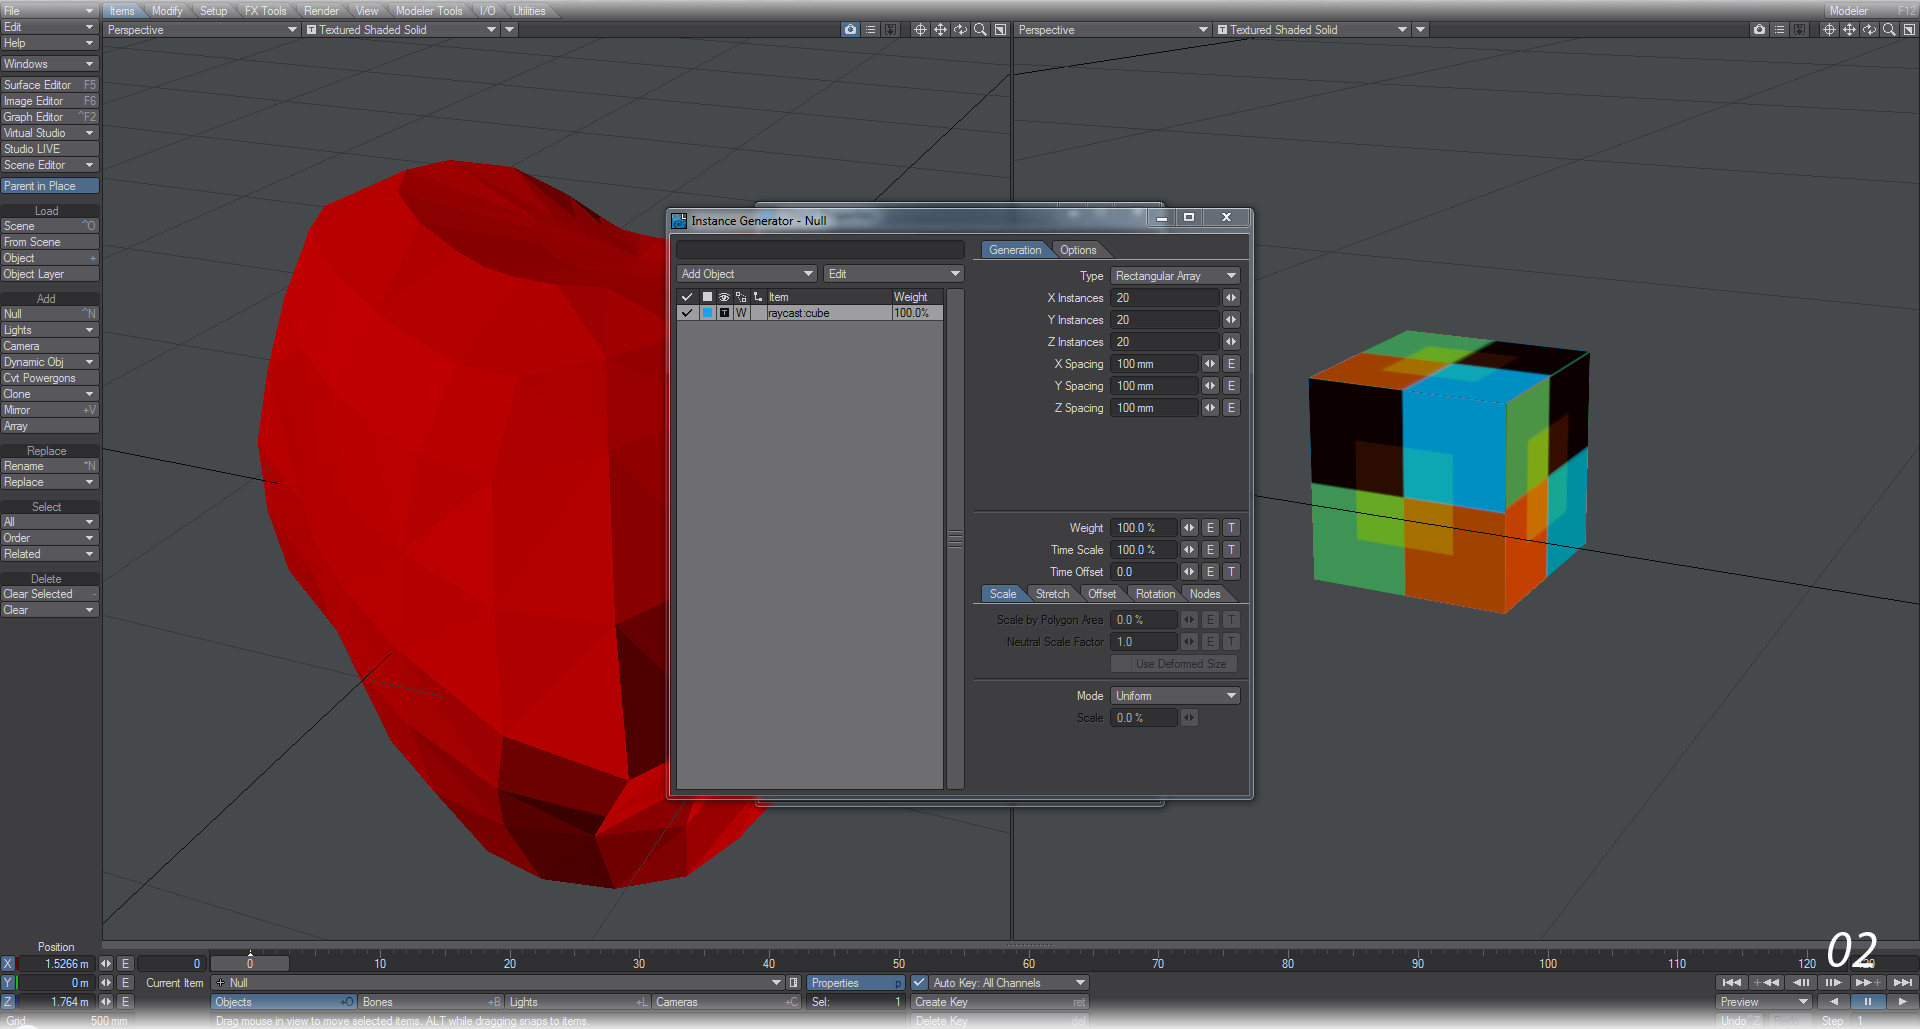
- Add a Null to the scene with Ctrl-N. Go into Object Properties for the null with the keyboard shortcut P and go to the Instancing tab. In here, add the block object and create a rectangular array with it. We have set ours to 20 x 20 x 20. Set the Scale mode to Uniform.
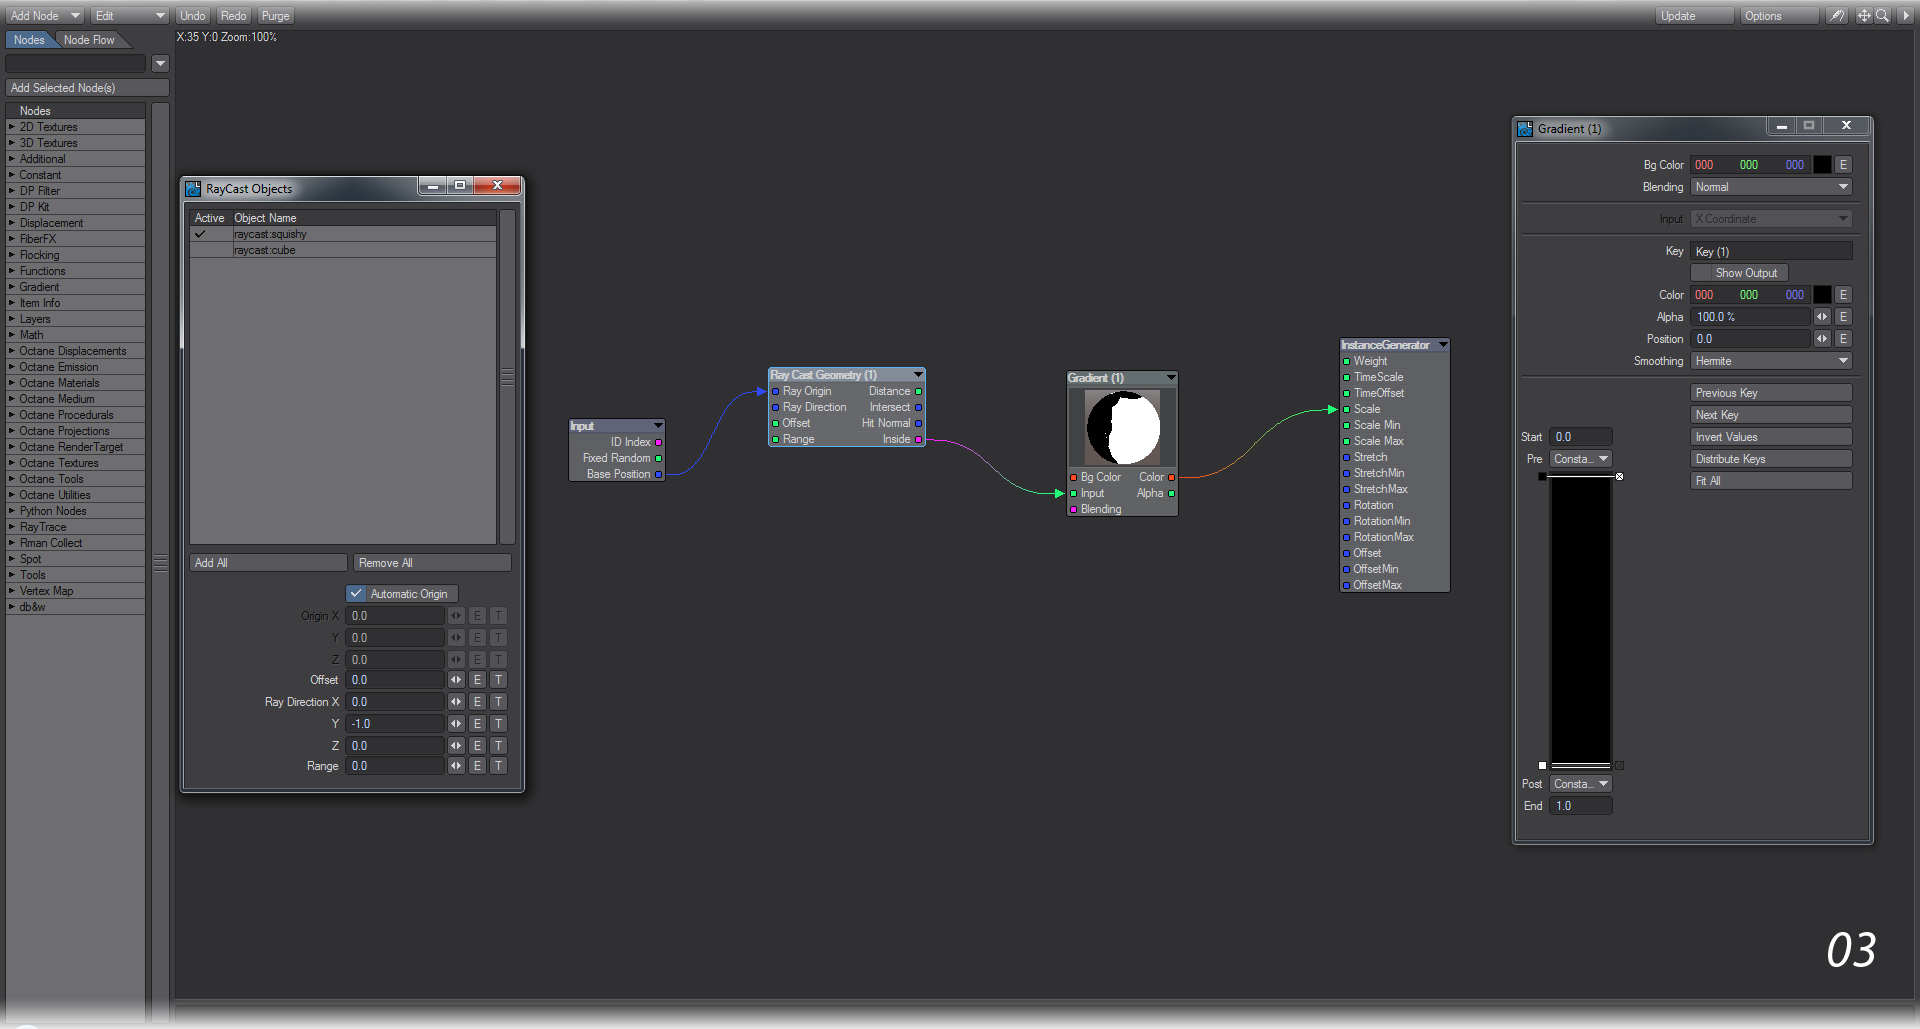
- Go into the Nodes tab in the Instancing window and add the following:
- RayTrace > Ray Cast Geometry
- Gradient > Gradient
Connect the Base Position from the Input node to Ray Origin on the RayCast Geometry node; then double click on the RayCast node to choose the item you wish to use. For us, it’s Squishy that is our Host object. Connect the Ray Cast Geometry’s Inside output to Input on the Gradient and set the Gradient up as follows:
Key at 0 - black Key at 1 - white (and set the Smoothing to Step)
Lastly, take the Color output and bring it into the Scale input on the InstanceGenerator end node.
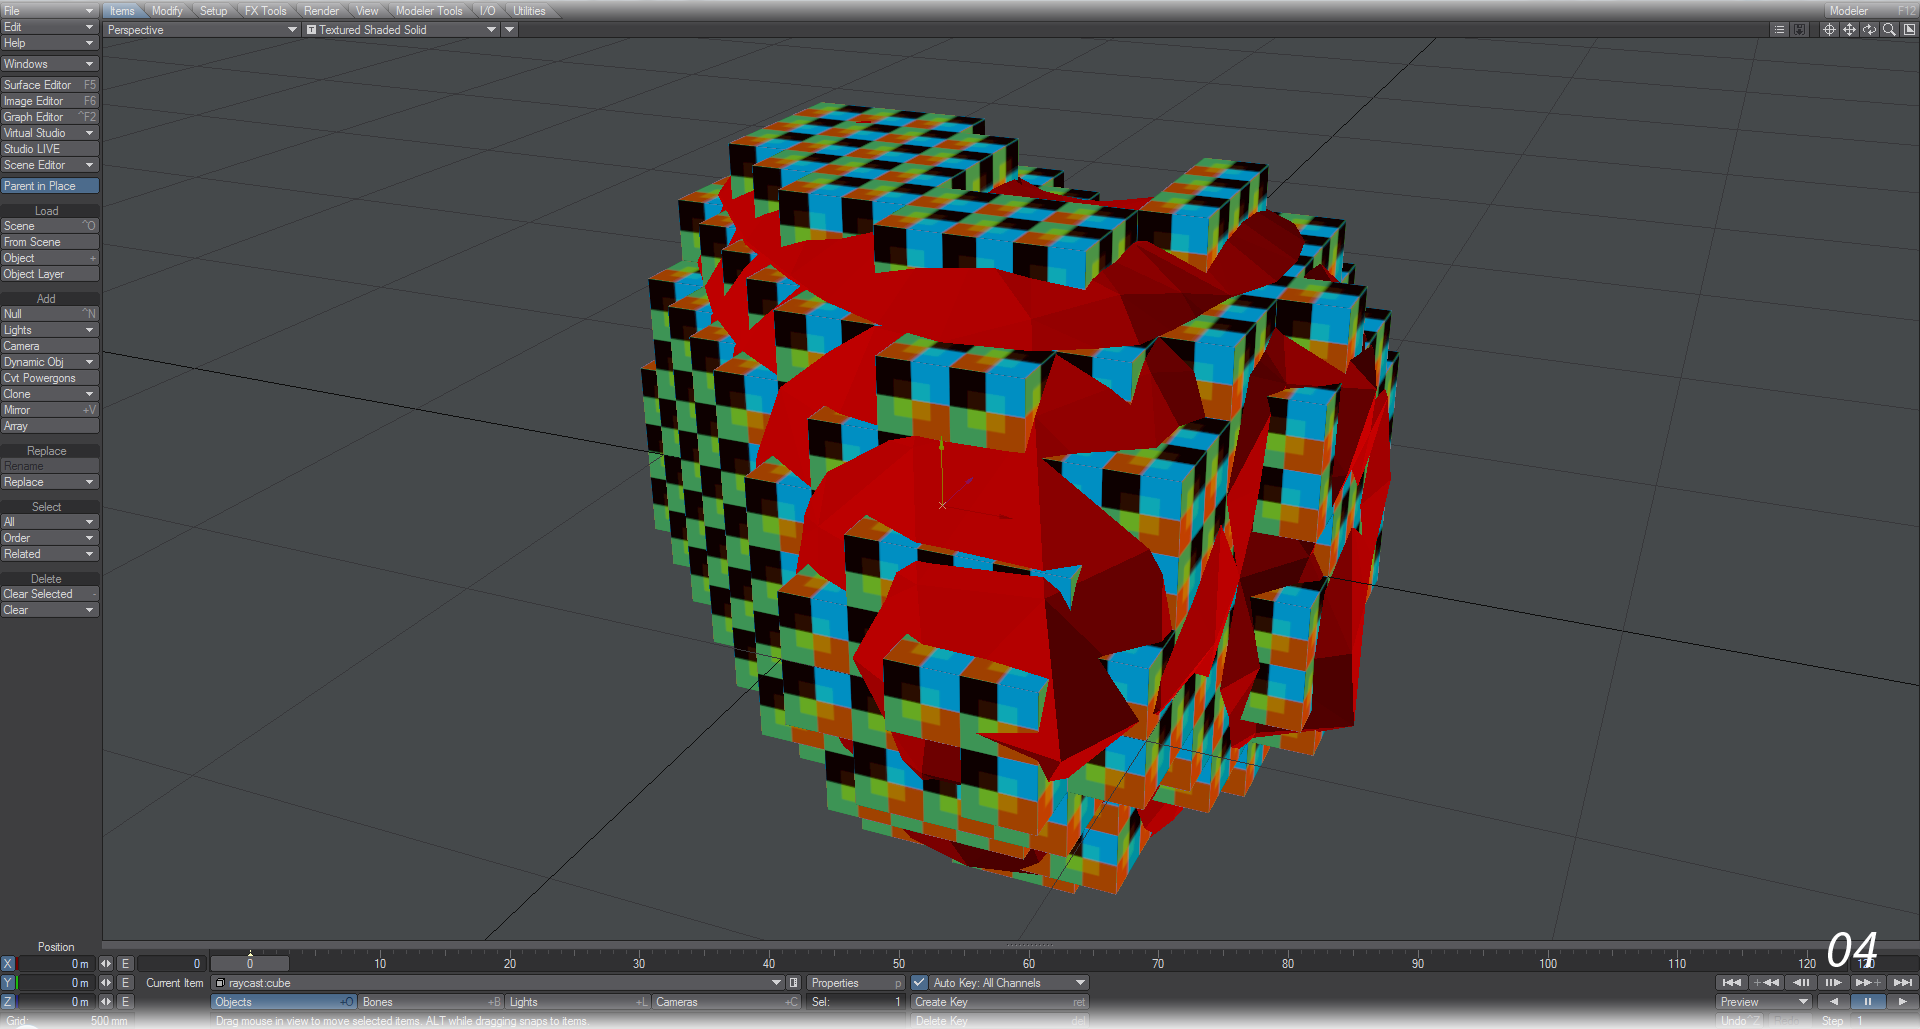
- Now when you have a look in OpenGL you should see your Host object filled with the Blocks. The ones that seem to be outside the heart still have their pivot points inside the Host.
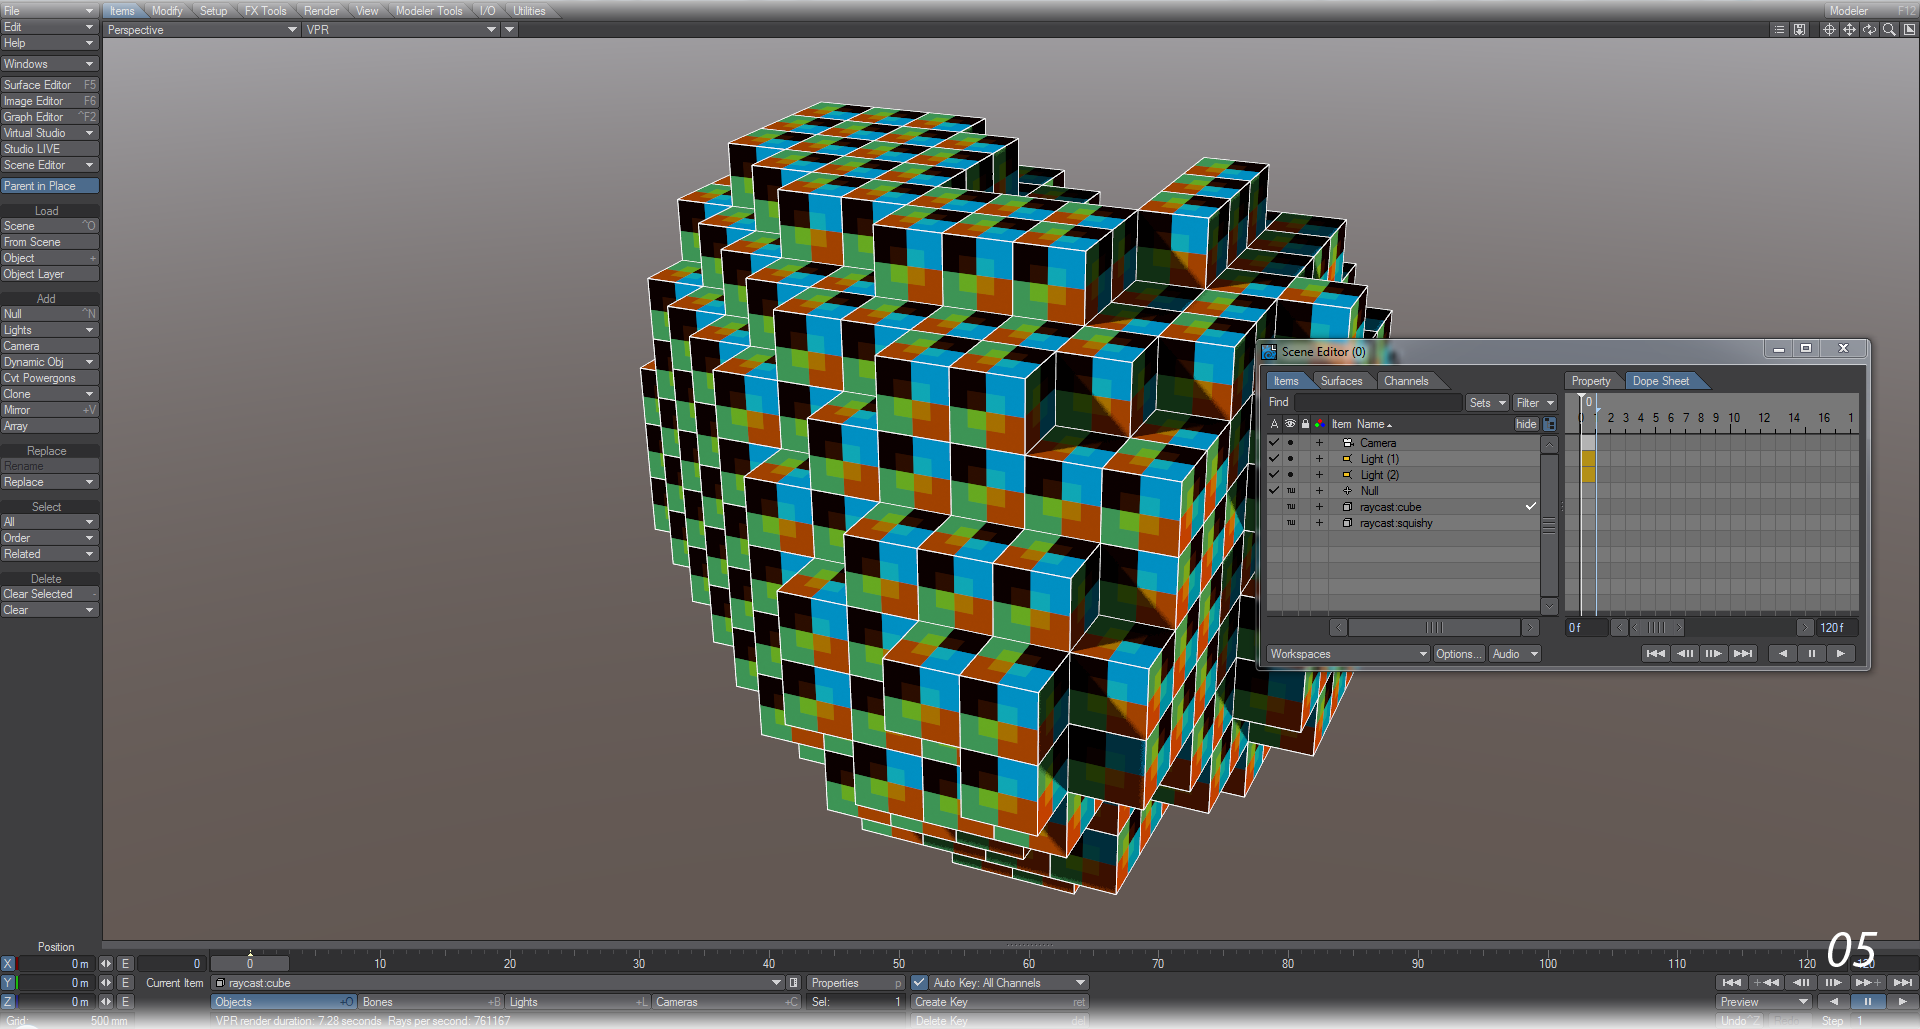
- If you really don’t want to see your two objects in OpenGL you can hide them, but it’s more important to only see the Blocks in the render. Here we have VPR with both the Host (Squishy) and Blocks (Cube) unchecked in the Render column in the Scene Editor, but both are still visible in OpenGL.
Going Further
This is a very powerful technique. The Host object can be deformed or moved, rotated and scaled without issue and the Blocks will follow (you may need to go forwards and backwards a frame), however it will severely slow down the program with large numbers. It would probably be better to use an MDD-scanned version of animation in order not to have too many evaluations going on.