Working with Viewports
By default, Layout has one large viewport that can be changed to show different things. Viewports have three dropdown menus.
View - What view the viewport is showing you. Examples include Perspective, Camera and Light;
Type - What render style is going to be used for the view. Examples include Bounding Box, Textured Shaded Solid and VPR;
Options - this menu has no title and contains a large variety of viewport tools including DoF/MBlur preview, Headlight and Match Viewport Perspective
You can split Layout's display into multiple viewports. The first option is to use the Viewport Layout choice in Display Options (D). The second is to use the F4 and F3 keyboard shortcuts to switch between the Viewport Layout choices sequentially.
You can also set the display mode used by the viewport using the Viewport Display Mode pop-up menu next to the View Type selector. This is much faster than using the Scene Editor Panel.
Views
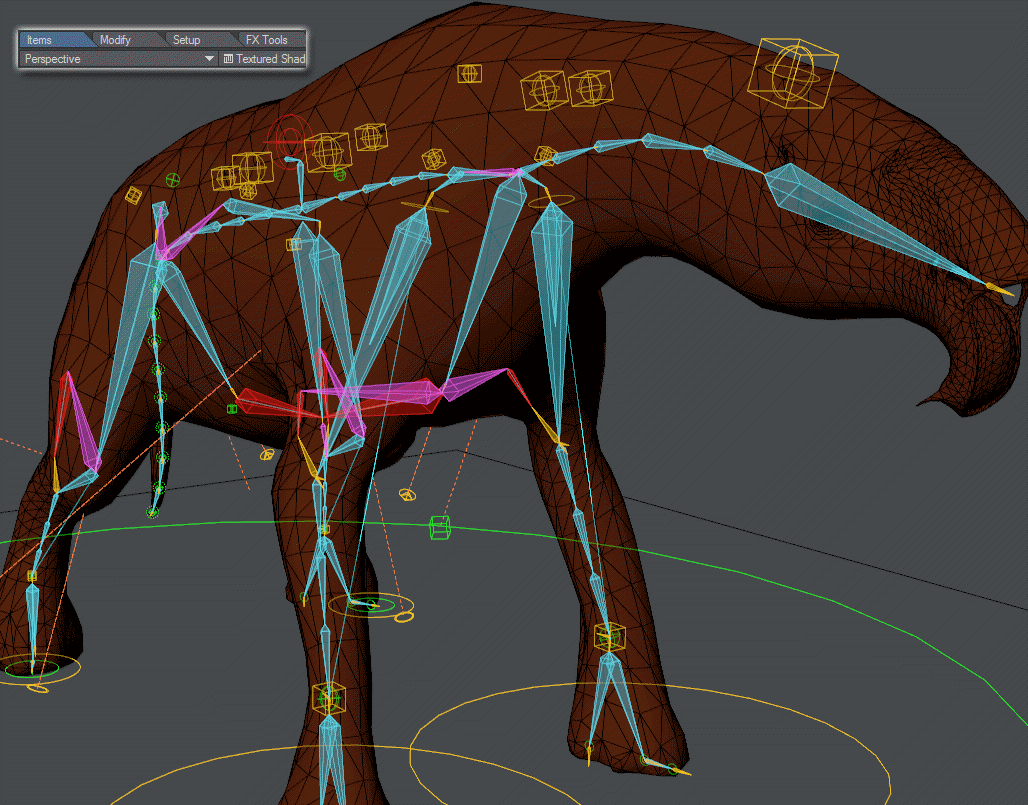
The three main views you will be spending your time in are Perspective, Camera and to a lesser extent Light (their keyboard shortcuts are numeric keypad 4, 6 and 5). The Orthographic views will be less used. It is worth noting however that the view names are based on "Looking towards...", so the Back view actually presents us with the head of the Rasper Cow pictured, and the Left view shows us the right flank of the creature.
The complete list of default views controlled by numeric keypad presses are as follows:
| View | Key |
|---|---|
| Back/Front | 1 |
| Top/Bottom | 2 |
| Right/Left | 3 |
| Perspective/Current Camera | 4 |
| Current Light | 5 |
| Current Camera | 6 |
| Schematic | 7 |
The second entry - Back/Front - indicates what happens if you press the shortcut a second time.
Types
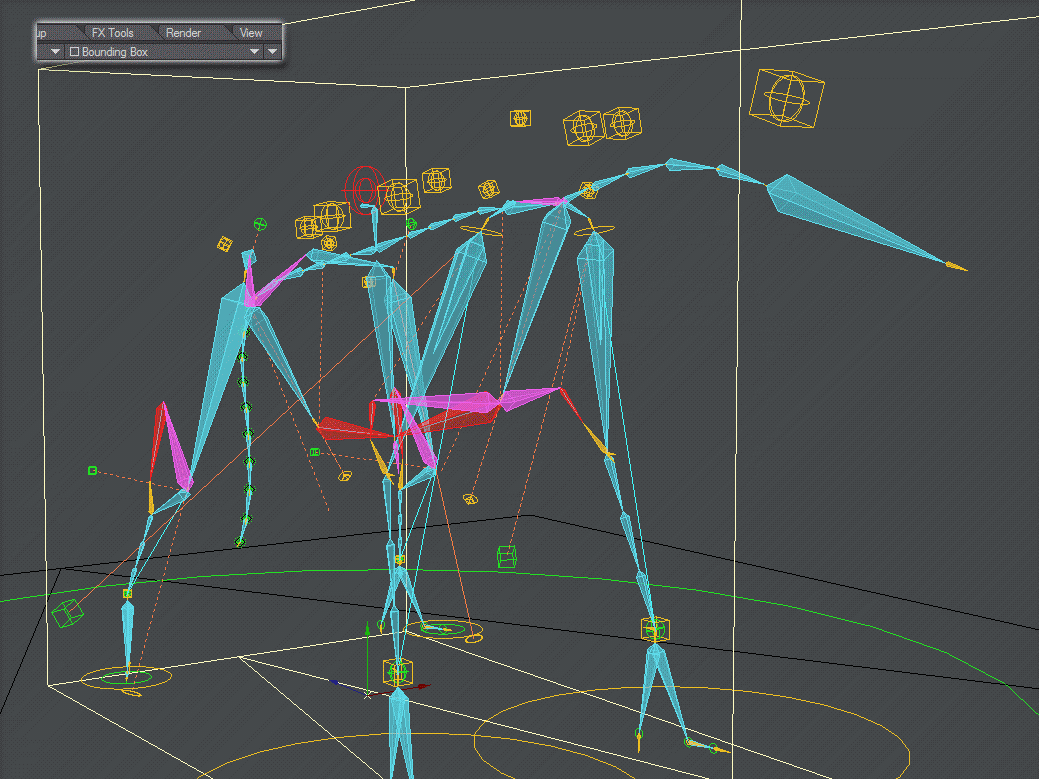
Although little to no difference can be seen between Wireframe and Front Face Wireframe in the above image it helps to simplify the display of more complex objects. You can actually mix display levels, discussed in the Scene / Dope Editor section.
Options
The third menu presents some options for displaying viewports. In the examples for Types above, the Bone X-Ray option is on. They are all discussed at Viewport Options.
Changing Your Point of View
With the View Control drag buttons located on the upper-right edge of a viewport, you can interactively alter the orthogonal and perspective POVs. The buttons are dimmed to indicate that they are not available when you use the Light or Camera views, where they have no effect since those are based on their respective item’s POV in the scene itself.
Center Continuously centers the viewport on the selected item. You may also activate the Center Current Item option on the pop-up menu next to the view selector.

For an object, the centering is based on its pivot point, which is discussed later. This is not always the center of an object. If you deactivate this mode, the existing POV position will remain until changed. As such, you can use this feature to establish a starting point if the need arises.
You can use the keyboard shortcuts A and Shift +A to Fit All and Fit Selected in any viewport. Fitting is based on pivot points rather than geometry.
Move
- Orthogonal view: Moves your POV horizontally when you drag left or right and vertically when you drag up or down.
Keyboard shortcut: Alt
- Perspective view: Moves your POV horizontally when you drag left or right and farther/closer when you drag up or down with the LMB . Moves your POV vertically when you drag up or down with the RMB.
Keyboard shortcut: Shift + Alt
You can use the keyboard shortcut G to center the area under the cursor.
Rotate
- Orthogonal views - not applicable.
- Perspective view - Rotates your POV’s heading when you drag left or right and its pitch when you drag up or down with the LMB . Rotates your POV’s bank when you drag left or right with the RMB.
Keyboard shortcut: Alt
Zoom
- All views - Zooms in and out when you drag left and right. (You can also use the < and > keys.)
Keyboard shortcut: Ctrl + Alt or Alt+Scrollwheel
Use the keyboard shortcut A to zoom the view out to where all items in the scene are visible.
Fullscreen Toggle
- The last icon in this group is a toggle to switch the associated viewport between fullscreen and back.
Keyboard shortcut: Numpad 0
It's grayed out here because Layout started fullscreen, as usual, and hasn't been put in a multiple viewport display yet so there's nothing to switch to.