Render Properties - Render
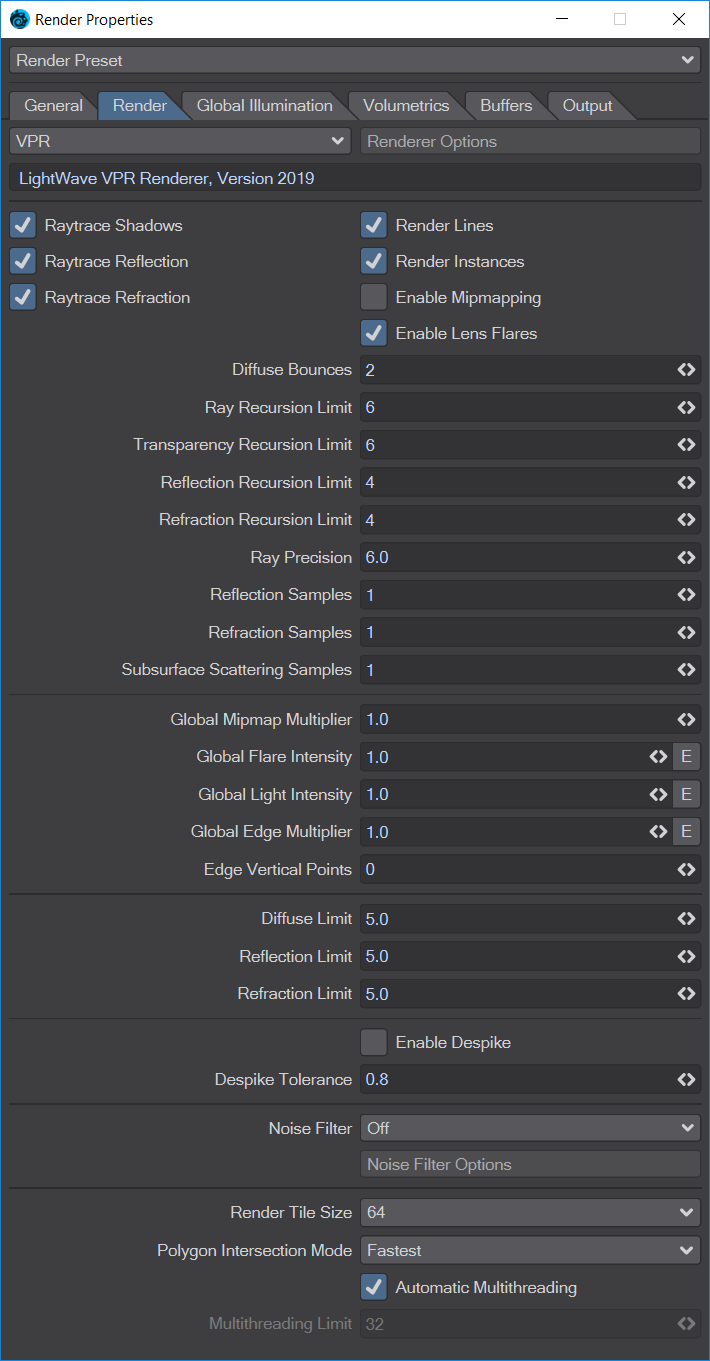
The Render tab covers general options for rendering. Here is where you’ll choose what options you want to use. Most of the defaults won’t need to be changed except for special purposes.
Renderer Dropdown
If you choose to add a third-party render engine to your LightWave, this menu at the top of the Render tab allows you to choose which you will use when pressing F9. The Renderer Options button will open settings specific to that engine if necessary.
Renderer Switches
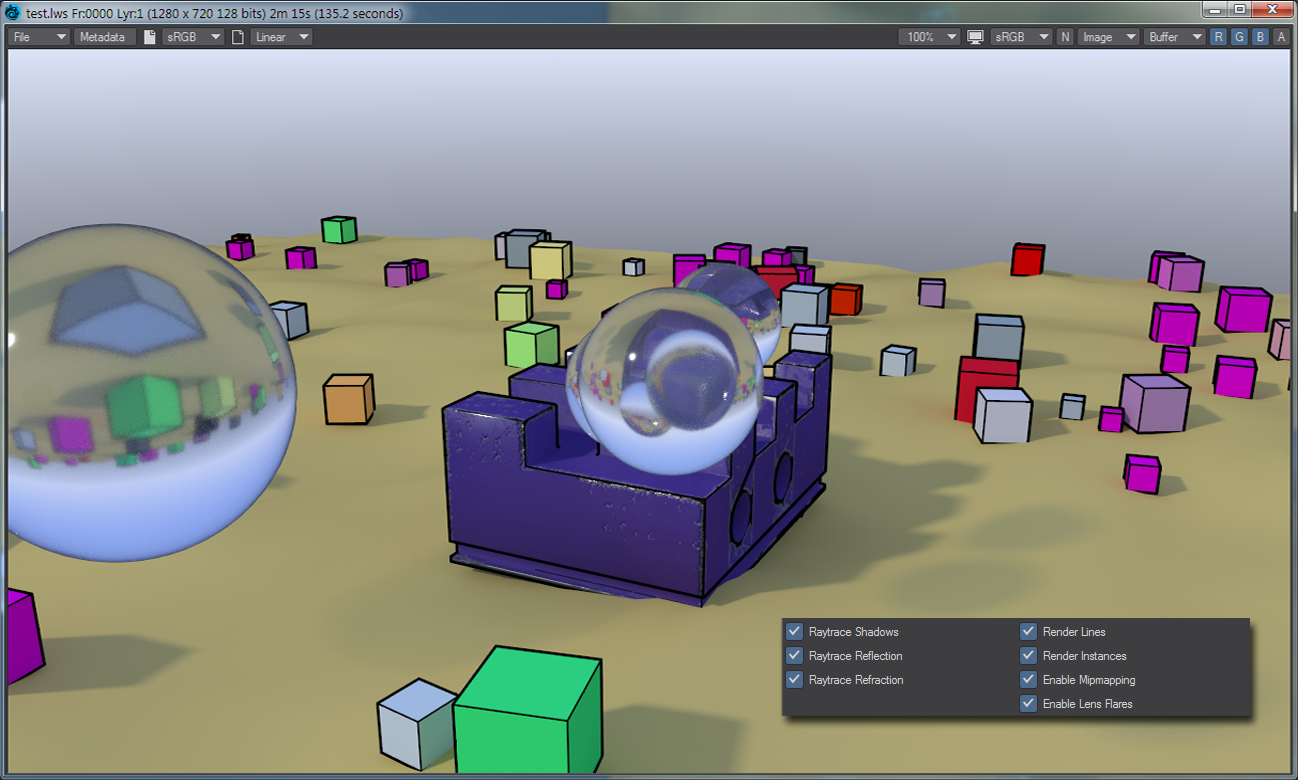
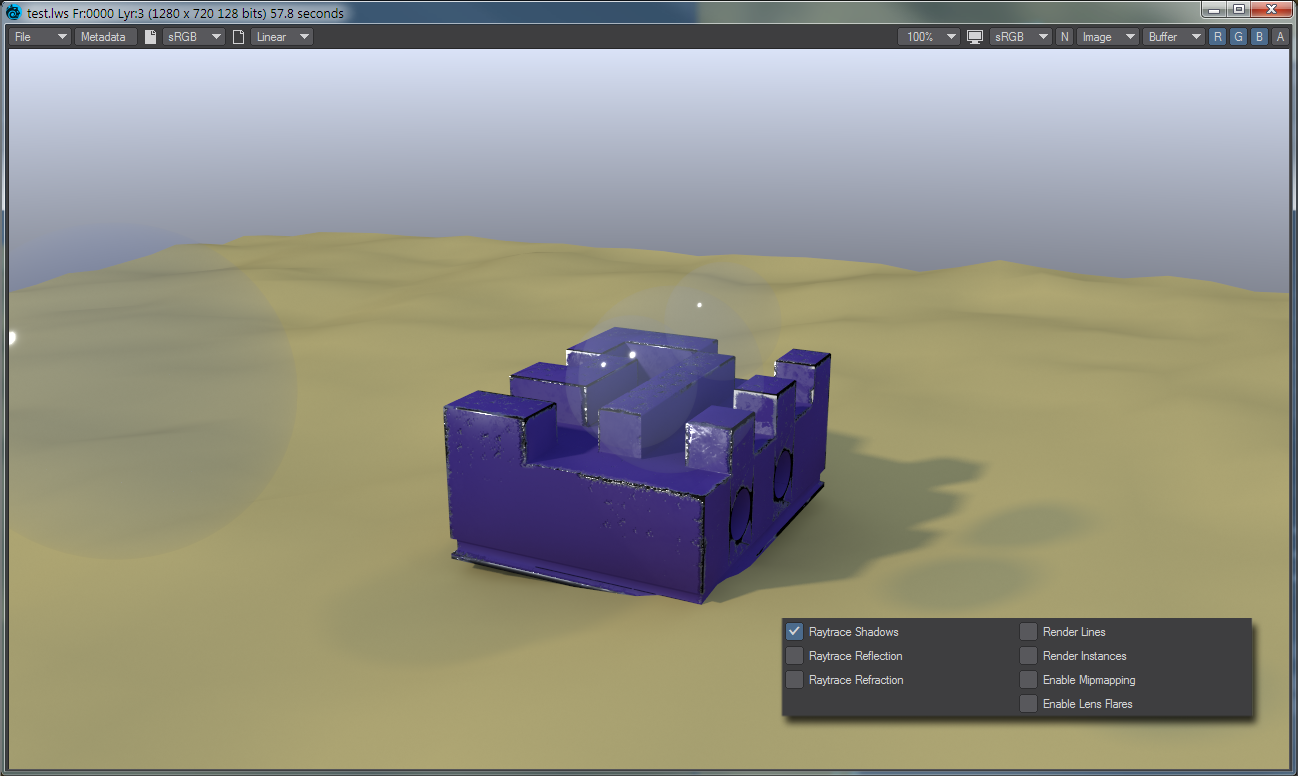
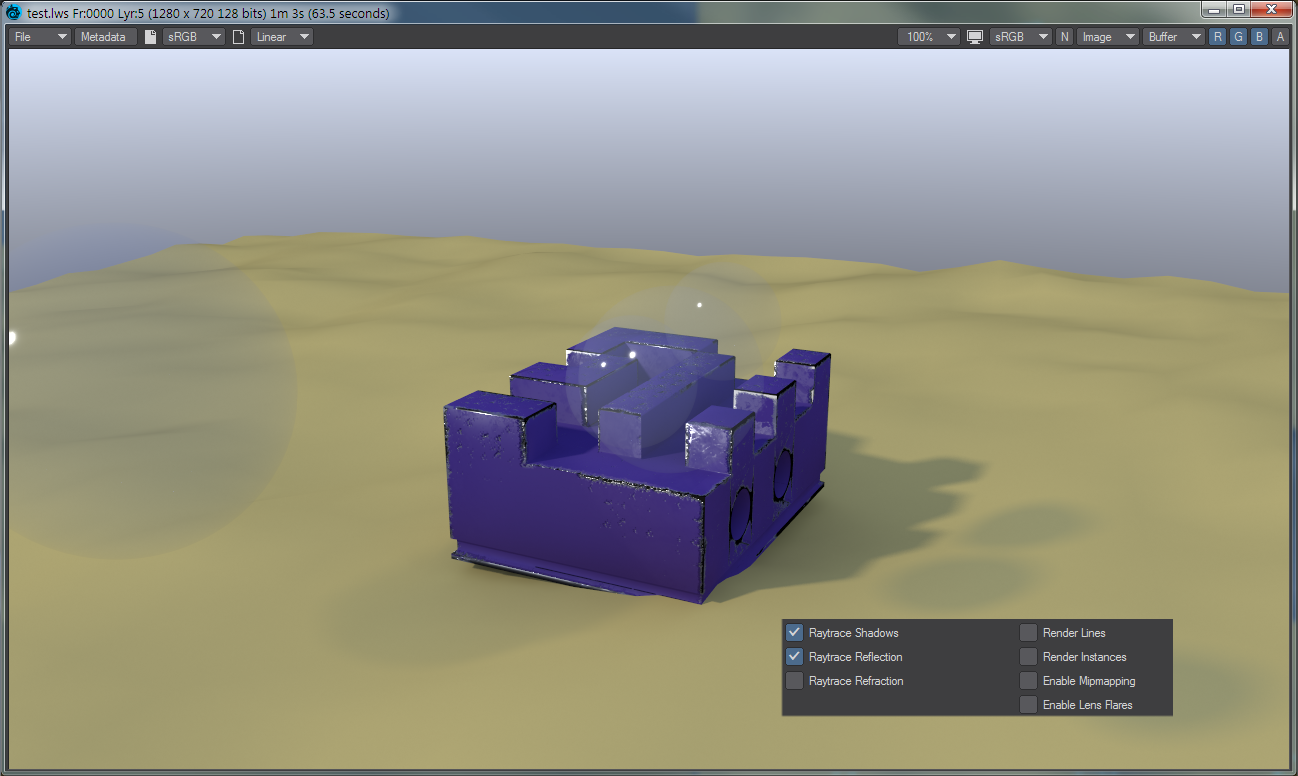
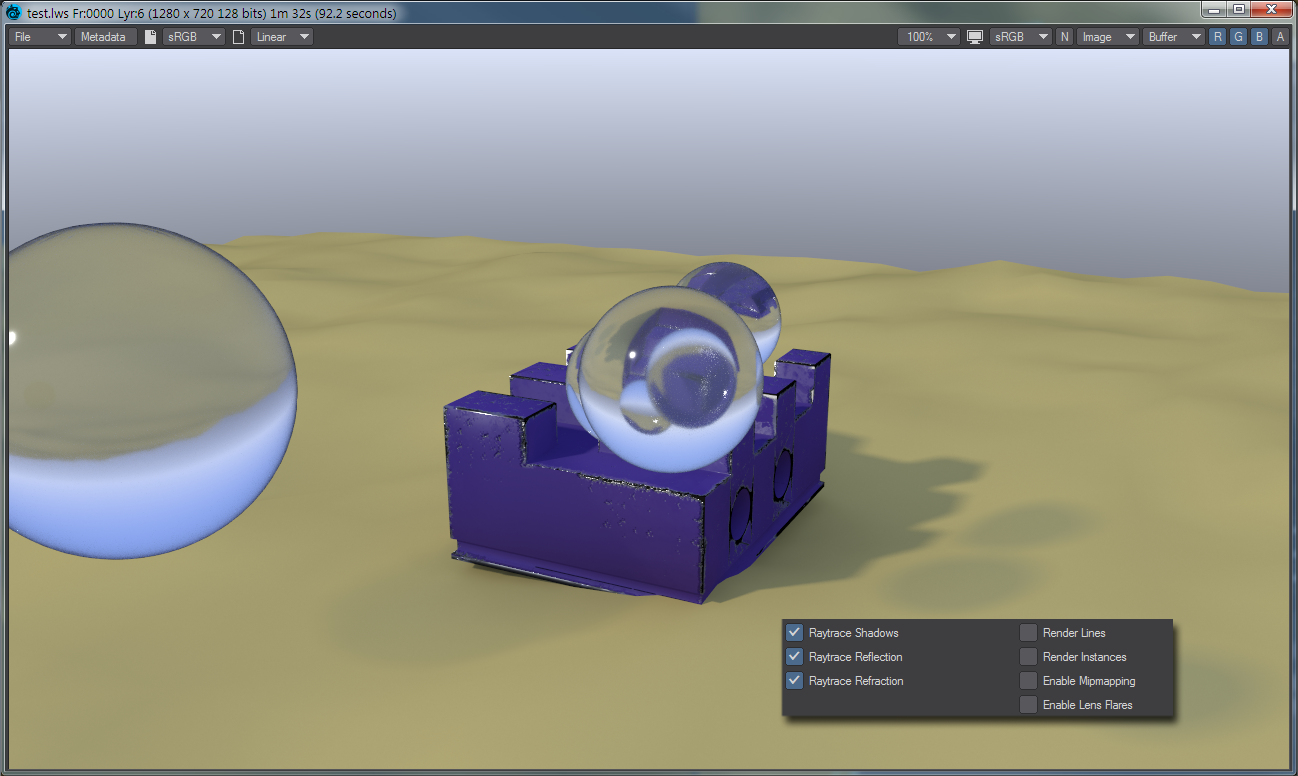
All options are switched on by default for a realistic render, but you can change them as you like. These options are global to the render. Objects have their own individual settings if you need to get more atomic.
Ray Trace Shadows
When you enable “Ray Trace Shadows”, any lights that have shadows enabled will now calculate ray-traced shadows.
To optimize your rendering times, you should carefully consider which shadow options you wish to have active for each object – for instance, objects that are in the background can probably have their shadows turned off completely.
Ray Trace Reflection
Enabling this feature will cause LightWave to calculate ray trace reflections between objects and the background depending on the settings for the surfaces in the Environment Tab in the Surface Editor. Again, you can optimize your rendering times by using images as Reflection Maps instead of raytraced reflections or by turning off reflections altogether for objects with lower importance.
Ray Trace Refraction
You can get LightWave to ray trace only transparent surfaces with refraction using this feature, allowing you to further optimize only those surfaces that have to undergo the ray tracing procedure. It works for surfaces that have some degree of transparency and a refractive index other than 1.0.
Selecting Unseen by Rays for an object tells LightWave to ignore the object in its ray-tracing calculations when reflection and refraction are involved. This means that the object that is unseen by rays will not appear in the reflections or refraction of another object. It will, however, render normally in the scene. This is especially handy for objects that are front projection-mapped; you probably do not wish them to show up in the reflections within other objects. Unseen by Rays will not affect the shadow options of a given object.
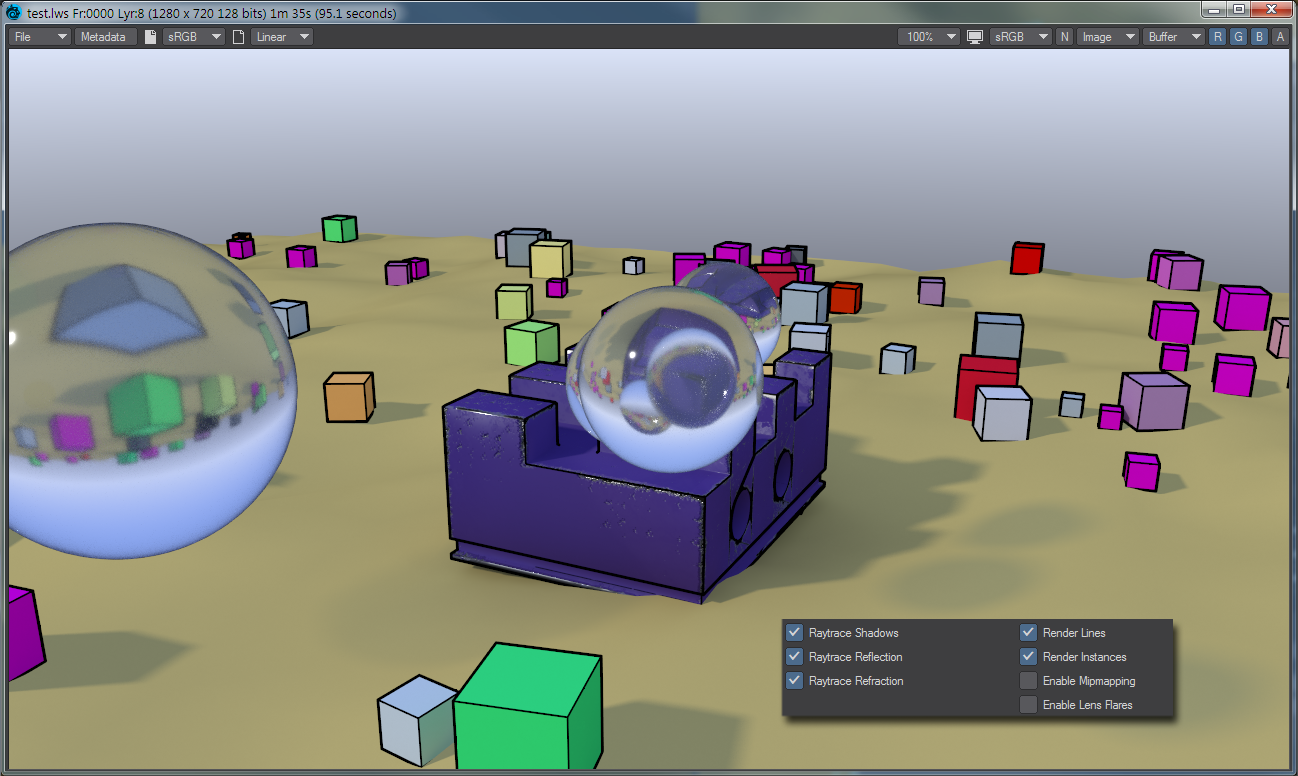
Render Lines
This needs to be enabled to render the edges of your geometry using the control on the Edges tab of Object Properties, or for single points or two-point poly chains.
Render Instances
Turns on and off instance rendering immediately.
Enable Mipmapping
(Default Off)
Activates or deactivates Mipmapping globally for a scene.
Enable Lens Flares
(Default On)
Globally enables LightWave's post-process Lens Flares effects.
Diffuse Bounces
(Default 2)
This sets how many bounces are generated in Global Illumination.
Ray Recursion Limit
(Default 6)
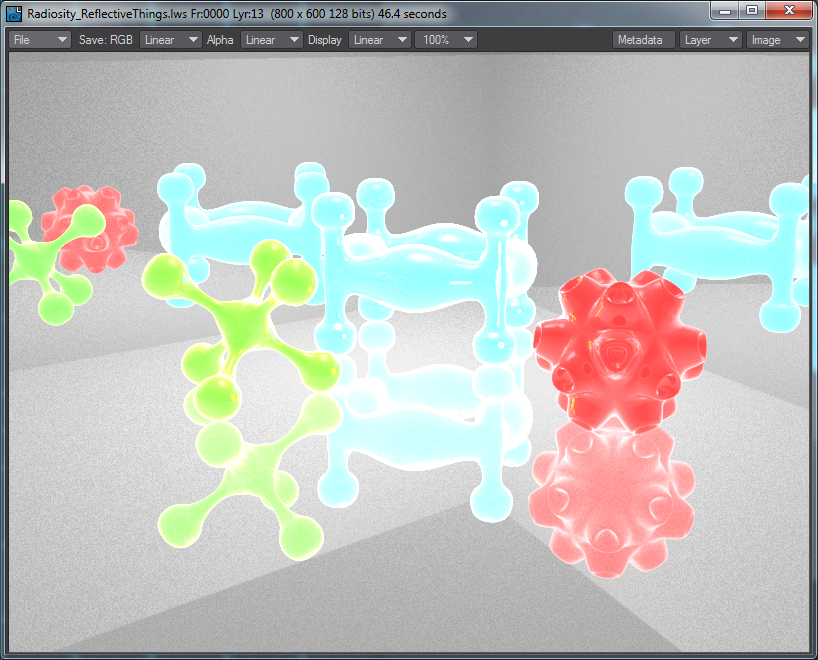
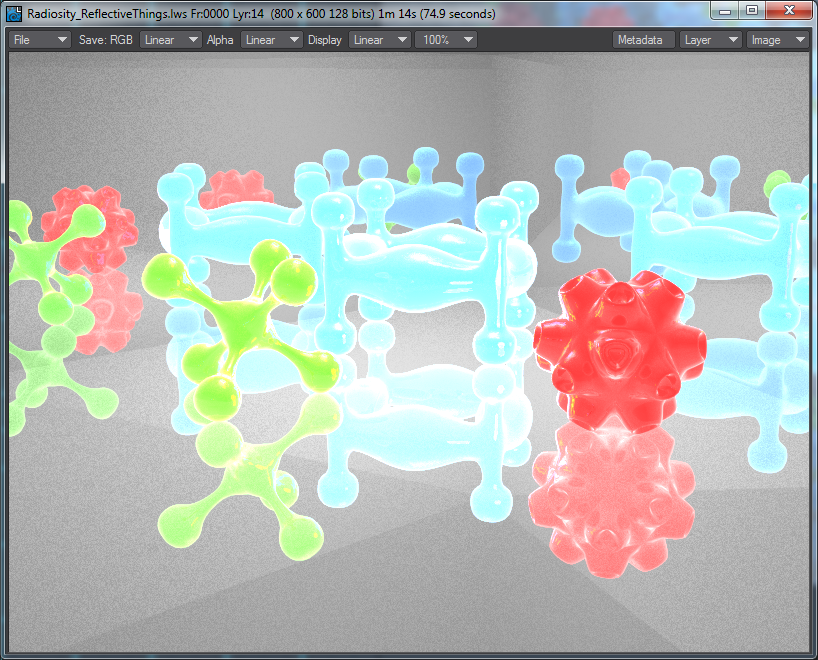
Ray Recursion is the maximum number of times you want ray-traced reflections reflected off reflective surfaces. In the real world, things can be reflected a seemingly infinite number of times. For instance, if you stand between two mirrors facing each other you will see a seemingly countless number of reflections, repeating until the imperfect transmission of light due to the density of the glass and air causes them to fade into blackness. In the world of 3D animation, you must set a limit for the number of reflections. The default value is 6, but you can set this field from 0 to 24. Lower numbers will yield faster rendering times.
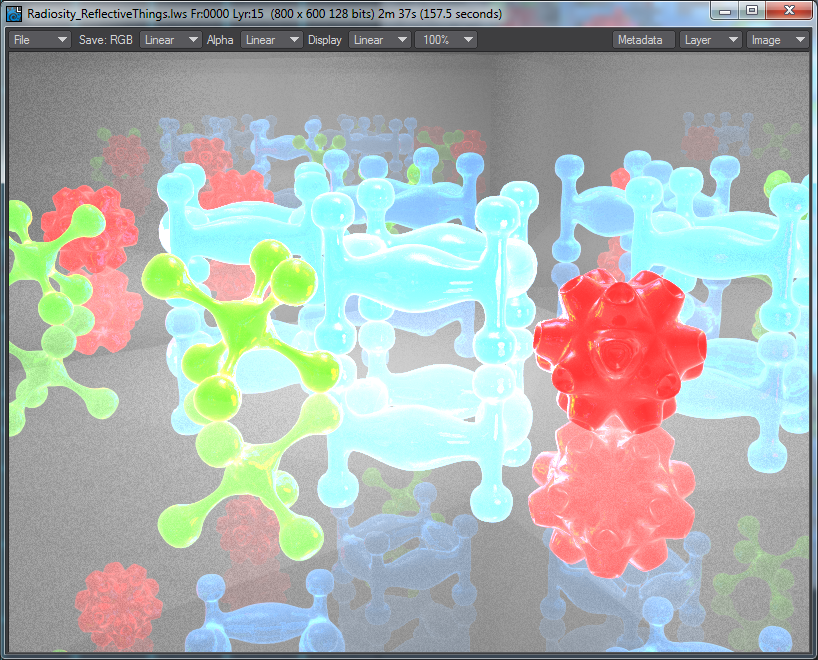
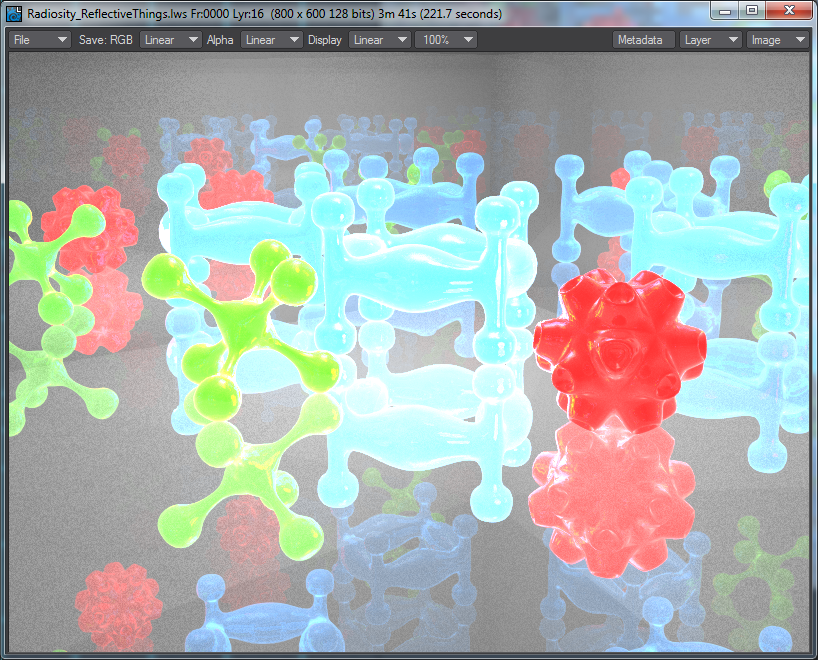
With 1 bounce of recursion we get a very empty scene, but a render time of only 46.4 seconds. The second image has recursion set to 2 and renders in 74.9 seconds.
Now we’re up to the default of 6 for recursion and a render time of 157.5 seconds. With 8, we get 221.7 seconds. Moving up to 16 and 24 levels of recursion and we no longer see the difference apart from render times. At 16 we get a frame in 237.4 and 24 is 244.4 seconds. Using Difference mode in Photoshop shows that the only pixel changes are in rendering time and window border.
Going below 3 for Ray Recursion can cause problems with things such as Clip Maps, so it’s always a good idea to have some Ray Recursion in the Render Globals.
Transparency Recursion Limit
(Default 6)
This is purely for non-refracted Opacity Rays, Clip maps and Shadow Rays
Reflection Recursion Limit
(Default 4)
How many bounces of light between surfaces. Once the recursion limit is reached rays can return nothing and so are black. This is an additional limit to place specifically on reflections when a scene might need more reflection samples than are desired for recursion.
Refraction Recursion Limit
(Default 4)
How many times light rays are bent between surfaces. Once the recursion limit is reached rays can return nothing and so are black. This is an additional limit to place specifically on refractions when a scene might need more refraction samples than are desired for recursion.
Ray Precision
(Default 6.0)
Is the mathematical digits of precision used for intersection tests. Typically it is 6 (or 1.0e-6) which works well in most scenes. It may need to be decreased for very rough objects with non-planar faces and this can be used to figure out problems with a model. If reducing the number fixes a rendering issue, the model is probably not well constructed. It determines if two slightly different intersection points are really the same intersection point with a precision error. Most users should not need to edit this value. If changed, they should plan on changing it back to 6 again when they are done fixing their models.
Reflection Samples
(Default 1)
Reflection samples define how many glossy rays are cast from the surface by the integrator to determine a pixel's overall shading. Every pixel in the rendered image is hit by an initial ray cast from the camera; when a ‘hit’ occurs, if you have Shading Samples higher than 1, more rays are cast. The amount cast is set by the number of Reflection Samples, so if you set it to 4, that many rays are fired. This process is repeated for each pixel if Minimum Samples is higher than 1, and is repeated as many times as set by the Maximum Samples in Camera Properties.
Lower numbers render faster at the expense of quality or noise in the image, the reverse is true for higher numbers.
Refraction Samples
(Default 1)
Refraction samples define how many refraction rays are cast from the surface by the integrator to determine a pixel's overall shading. Every pixel in the rendered image is hit by an initial ray cast from the camera; when a ‘hit’ occurs, if you have Shading Samples higher than 1, more rays are cast. The amount cast is set by the number of Reflection Samples, so if you set it to 4, that many rays are fired. This process is repeated for each pixel if Minimum Samples is higher than 1, and is repeated as many times as set by the Maximum Samples in Camera Properties.
Lower numbers render faster at the expense of quality or noise in the image, the reverse is true for higher numbers.
Subsurface Scattering Samples
(Default 1)
Subsurface Scattering samples define how many subsurface scattering rays are cast from the surface by the integrator to determine a pixel's overall shading. Every pixel in the rendered image is hit by an initial ray cast from the camera; when a ‘hit’ occurs, if you have Shading Samples higher than 1, more rays are cast. The amount cast is set by the number of Reflection Samples, so if you set it to 4, that many rays are fired. This process is repeated for each pixel if Minimum Samples is higher than 1, and is repeated as many times as set by the Maximum Samples in Camera Properties.
Lower numbers render faster at the expense of quality or noise in the image, the reverse is true for higher numbers.
Global Mipmap Multiplier
(Default 1.0)
You can increase the multiplication level globally for Mipmaps here.
Global Flare Intensity
(Default 1.0)
Determines the Global strength of all Lens Flares in the scene. A setting of 1.0 uses the same setting, a setting of 0.5 would cut the strength in half, while a setting of 2.0 would double the strength. The Enable Flares button needs to be checked for changes here to make a difference.
Global Light Intensity
(Default 1.0)
Determines the Global strength of all lights in the scene. A setting of 1.0 uses the same setting, a setting of 0.5 would cut the strength in half, while a setting of 2.0 would double the strength.
Global Edge Multiplier
(Default 1.0)
The Global Edge Multiplier is a simple way of being able to rapidly change edge sizes for different resolutions. Imagine that you have created a scene using edges for 1080 and the director wants to go to UHD. Before the Global Edge Multiplier you would need to adjust the edge sizes for all objects. Using this field, it would be a simple matter of changing from 1.0 to 2.0 when the camera resolution is changed.
Edge Vertical Points
(Default 0)
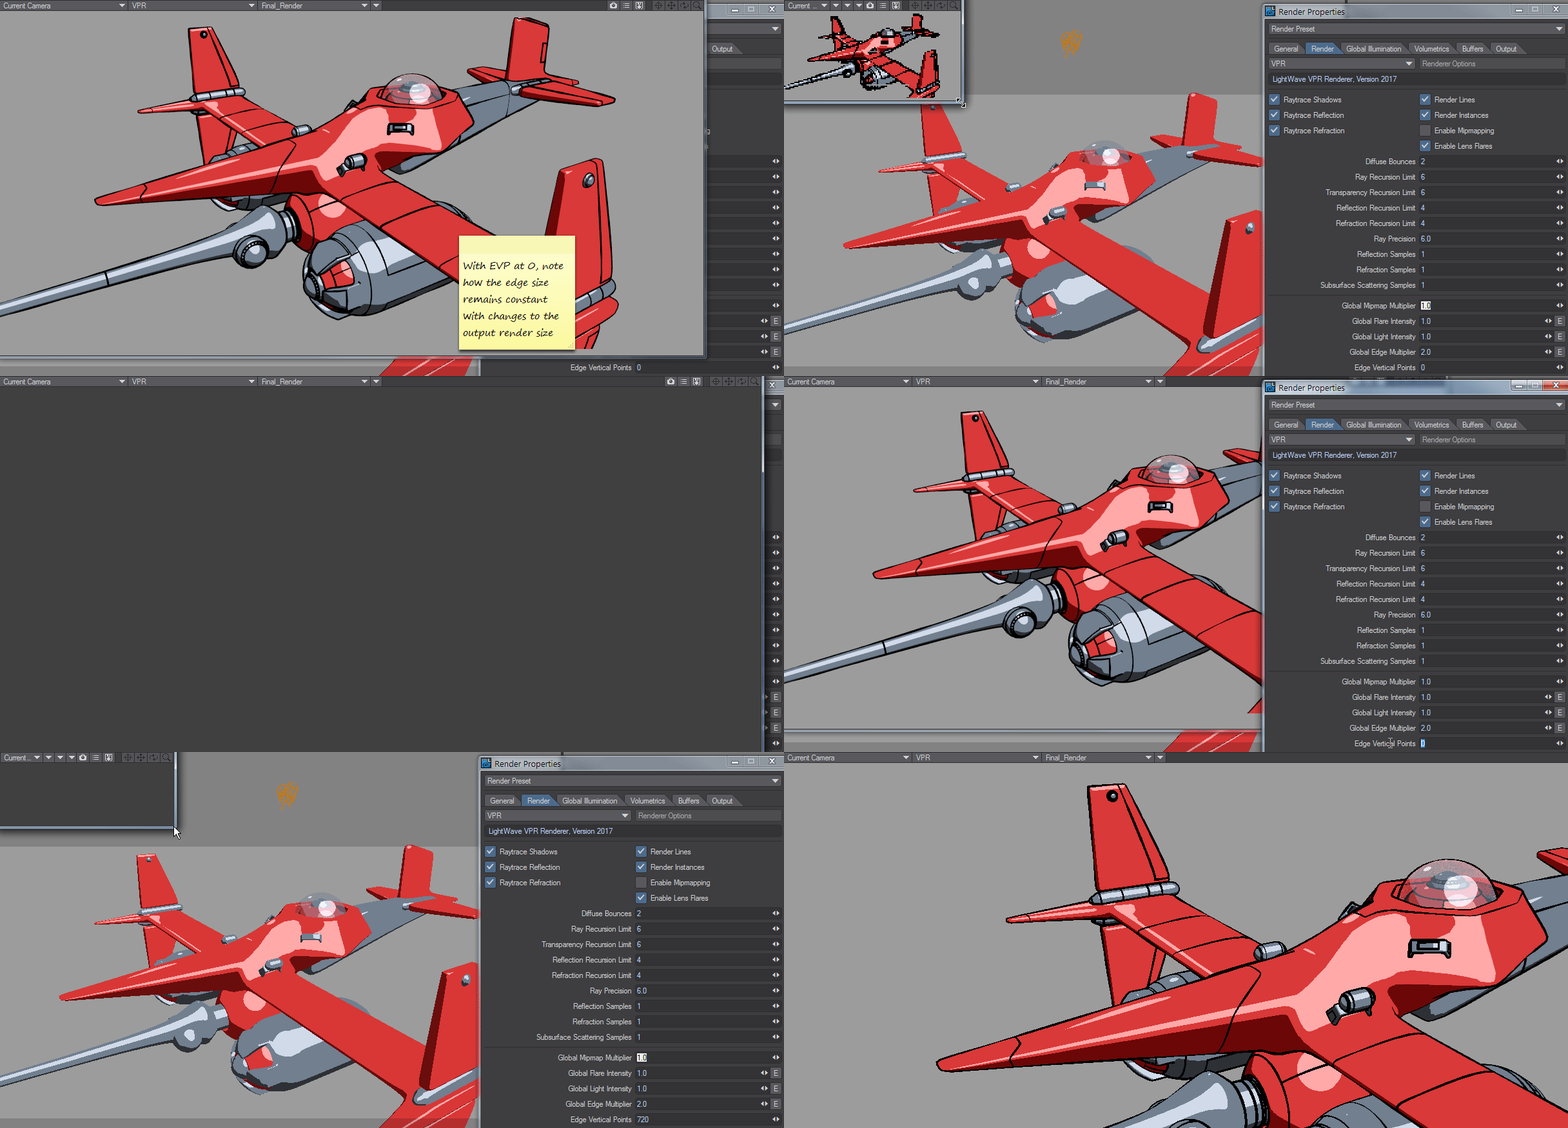
Edge Vertical Points (EVP) offers a more advanced way of doing the same thing. An explanation of the control name is needed first. Edge, because the setting relates to the edges in your scene; Vertical, because it is only concerned with the vertical scale of such edges, given that the horizontal scale will match; Points, referring to the abstract measurement used for text on a computer screen to disassociate from the rigid pixel. The idea here is to set the EVP to a number you feel represents the majority of your work, your standard. As an example, we'll use 1080. Now, as the resolution of your output changes, the scale of the edges compared to their width onscreen rendered will stay consistent - edges on a 60" HD screen will appear the same as a 60" UHD screen (but the UHD screen will be sharper).
An example that shows the principle well. Imagine that rather than changing the viewport size we are changing the camera resolution between SD, HD and UHD. The EVP maintains the ratio of the space edges take onscreen
Diffuse Limit
(Default 5.0)
Used to clamp the maximum value of indirect rays
Reflection Limit
(Default 5.0)
Used to clamp the maximum value of indirect rays
Refraction Limit
(Default 5.0)
Used to clamp the maximum value of indirect rays
Enable Despike
Despike examines buffers for anomalous spikes in their data while rendering and attempts to smooth them out.
Despike Tolerance - Defaults to 0.8, any brightness below 0.8 will be affected by neighboring samples. Do not use Despike unless you have actual bright spikes in the render you want to remove.
Noise Filtering
This dropdown offers three choices.
- Off - No noise filtering
- On - CPU - Uses CPU-based noise filtering first seen in LightWave 2018. The options are described here
- On - GPU - Uses NVidia Optix 6.5 AI denoising, and requires NVidia drivers of at least v435. Only works for still images (not network rendered) and requires an Nvidia Geforce, Quadro or Tesla graphics card with at least a Kepler chipset. There are no user-configurable options
MacOS no longer supports the NVidia CUDA system. This means that Optix denoising will not be available for the MacOS platform - Source
Render Tile Size
(Default 32)
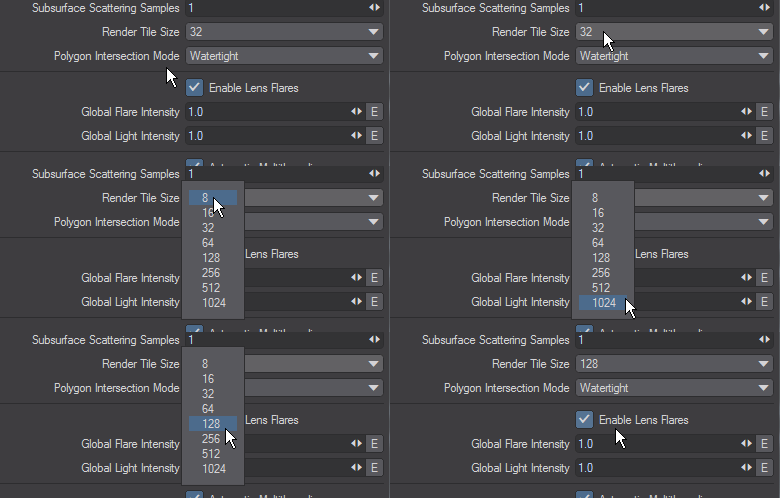
This dropdown giving a choice from 8 pixels square to 1024 will require your judgment to get the most rapid render. There is no easy way to judge whether large tiles will make more sense than smaller ones because the setting you choose will be completely scene-dependent. Test renders and limited region renders will allow you to tune to get the best performance.
If you choose a small size your render will be slowed slightly because each tile needs to have an unseen border rendered for matching to other tiles. The smaller the tile, the more time is spent on these unseen borders
Tile Colors
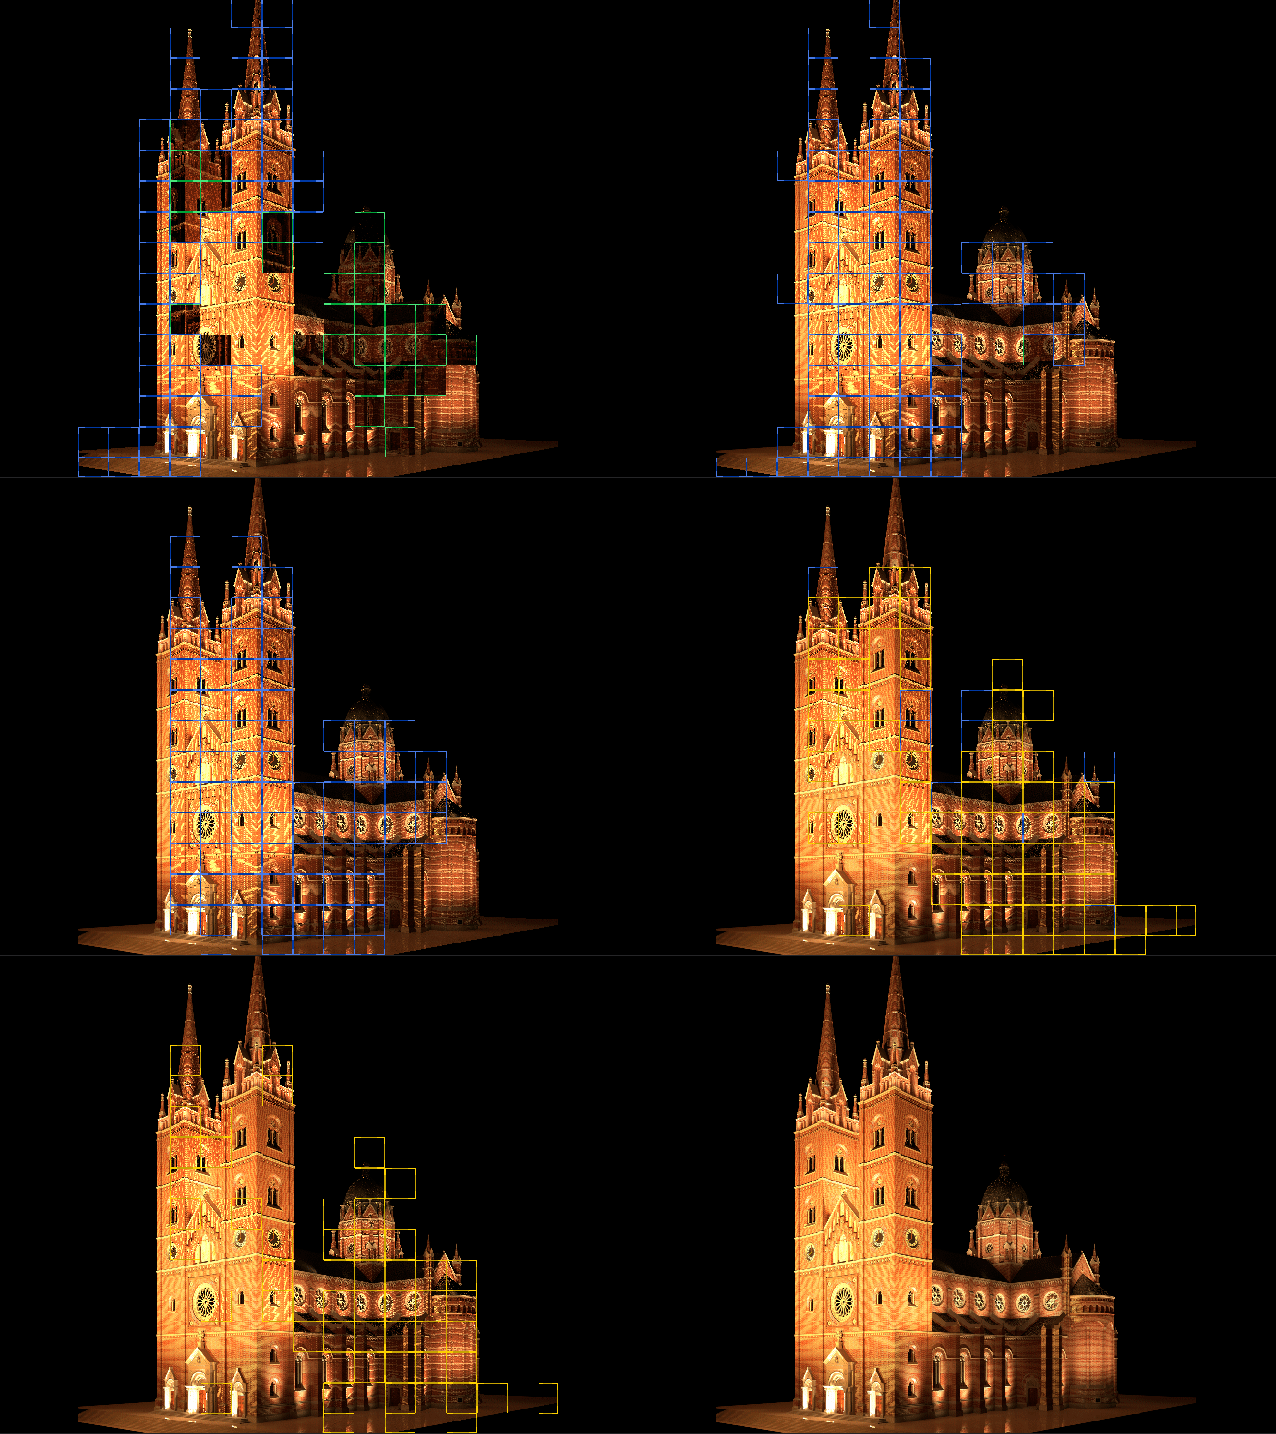
Render tiles come in three colors. Green, Blue, and Gold. There will be a tile for each core of the processor rendering. The three colors appear at different stages of rendering and the first to appear; once any GI work has been done, are green. Tiles that are green represent the first sampling for a section of the render. Once the first pass has been made, the tiles turn blue to show the adaptive sampling passes taking place. This is the usually the longest stage. Towards the end of the render, some cores may have finished any available tiles and would otherwise sit idle. LightWave will start to split tiles to keep all cores engaged until the end of the render. These split tiles will be gold.
This animation shows the different tiles used for rendering. The system used consisted of a Dual E5-2698 v4 with 40 cores and 80 threads resulting in a lot of tiles for the render.
Polygon Intersection Mode
(Default Watertight)
There are three intersection modes with increasing precision:
- Fastest - This is the speediest of the three, but can sometimes return dots where edges between polygons don't line up precisely
- Watertight - Should work in all cases, but still uses single precision math that might fail in extreme situations
- Double Precision - Bulletproof but not as fast
Multithreading
The Multithreading setting is used for systems with multiple CPUs or CPUs with multiple cores. Normally, you should set this to the number of processors on your system; however, there are times when you will get faster rendering with this set at a greater or lower number. For scenes that are very simple and render in seconds, you may find that setting multiple processors to the task will actually slow down renders because of the overhead of the communication between the processors. For such scenes, it is better to set up batch rendering so that each processor can render its own frames. Checking the Automatic Multithreading button will set the number of threads to the maximum on your computer. There is a maximum of 64 threads for rendering.
A potential for problems exists with some older plugins that were not designed with multi-threading in mind. If problems occur, try using the 1 Thread setting.
