Render Properties - Global Illumination
(Default keyboard shortcut: Alt-P)
Introduction
![]() Without Global Illumination, lighting in LightWave is relatively simple, based on a scene's lights. Their range of intensities and a mapping of the resulting surface brightness translate into image pixel values. Global Illumination (GI) simulates light that bounces between surfaces in your scene. In real life when light hits a surface, some of it bounces away from the surface and can illuminate other surfaces around it. For a diffuse surface this bounced light is spread evenly in all directions. For a reflective surface, the light bounces with different intensity in different directions creating bright rings of light, known as caustics, on the surfaces it illuminates.
Without Global Illumination, lighting in LightWave is relatively simple, based on a scene's lights. Their range of intensities and a mapping of the resulting surface brightness translate into image pixel values. Global Illumination (GI) simulates light that bounces between surfaces in your scene. In real life when light hits a surface, some of it bounces away from the surface and can illuminate other surfaces around it. For a diffuse surface this bounced light is spread evenly in all directions. For a reflective surface, the light bounces with different intensity in different directions creating bright rings of light, known as caustics, on the surfaces it illuminates.
.png)
Sponza cathedral courtesy Craig Monins
GI is a physical simulation of real-world lighting. Scenes rendered with GI enabled have far more realistic shading. Corners appear darker. Interiors of rooms emerge from the shadows. Colored objects can cast colored light on other surfaces around them. However, GI can be slow if using purely Brute Force. The interpolated mode trades a small amount of realism for a lot of render speed. It can create noise-free global illumination with reasonable render times. When combined with the high dynamic range calculations, renderings can become astoundingly realistic.
How Global Illumination Is Calculated
LightWave approximates Global Illumination using “projection hemispheres.” These basically “sit” on surfaces, each projecting out multiple Global Illumination rays at various angles using the theoretical normals of each polygon in the hemisphere. This is called an “irradiance evaluation.”

An Illustration of a Projection Hemisphere
If a Global Illumination ray strikes a surface that scatters light, some amount of that light illuminates the surface where the ray originated - colors are determined in the usual (non-Global Illumination) way, which can include the effects of luminosity, mirror reflections, caustics, and so on. The light-scattering surfaces are essentially extra little light sources that affect the diffuse shading of the current surface. Evaluated and non-evaluated areas are blended to compute the final effect.
Performing a full irradiance evaluation (tracing hundreds of rays) every time a point must be shaded is too time-consuming. Fortunately, unlike direct lighting, with its concentrated sources that can cause sudden changes across a surface (e.g., shadow boundaries), the indirect lighting that Global Illumination is meant to handle tends to change gradually over a surface. LightWave can use the results of each previous evaluation and smoothly interpolate between them. Only when no previous evaluations are close enough to the point being shaded, is it necessary to fire a new set of rays.
What is close enough? Each time LightWave performs a full evaluation, it estimates the size of the area that can produce valid results. This depends on factors like how far the rays traveled. This depends on the distance from the camera and the field of view per pixel. If all rays went a great distance before hitting anything, then the indirect light must be fairly constant and the calculated irradiance should be good for a large area. But if several rays hit nearby objects, then the indirect light might be varying more rapidly across the surface and the irradiance evaluations should be more closely spaced.
Once you have checked Enable GI, you have the possibility of two passes of GI evaluation, a choice of Brute Force or Irradiance Cache. Irradiance caching is an interpolated form of GI calculation that allows you to fine-tune how your Global Illumination is calculated by setting how many Rays are sent out, what Distance and Angular Tolerances are used and either Minimum and Maximum Pixel Spacing, if you are using Screen Clamping, or Minimum Size if your scene depends on real-world scale.
New Panel Hierarchies
New panels (like the Surface Editor, Render Properties, Scene Editor, Scene/Dope Editor and others) have collapsible hierarchies. Holding down the Ctrl key when clicking the expander arrow will open or close all children, holding down Shift will affect all siblings and holding down the Alt key when clicking a closed hierarchy will open that group and shut others. Holding Alt when there are several hierarchies open will maintain the one clicked on and close the others. All of the modifiers can be combined, they are not mutually exclusive.
Global Illumination
Enable GI - On by default, there are two choices currently: Brute Force and Irradiance Cache. You can use any combination of the two engines you like but using Brute Force as the Primary and Irradiance Cache as the secondary makes the most sense. Be aware that the interactive version of VPR will not do any preprocessing, so a pure Irradiance Cache render, without existing cache, will probably end up blotchy.
In 2015 and earlier versions of LightWave, the Indirect Bounces setting on the Global Illumination tab controlled how many bounces were rendered. That setting is now on the Render tab and named Diffuse Bounces. It performs the same function.
Brute Force
- Intensity - A multiplier applied to overall GI brightness. Useful especially for interior scenes. GI is a type of illumination and like other lights, its intensity can be modified. However, only an intensity of 100 % is close to physically accurate.
- Rays - It is the number of brute force rays to use per pixel sample when not using interpolated or in regions of interpolated GI when interpolated samples could not be generated.
Caustics - Generally, a caustic occurs in the real world when light reflects off a curved surface or refracts through a transparent surface so that it is focused on a small area. Light through a wine glass is a good example. With a more complex surface, the caustic can create a random pattern like those seen on the floor and sides of a swimming pool. Switching Caustics on here will generate accurate caustics rather than the approximations seen in previous versions.
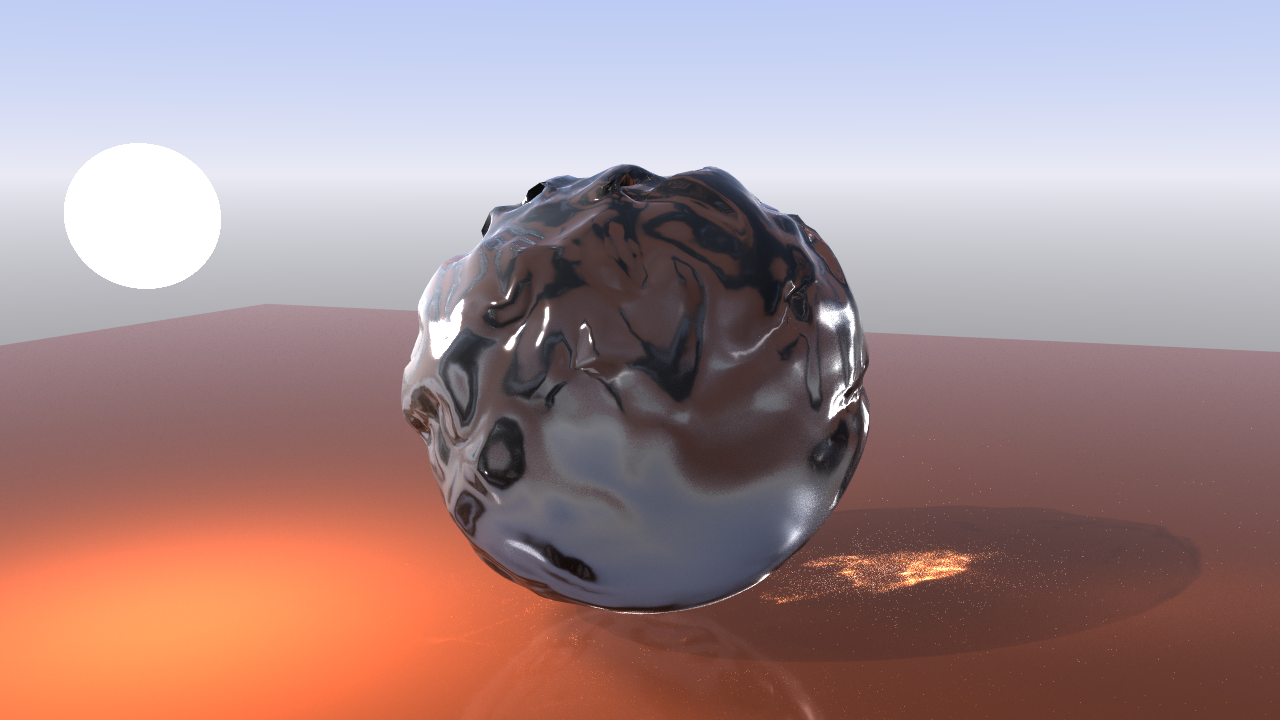
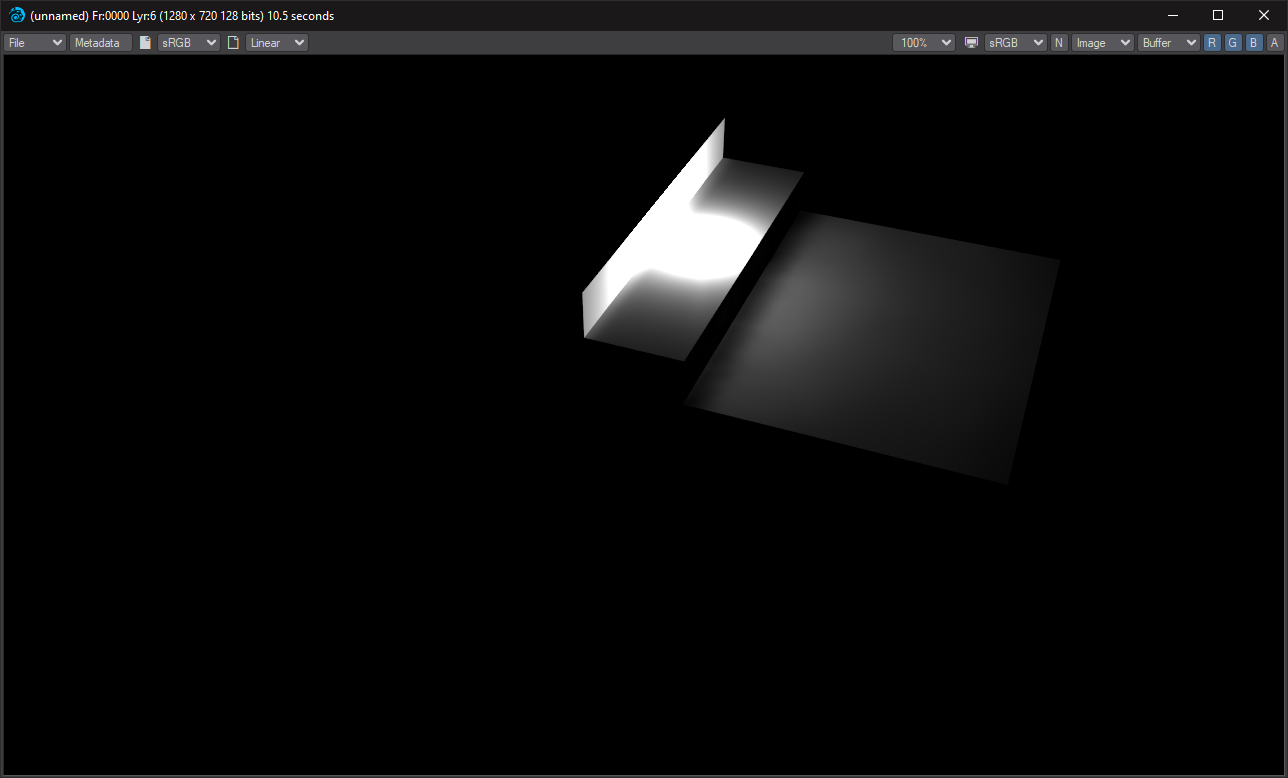
Caustics can add a significant amount of time to your render, so it's all about balancing your time budget with your quality requirements. Our first shot is purely brute force, with no secondary GI, and it took 1918.9 seconds to render:
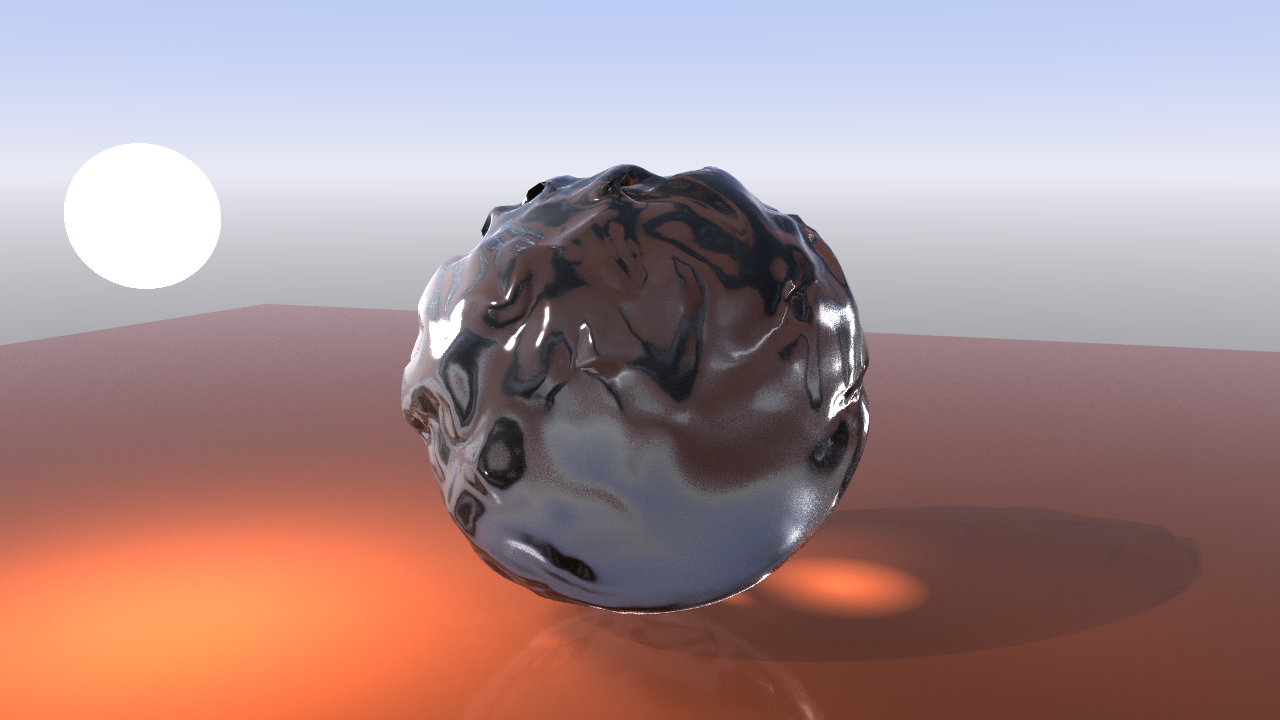
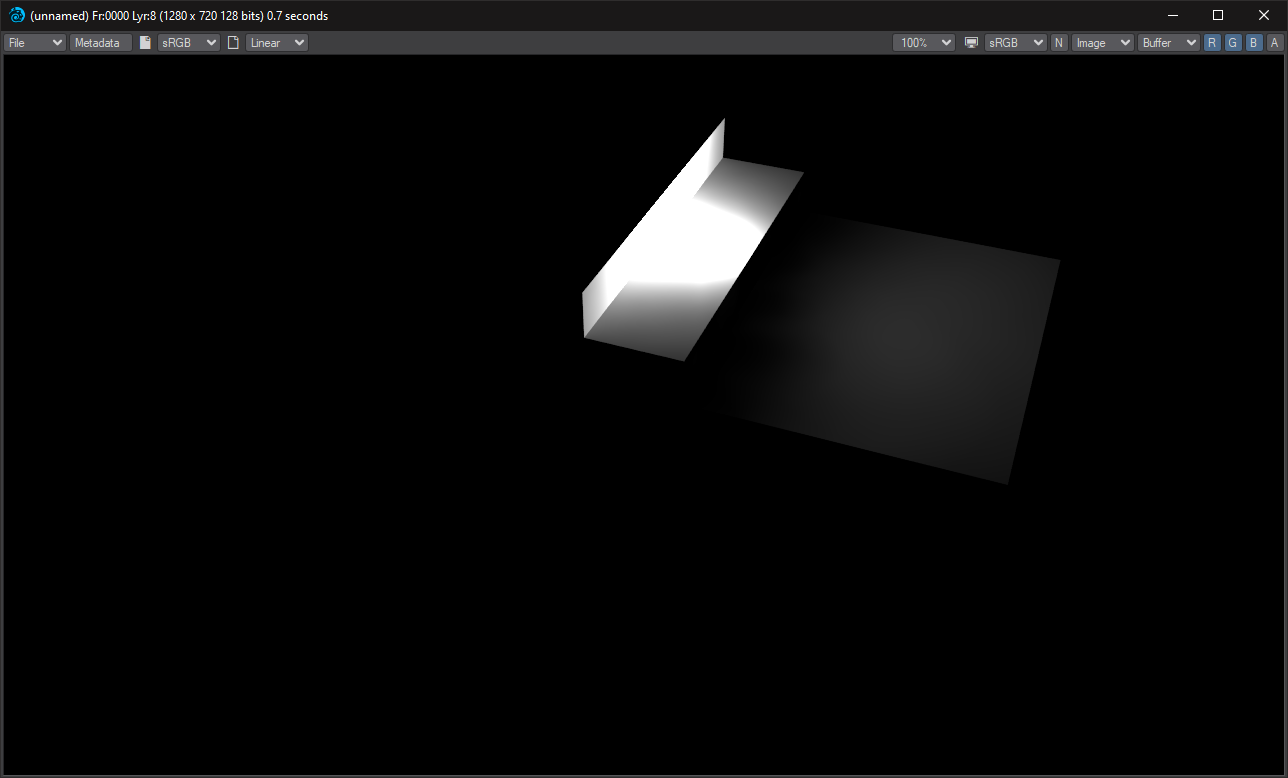
The second test used just primary brute force again but lowered the quantity or rays from 128 to 64 to try and improve render time. The following render took 722.6 seconds to complete:

The caustics aren't quite as good as the first render, but the time taken was significantly less. We should try further:
The overall quality is fine in this Irradiance Cache render at the default 512 rays, and the render time is great at just 125.5 seconds, but the caustics are without detail. Try again.

Now we have a happy compromise. Brute Force primary rays at 64, and default Irradiance Cache 512 ray secondary GI with Caustics on gives a result that fits our time budget at 505.1 seconds, and the quality is pretty similar to our first image but at a quarter the cost in render time.
- Affected by Volumetrics - Allows volumetrics to be included in the global illumination calculation. This can slow rendering but is more accurate if there are volumetrics in the scene.
Irradiance Cache
Irradiance Cache GI presents more options than Brute Force. It is also, by its nature, not something that will work perfectly out of the blocks without preparation. The "Cache" in the title is the giveaway. VPR and F9/10 will still work, but without a cache, VPR risks being "blotchy."
- Rays - the number of evenly-distributed Global Illumination rays sent out for evaluation. As you might expect, the higher the density, the more accurate, but the longer the rendering will take.
Interpolation Accuracy - Increasing accuracy will mean better contact shadows, but requires more rays thus slowing down the render
- Minimum Pixel Spacing (MinPS) - Controls how tightly GI samples are packed near corners and measured in pixels. Larger values reduce the number of GI samples near corners which makes the GI less accurate but also can decrease render times.
- Maximum Pixel Spacing (MaxPS) - Controls the maximum distance in pixels between interpolated Global Illumination samples. Larger values (100 is typical) reduce noise in large flat areas. Lower values make shadows more accurate but need more rays to reduce noise.
Distance Tolerance (DT) - is set in millimeters and controls the density of samples on flat surfaces. It is the maximum variation allowed in the sample direction in order to blend. Smaller distances will cause more samples to be taken for a surface but will help with small details like louvers, etc.
Left: Distance Tolerance is too large for this scene. Note the leak of light to the step below. Right: Reducing the Distance Tolerance size has cured the light leak
- Angular Tolerance (AT) - is set in degrees and controls the density of samples on curved surfaces such as a sphere or a cylinder. It is the maximum variation allowed in the sample direction in order to blend. Smaller tolerances will cause more samples to be used on curved surfaces, but will help with details.
- Screen Clamping - When Screen Clamping is checked, the MinPS and MaxPS fields are used. If Screen Clamping is unchecked, the Minimum Size field will be consulted for samples
- Use Specular - Uses specular effects from the scene to inform the radiosity solution
- Use Glossy - Uses Glossy Reflection samples for the radiosity solution
- Use SSS - Uses Subsurface Scattering samples for radiosity
- Resolution Multiplier - Create a radiosity solution that is smaller, or bigger, than your render resolution
Ray Recursion is the upper limit on the number of Diffuse Bounces you are allowed. For example, if you have a Ray Recursion Limit set to 1 and Diffuse Bounces set to 8, only one Global Illumination bounce will be calculated. However, if you have Ray Recursion Limit set to 8 and Diffuse Bounces set to 4, you will still get four bounces of Global Illumination.
Interpolated Cache
- Use Cache - When checked, a cache can be created and used for rendering. When unchecked the following settings are all ghosted and unavailable
- Cache Type - Two choices:
- Frame - is used for scenes where you have moving geometry or lights
- Scene - is used if the camera in your scene is the only thing moving (flythroughs, etc)
- Cache File - The name of your Irradiance Cache file. Clicking on the paper icon at the end of the filed will open a requester to set the name and path
- Clear Cache - Click here to remove an existing cache so that a new one can be baked
- Scene Baking Frame Step - How often to bake a cache for your scene. The default of 1 might take a long time where every 10 frames, or even more, might be suitable for your scene
Bake Grid - If you don't know where your camera will be going in your scene yet, or you want a belt and braces approach that ensures that every eventuality will be covered, you can bake a grid cache. The grid cache sets a grid at the spacing set for the bounding box of your whole scene.


The first image shows our test scene with a chair separated from the room we are trying to bake, the second shows the chair in the room. In this simplified diagram, every vertex in the blue bounding box represents where the 360° camera is taking samples (Grid Spacing), at the resolution chosen (Grid Resolution)

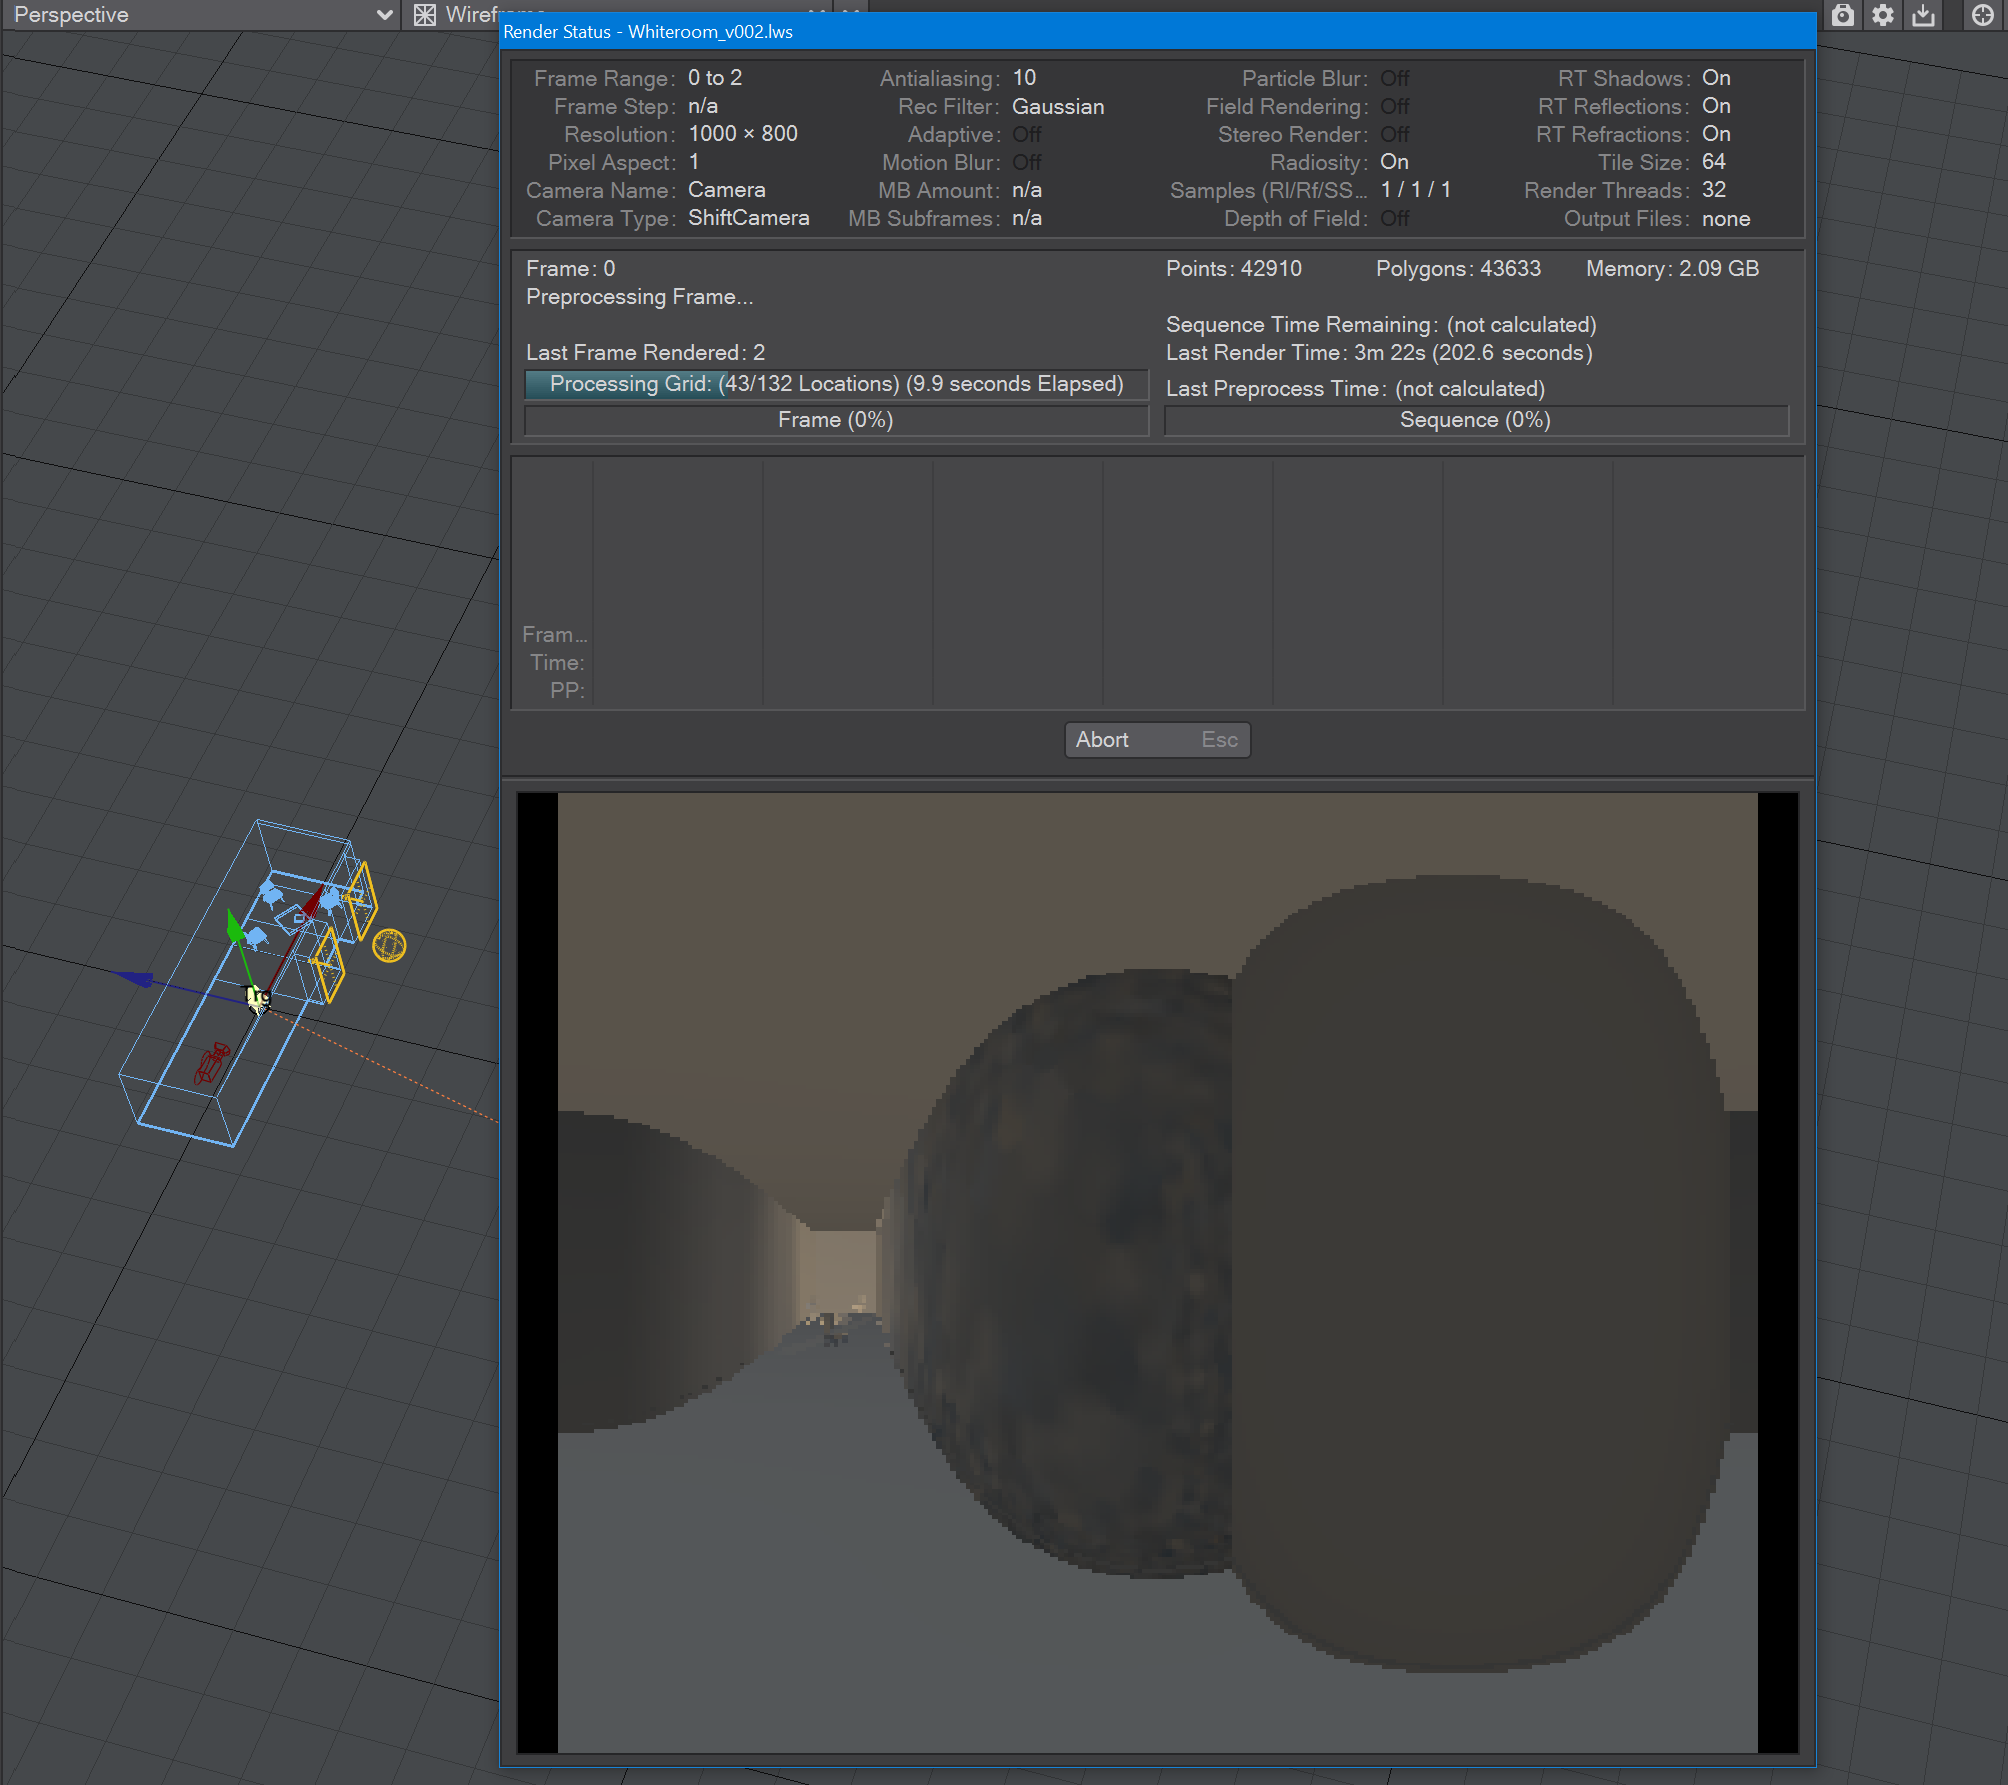
The baking process shows this clearly - in the grid bake shown on the left there are large expanses of nothing. Notice also that there are 4,698 locations to bake, adding to the time needed for a render of the cache. In the image on the right, we have returned the chair to within the room we are trying to bake. Already we can see that there are only 132 locations to bake and there will also be very little checkerboard because there are only a few openings (the windows).
- When you check this option, two further suboptions become available:
- Grid Resolution - By default, this is set to 1024. The resolution of the cache. A cache is not an image, nor a set of images, but the resolution here is similar to the resolution of an image. The higher the resolution the longer each grid will take to bake but the more detail it will contain
- Grid Spacing - This is how frequently you will be taking snapshots for this cache, at the resolution specified above
If your grid is taking longer to bake than you expect, check several things:
- That the resolution and spacing of the grid is appropriate to the scene (no point baking extreme detail when it won't be seen)
- The grid encompasses the bounding box for the scene. As the example in the wiki shows, don't have elements outside the area you are concentrating on
- That you are not baking the grid to a slow network location
Caching saves Global Illumination data for subsequent render passes and frames, which can significantly reduce rendering time. The Global Illumination cache gets loaded before baking begins if it exists. This will allow you to continue baking an existing Global Illumination cache. You could, for example, extend an animation by setting your start and stop frames beyond those you have already baked and clicking Bake Global Illumination Scene. You could add just a single frame to the cache by selecting a frame and clicking Bake Global Illumination Frame.
Debug Display Options
The Show Nodes toggle shows the octree nodes that are used for storing the radiosity solution.
Lighting Considerations
Global Illumination must consider global illumination, which means accounting for all lighting, whether direct or indirect. This includes indirect light provided by the Environment light and its plugins, sometimes referred to as "sky lighting."
When the Global Illumination rays are fired, the color and brightness of the closest element hit by each ray (other than direct light sources, which are accounted for separately) are added into the global illumination for that point. It doesn’t matter if a ray hits another diffuse shaded polygon, a luminous polygon, or the backdrop - whatever is hit will be taken into account.
If the backdrop is blocked by objects, it won’t affect shading. For example, in a scene with an imaginary infinite ground plane object, the lower half of the backdrop gradient won’t matter since no rays will ever reach it. Similarly, when shading the floor of an enclosed room, only the areas of the backdrop seen through open doors, windows or skylights will contribute.
Moreover, with gradient backdrops, orientation matters. If the sky is dark blue at the zenith, but bright at the horizon, then the sides of an outdoor object may get more sky lighting than the top. This is because Global Illumination rays are fired more densely near the direction of the surface normal than around the base of the sampling hemisphere for each shaded point. Thus, light coming in perpendicularly is more important than light coming in at a glancing angle.
Troubleshooting
“Blotchiness” in areas lit by Global Illumination occurs when different evaluations come up with different results. If the lighting environment is complex and there are not enough rays to properly sample it, then two or more nearby evaluations can be different enough to cause blotchiness. This can occur, for example, when Angular Tolerance is set too high.
Consider a scene lit only by a single luminous polygon. The smaller that polygon is (as seen from the surface being shaded), the larger the number of rays necessary to ensure that at least one of them hits it. If only one of two adjacent Global Illumination evaluations contains a ray that hits that polygon, then the other evaluation will result in a dark patch on the surface. You can minimize this effect by increasing the evenness of the environment - that is, making the luminous polygon bigger or dimmer or using more rays to increase the density of the sampling pattern.
The same principle applies to indirect lighting. A brightly lit area is very much like a luminous polygon as far as Global Illumination is concerned. For example, when shading a ceiling, more rays are required if the adjacent wall has a few tight spotlights shining on it than if the wall is lit by a broad floodlight. Specular highlights or caustics can also act as tiny indirect light sources that can require a higher sampling density.