Subpatch Modeling - Three
Creating Primitive Shapes
In the visual arts, it is generally understood that all forms start with a primitive shape. It is no wonder then as to why in Modeler and in other 3D modeling applications, the creation of primitive shapes are a built-in function. Click on a tool, pull out a box or a ball. However, while this is great for polygonal modeling it does us no good for subpatch modeling, for as you have seen, hitting TAB on a box will give you nothing but putty and the ball tool puts a series of triangles at the poles. Something we don't want either.
Sure we could add segments to a box and it will hold its shape or just like with the triangles at the tip of the ball. But to truly master this art of subpatching we are going to have to do better than this. We need to know how to make subpatch-friendly primitive shapes. We can then use this understanding to construct more complex forms.
I will start with an overview of the tools you might want to use if you are going to follow along. I am not going to impose a workflow on you but give you what tips I can that I think are applicable as we go. Not going to bog you down with a step-by-step either but rather give you the basic sequence the object should be constructed. You can otherwise go at your own pace and sequence if you choose.
Tools
These are the following tools you should get to know for this segment of the tutorial. Note that you may also have your own preferences and/or plug-ins.
Basic Primitives:
Use cursor keys to add/reduce sides and/or segments while using the primitive creation tools.
Go to:
- Box Tool (Shift-X)
- Ball Tool (Shift-O)
You may use the numeric requester if you prefer in some cases.
Add Geometry
- Knife Tool (Shift-K remember that this tool also has a numeric requester for precise placement)
- Bevel Tool. (B on the keyboard Ctrl key to constrain to one action - inset or shift - based on mouse movement)
Extend Geometry
- Extend Tool (Shift-E)
Merge Geometry
- Merge Polygons (Shift-Z on the keyboard)
These are the minimum tools you will need to know for this segment. Consult the LightWave manual if you need assistance. Also if you have the online help files installed, you can press F1 in Modeler and it will bring up a reference manual for LightWave with a search function.
This tutorial was written before several current Modelertoolswere written. Look into tools like Edit Edges, that will make adjusting for harder edges far more simple.
Note: A general understanding of the basic functions of Modeler as well as some basic tools such as Move, Stretch, etc. are assumed.
Flat Box, Rectangle, Cube
Flat Box
Simply create a box:

Slice cross hatch edges.

Use Band Saw Pro with two segments, one at 2% and the other at 98%. Do it once, the tool will remember it and do it the other way for perfect symmetry.
Hit TAB for subpatch.

It will have a fairly tight corner.

Uses: Basically a starting point for anything flat and square or square-like or even with sharp corners.
Other Uses: You can use this for a wall or floor or any flat geometry you may want to use as a base for displacement but that needs to remain square or rectangle.
Extrude and add a slice down the middle of the edge for a flat rectangle shape. If you need tighter edges simply add more segments to the edge or face.
Uses: For a tabletop, desktop, etc. Basically the starting point for anything square or rectangle and thin. Could be the base for a more complex object.
Other Uses: Use as a base object for something such as a stone wall that could be created using displacement.
As you can see this makes a perfect "imperfect" object with slightly rounded corners. This is much faster to create, fewer polygons and overall more useful than creating something like this using polygon modeling.
Cube
Pull out a box. (Tip: Ctrl key to lock to perfect cube)

Add your edges (Band Saw Pro three times)

Subpatched makes a nice tight box.
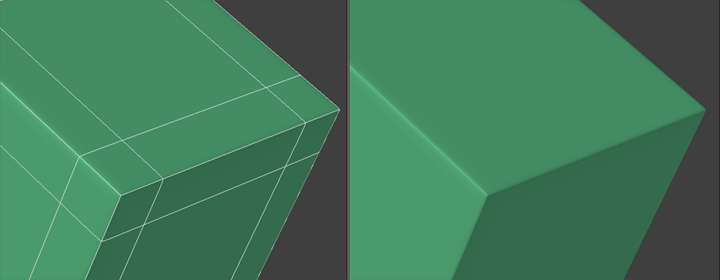
Simple and low on polys.
Uses: Use to make a tutorial on how to make a perfectly imperfect cube with subpatches. Seriously though, different than the flat rectangle. This is the basic configuration for a portion of an object that needs to retain some kind of boxy shape with hard edges.
Rounded Edge Cube
Apply Rounder with these settings to a box.

Subpatch.
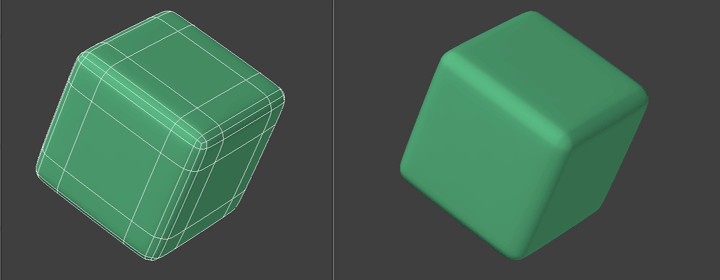
Uses: Any boxy shape or portion of an object that also needs rounded edges.
Ball
Create an 8X8 ball.

Tip: Fix Poles Detail/Polygon/More
This tool creates a ring around the tip where the triangles are. But whatever you want to do to get the end result.

Merge pairs of polys to get this pattern at the ends.

Subpatch

Stretch Tool to flatten slightly and make perfectly round.


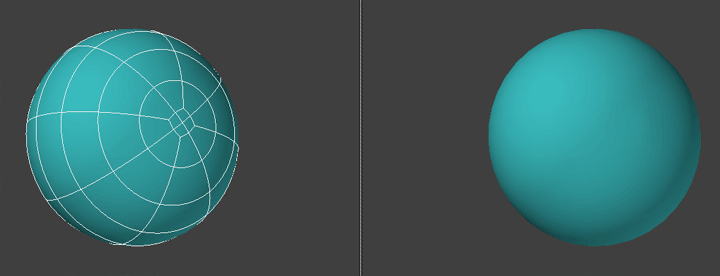
Uses: Great for eyeballs. Any round shape that needs to be animated with squash and stretch. An egg, the crown of the human head.Basically any object that starts with or uses a sphere-like shape.
You will get some slight bumpy parts at the poles of the sphere but there simply is no way to make a perfectsubpatchedball. There is always going to be a compromise someplace. This is the best one I have found. It has to be a matter of using common sense in the animation or still work place this where it will be least noticeable on a shot by shot basis.
Disc
8-sided Disc

Bevel

Add Edges Tool (center polys) and Bandsaw Pro to add this geometry.

Subpatch
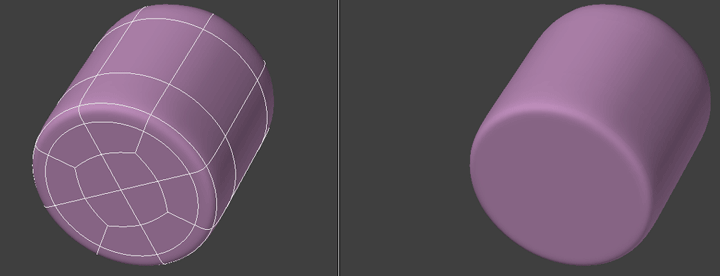
Uses: Starting point for anything with a tubular shape or any part of an object that has this shape.
More Primitives
If you want you can use what you have learned here to create more primitive shapes such as these:
Tip: More primitive shapes under Create/Primitives/More.


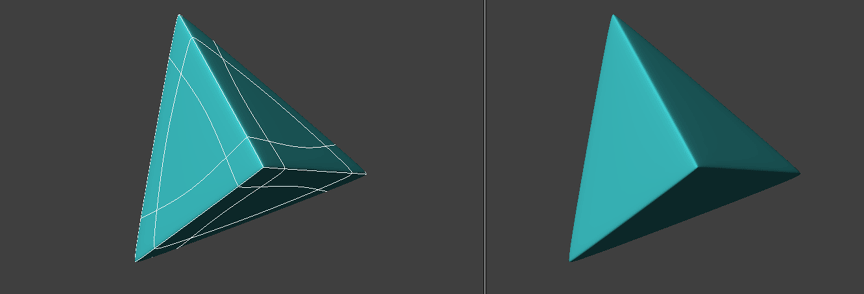
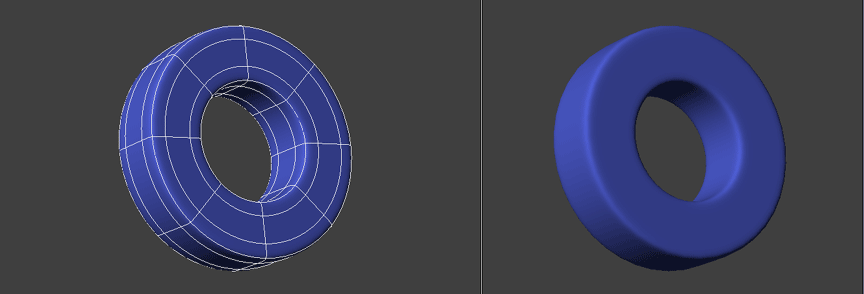
So, from this you can see that the geometry does not need to be complex to create these forms. On this note, it is always a good idea to start simple and build into complexity as you go.
We have now explored the basic shapes we will need to create more complex forms, and that's just what we are going to start learning how to do next.