QuickTime
Apple has never provided a 64-bit version of QuickTime for Windows systems, however LightWave has a pass-through that will make saving to QuickTime possible again on such systems. When saving a QuickTime animation you will note that a new icon appears in your taskbar labeled QT32_Server.

It’s not likely you’ll need to do anything with this application and it will quietly shut itself down when no longer needed. If you do need to you can open the window with a double-click on the taskbar icon, or a right click and choosing Open from the menu. You’ll get this window:
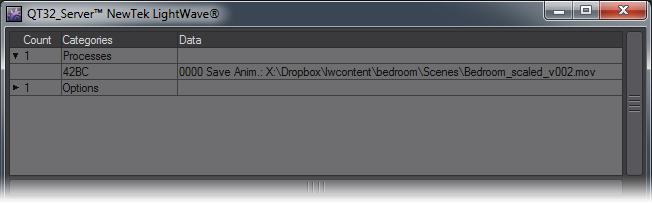
In which you can change the Shutdown time and see how ongoing jobs are proceeding.
When you select QuickTime as your output format clicking on the Encoding Options button will show the following window:
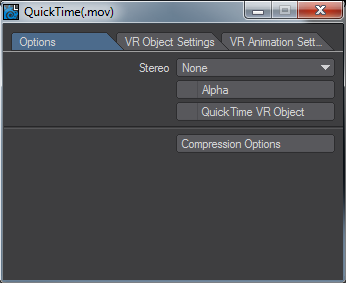
The first setting is Stereo and you can choose different types:
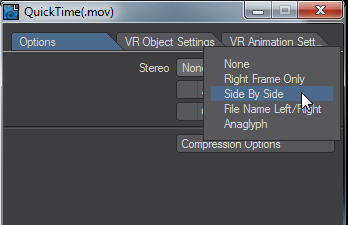
You can choose to render out a sequence in one of the Stereo types, but unless you have set up Stereoscopy in the Camera Properties window you will just get output that is "flat".
The choices are:
- None - Even if you are using a stereo camera, this outputs a flat QuickTime animation.
- Right Frame Only - Only output the right eye camera for tests.
- Side By Side - Outputs the left eye and right eye side-by-side to create a double-width QuickTime file.
- File Name Left/Right - Outputs two movs, one for the left eye, one for the right.
- Anaglyph - Produces an animation that can be viewed with red/blue glasses
Alpha is the next choice. It creates a QuickTime animation with integrated alpha channel.
QuickTime VR Object - QuickTime VR Objects are QuickTime movies that display an object from multiple views. Special data embedded in an otherwise ordinary movie tells QuickTime how to play through the frames of a movie as a viewer moves the mouse across the image. When the viewer moves the mouse down, the player skips a large number of frames to find one that corresponds to a view of the same side of the object, from a lower position. This can simulate rotating the object in space, if the views are right.
Once a scene with the appropriate camera and/or object movement is created, open up the Render Properties Panel and select QuickTime (.mov) under the File Format dropdown menu. Click the Encoding Options button to set the critical parameters for your animation.
The Compression Options button will invoke the standard QuickTime Compressor selection dialog. The choices are many and the differences subtle. The only relevant warning for QTVR is that you should set the compression to use keyframes at every frame, since these movies are not played in a linear fashion.
If you receive error messages telling you to install QuickTime like so:
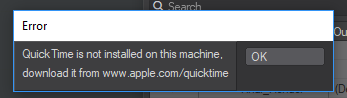
even though you do have QuickTime installed, you need to edit your system path, so that QuickTime is nearer the start. This is a QuickTime problem rather than a LightWave one, and on Windows, it is resolved like so:
- Right click on your computer icon and select Properties
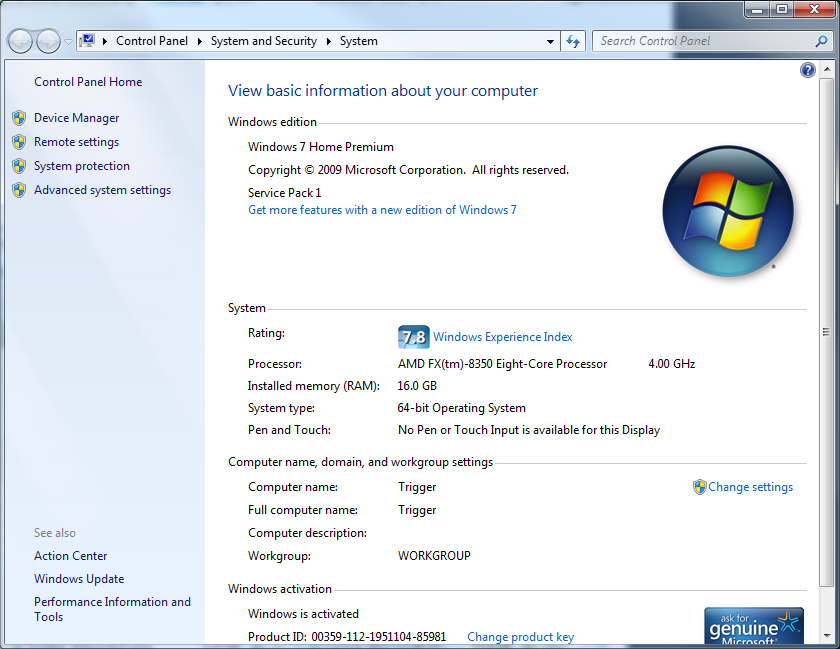
- On the left-hand side of this window, click Advanced System Settings, which will take you to:
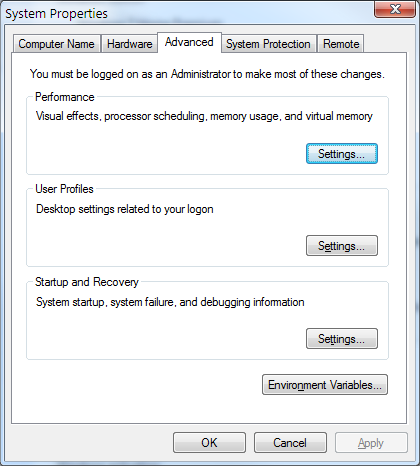
Choose the Advanced tab as shown. - Click Environment Variables to open the next window:
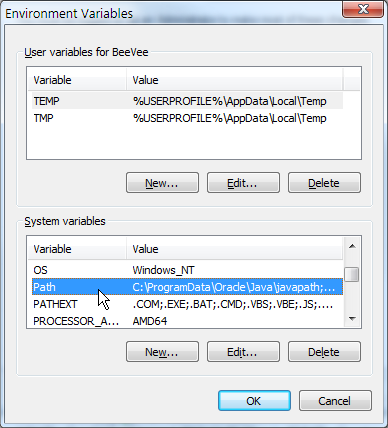
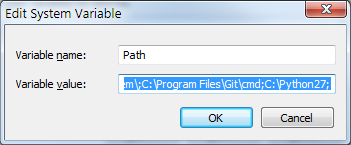
You need to select the Path as shown and click the Edit... button. - The Path gadget will present you with the complete system path in a single line. QuickTime will be in there somewhere and needs to be moved further to the start of the pathline. Copy and Paste the whole line to a decent text editor so that you don't go mad trying to edit in the single line.
VR Object Settings Tab
- Columns (Pan Frames) - is the number of frames of horizontal views in the animation. If your view is from 0 degrees at frame 0 to a full 360 degrees at frame 20 (the same view as 0°), then you will have 20 columns (frames 000 to 019). In a typical movie, the row angle will step up after this many frames.
- Start Pan and End Pan - These values set the angle range of the horizontal views.
- Flip Horizontal Control - reverses the object’s direction of rotation with regard to horizontal mouse movement. In other words, if you drag the object left and it turns to the right, you need to change this setting (or reverse your entire animation!).
- Rows (Tilt Frames) - is the number of frames of vertical views in the animation. In a QTVR Object Movie, the animation moves through all the pan frames in a row before moving to the next tilt frame, and does all the pan views again with that tilt.
If there are 20 pan frames (000 to 019, as above), the tilt angle will change every 20 frames, so sequential tilt values will be at frames 000, 020, 040, 060, etc. This means that your entire animation must be (tilt frames)*(pan frames) long.
The default Columns and Rows settings (20 x 20 = 400 frames) are more than enough for most uses and you may be able to use lower values to reduce the size of the file.
- Start Tilt and End Tilt - These values set the angle range of the vertical views.
The Start and End settings may not seem to change simple viewing of the objects, but may be critical if the object is embedded in a larger QTVR world.
- Flip Vertical Control - reverses the direction of rotation of the object with regard to vertical mouse movement. If you drag the object up, and it rotates down, you need to change this setting.
VR Animation Settings
This tab sets some advanced QTVR options.
- Frames Per View - sets the animation loop size that will run from each view. If this value is greater than one, then your animation should hold each pan view for this many frames, as the loop happens. This also means that your animation length must be multiplied by this number. You should not alter the pan or tilt frame counts; QTVR will handle that.
- View States - The QTVR object format features an alternate state that can be displayed based on some user input, for example, when you click the mouse. The View States value supports this alternate state, but will also multiply your animation frame count. These extra frames take the form of an entire identical animation of the object in an alternate state, appended onto the first. Currently, the QuickTime player appears to support only two usable states, not clicked and clicked. In theory, higher values could be used.