Instancing reference
There are several types of instancing for the user to choose from. Most of these provide additional dedicated controls when activated. In addition, each instance type can use the options found under the tabs at the bottom right of the panel to control the distribution and range limits of various attributes for instances. Nodes are available to allow for varying the surfaces among instances and controlling other attributes as well. First, we will list the types and their dedicated controls, then we will cover the controls in the tabs below.
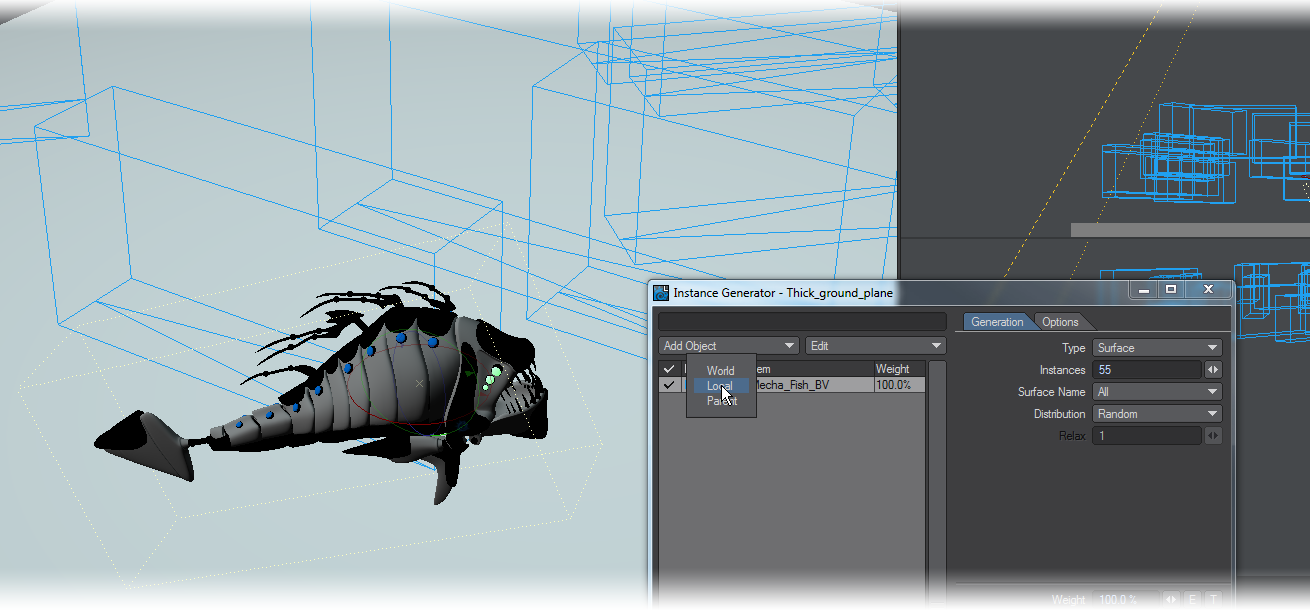
![]() The default Transformation Handling status for new instances is now Local instead of World
The default Transformation Handling status for new instances is now Local instead of World
Overview of Controls
Instance Generator Name
You can have multiple Instance Generators attached to an object. The text entry field found at the top left of the panel allows you to enter a name for the Instance Generator you’re editing. This is the name that will appear in the Instancer list on the Object Properties panel, so that you can tell multiple Instance Generators apart.
Add Object Popup Menu
This lists the objects in the scene, and allows the user to select the objects that will be instanced. When an item is selected, it then appears in the Instanced Objects List, just below the two dropdown menus.
Edit Popup Menu
- Remove Selected - Removes the selected object from the Instanced Objects Window.
- Remove All - Removes all objects from the Instanced Objects Window.
- Replace Object - Pops up a list of the objects in the scene, and the user can pick one to replace the object currently selected in the Instanced Objects Window.
- Add from Layout - Adds selected object or objects to the Instanced Objects Window.
- Remove from Layout - Deletes selected object or objects from the Instanced Objects Window.
- Replace From Layout - Swaps one item selected in Layout for one item selected in the Instanced Objects Window.
- Copy Settings - This copies all the transform settings (Scale, Stretch, Offset, Rotation, and Nodes) for the selected instance item now that all instance items in an Instancer can have different values.
- Paste Settings - This pastes all the transform settings for an instanced object now that all instance items in an Instancer can have different values.
Instanced Objects List
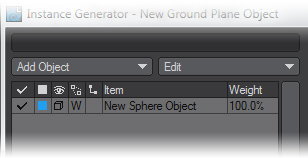
Lists the instanced objects and provides controls for several basic attributes.
- Active (Checkmark) - Controls whether an object will be instanced or not.
- Instance Color - Selects the OpenGL color for instances of this object.
- Visibility - Controls the display of the instances for this object in Layout.
- None - Instances are hidden in the viewports (but they are still active)
- Point - Instances are displayed as points.
- Bounding Box - Instances are displayed as bounding boxes (default option).
- Wireframe, Front Face Wireframe, Shaded Solid, Textured Shaded Solid - Displays the mesh of the instanced object. This could severely slow down your scene, use with caution.
- Transformation Handling - Sets handling of transformations of the instances concerning the source object.
- World - When world coordinates are used, the instances will respect any transformational changes made to the source item (default option).
- Local - When local coordinates are used, the instances ignore any transformational changes made to the source item.
- Parent - New to 2019, when instancing a PART OF a hierarchy, setting Parent mode ensures the hierarchy maintains the relative positions of its elements TO THE HIERARCHY'S PARENT. The root object for the transform can be set in the options tab.
- Hierarchy (toggle) - Selects whether a hierarchy attached to the source item should also be instanced. By default, this toggle is not checked. When checked, the attached hierarchy is also instanced and inherits the transforms relative to the parent item.
- Item - Name of the object(s) used as an instance source.
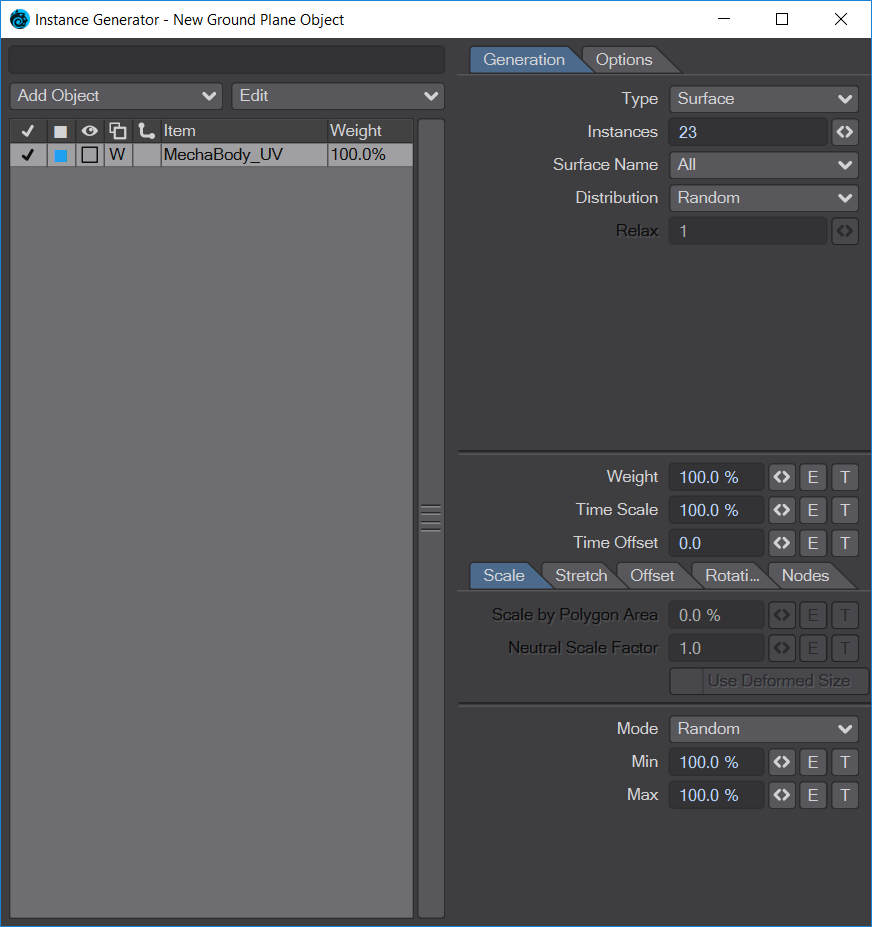
Generation Tab
The controls in this tab are where you set the type of generation for instances. The types are:
- Item (Pivot) - Creates an instance at the pivot point of the host object. A usual use case for this would be to use a null to create a clone of a scene item - what Clone Instance does.
- Points - Creates instances at the points of the host object.
- Max Points - Automatic way to set instances to match the number of points in the host object. This setting evaluates subdivision geometry, so you’ll always get the full number of instances regardless of display vs render subdivisions.
- Instances - Set the number of instances to create.
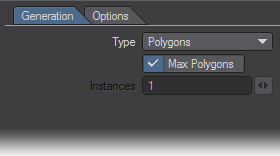
- Polygons - Creates instances at the polygons of the host object.
- Max Polygons - Automatic way to set instances to match the number of polygons in the host object. This setting evaluates subdivision geometry, so you’ll always get the full number of instances regardless of display vs render subdivisions.
- Instances - Set the number of instances to create.
- Particles - Creates instances at the locations of particles (for use with particle emitters only).
- Surface - Creates instances on all surfaces or a designated surface of the host object. The host surface must be quads or triangles, no n-gons.
- Instances - Set the number of instances to create.
- Surface Name - Select the surface(s) on which the instances will be placed.
- Distribution:
- Random - Places the instances randomly on the selected surface(s).
- Uniform - Place instances at uniform distances on the selected surface(s).
- Relax - (Active when Uniform is selected) You can relax the instance distribution across your object in a series of iterative steps that will gradually quantize placement making instances more evenly spread. There are 40 levels of relaxation and each one marks an iteration, so setting it immediately to 40 will take some time to show results depending on the number of instances to be processed. If the instances overlap, then either too many are being packed in or the scale is too high.
-
 Static - New to 2020 - setting Surface instances to static will stop evaluation at render time. This will mainly help with Octane, and other third-party renderers, having to spend significant time doing their own evaluation of each frame being rendered. Setting items to static will stop enveloped transforms from occurring during the rendering of the scene.
- Rectangular Array - Creates instances in a 2D or 3D box-like array.
- X, Y and Z Instances - Sets the number of instances to create in each Axis.
- X, Y and Z Spacing - Set the spacing of the instances along each Axis.
- X, Y, and Z Alignment - You can choose to align the array on the negative side (-), centered (0), or positive (+)
- Radial Array - Creates instances in a 2D circular array on the selected axis around the pivot point of the host object.
- Instances - Set the number of instances to create.
- Axis - Set the axis for the array.
- Radius - Set the radius of the array.
- Start Angle - Set the starting angle of the array on the circle.
- End Angle - Set the ending angle of the array on the circle.
- Offset - Sets an offset distance perpendicular to the axis chosen between the instance at the start angle and the instance at the end angle. The instances between will be proportionally offset.
- Motion Path - Creates instances along the motion path of the host object.
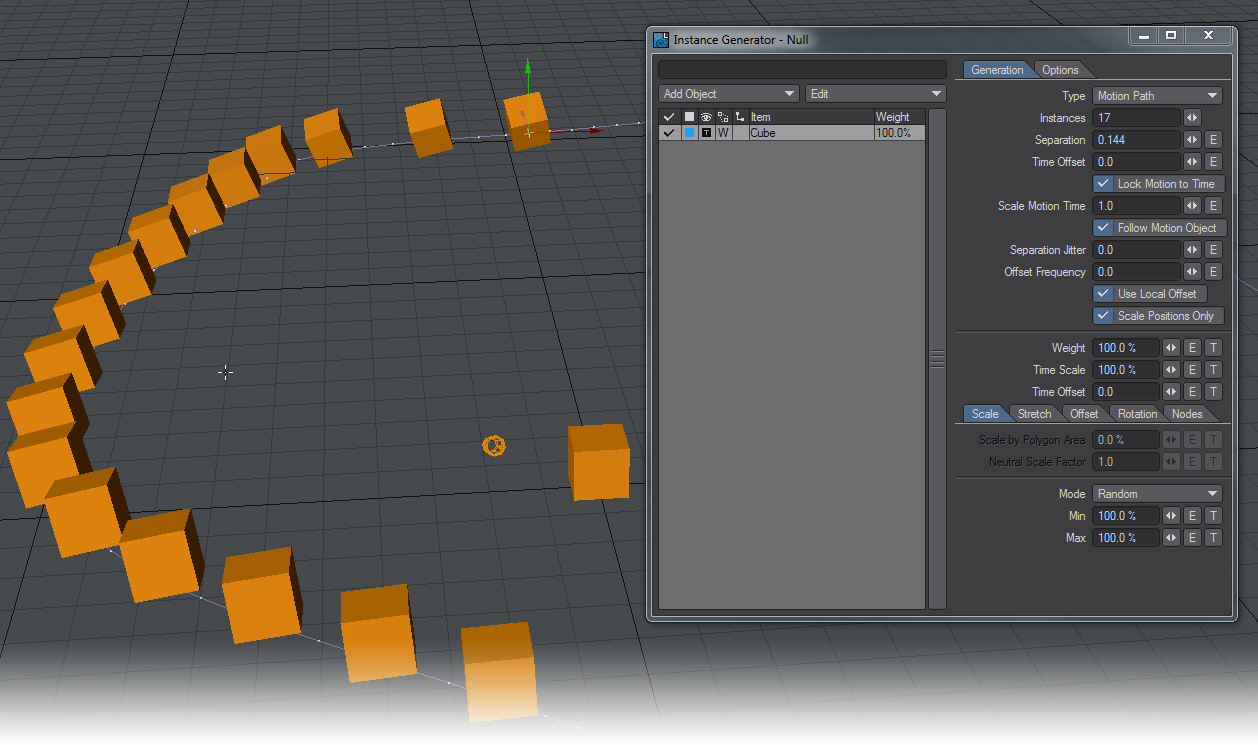
Giving a Null a motion path and then assigning it an Instance Generator allows this chain of Layout-created cubes to follow the Null’s motion path with a great deal of control.
- Instances - Set the number of instances to create.
- Separation - Time in seconds between each instance.
- Time Offset - This slips the instances forward and backward along the motion path, and again is in seconds. If the value was 1 , then the instances would appear 1 second further along the motion path. Negative values slip the instances further back.
- Lock Motion to Time - This makes the instances move along with the motion object. You can use this in conjunction with Time Offset to make the instances move along with the object, but further ahead or behind in time.
- Scale Motion Time - Scales the speed that time passes when Lock Motion to Time is on. For example, 0.5 would move the instances at half the speed of the motion object, while 2.0 would move them twice as fast.
- Follow Motion Object - Instances are generated from the motion object forward in time, or backward; this control determines the behavior. If Follow Motion Object is on, the first instance is generated at the motion object’s position and the rest trail backward down the path. Otherwise the instances are generated ahead of the motion object with the final instance generated at the motion object’s position.
- Separation Jitter - Jitters the Separation randomly so the instances are not uniformly distributed along the path. A value of 1 would jitter randomly from 0 to the separation value in either direction.
- Offset Frequency - Setting is in seconds; randomly jitters the position of the instances as they move down the path, like a simple flocking behavior. The positions change every second of the value of Offset Frequency, so for a value of 2 the instances should change position every two seconds.
- Use Local Offset - The offset values in the Offset tab can be either applied in world or local coordinates relative to the alignment of the instance on the path.
- Scale Positions Only - If the motion object is scaled as it moves, the instances can be scaled along with it, or just their positions can be scaled, to make them spread out from the path or move towards it.

- Spline - Creates instances along a Spline Control spline.
- Instances - How many Instances you’d like to place along your spline.
- Separation - How far apart you want the instances. The control is disabled if you choose the Distribute checkbox.
- Distribute - This control spreads the instanced items evenly along the spline. It ghosts the Separation control when used.
- Offset - You would use the Offset setting to create an offset from the start of the spline for your instances. If you set an Envelope for this setting, you can animation your instances moving along the spline
- For Rotation, there are three Alignment options in the Rotation tab:
- Spline - World - Uses world coordinates for item rotation
- None - no rotation
- Spline - Local - uses Spline coordinates for the rotation of the instanced mesh
Example - Curve to Spline and Spline Instancing
Options Tab
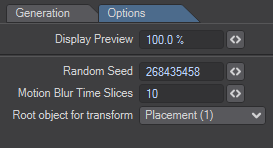
- Display Preview - For faster interaction when working with a large number of instances, set the percentage of instances to be visible in the viewport. This does not affect final rendering, but will make the UI, OpenGL and VPR more responsive by rendering with a lowered amount of instances.
- Random Seed - This value is what instancing uses as a base to generate a random number. Changing this will vary any settings using ‘random’ values e.g. random scale. Every Instance Generator will have its own unique number, but if you wish different instance generators to use the same random state, you can set the same number here. Useful if you want items in more than one instance generator to be aligned.
- Motion Blur Time Slices - This is a setting for rotations. Low numbers give a segmented look to objects moving in an arc, but the default setting of 10 should give a good look in most cases.
- Root Object for Transform - Changing this value gives the user the ability to move the instancer up and down a scene hierarchy.

Above the transform settings are three controls:
- Weight - The weight property can be used for limiting (turning off) the number of instances being shown, despite how many instances you have set. It does this by determining an approximate amount of probability of an item being shown , using the value you set. You can use a simple value, or the Texture Editor for more advanced weighting. This property can also be animated, so you can have instances appear/disappear over time.
The weight is not the percentage of the maximum number of instances for each item, but is the approximate probability as a percentage of that item being shown. Note that this randomness is designed to work with large quantities of instances. If you are working with a small number of instances it would be wise to use a different method, such as Points or Polygons, if you expect fixed quantities of instances.
Weight Examples
Imagine we have a scene with only one item being instanced across a plane, with the max number of instances set to 100. At a 100% weight (or probability) it would clearly show all 100 instances. However, this setting can be used to limit the number of instances; if we set the weight 50%, you would only see approximately 50 instances, because they have a 50% chance of being shown. If you count the number of instances in the 50% weight image above, you’ll notice there are 53 instances and not 50 as you might expect. To explain why this is the case, we need to add another item into the mix.
Two items being instanced at 100% weight will result in 100 total instances, but with each item approximately equal in number (both have 100% probability of appearing, so they are approximately equal in number). If we set both items to 50% weight, they now have 50% probability of being shown, however, we won’t see 100 instances as you might think, but 53 as before. This might not make sense at first, but the key word here is probability, so let’s try and explain.
The instancer has been set to have a maximum number of 100 instances. Let’s imagine that number as a list of 100 ‘instance slots’, that are ‘drawn’ in order from 1 to 100 (this is not how it works internally, but will help explain the concept).
To achieve a random distribution when we have more than one item to instance, that ‘list of instances’ also needs to be filled randomly, so as the instancer draws each ‘slot’ in order, we see the instances scattered in a random fashion rather than ordered in groups of each instance item.

However, creating a randomly ordered list of items to be instanced is not very efficient, especially when you have the potential to have thousands or even millions of instances. This is why the instancer does not work this way. Instead, it uses the probability of an instance being shown, or the weight value.
In reality, the instancer goes through the number of instances set, looking at the items in the instancer list and working out the probability to be shown for each item at that instance number. It determines this by a random percent value, if that value is less than the weight amount for the item, then the instance number it’s on is shown.
Due to this randomness, the probability that an instance will be visible can vary a little, which is why there are 53 instances in this case and not exactly 50, but doing it this way is much faster than building and storing a pre-determined list of random numbers. That is why this method should not be used if instance numbers are low or exact numbers are required, since the variance for a small set will be larger proportionately than for a large set — 53 out of 100 is a lot more significant than 503 out of 1000 although both examples here have the same +/- 3 variance.
- Time Scale - Allows any instanced hierarchies to be animated slower or faster than the original object hierarchy that was instanced.
- Time Offset - Sets the animation offset (in seconds) of any instanced hierarchies from the original object hierarchy that was instanced.
Time Offset only works when the Instanced item is set to Parent and not World Coordinates.
Instance Transformation Options
At the bottom of the Instance Generator panel are a set of tabs for controls that can be used with each type of instancing. These are Scale, Stretch, Offset, Rotation, Nodes.
Scale, Stretch, Offset and Nodes are identical for each type of instancing. Scale, Stretch, and Offset each provide two modes, Uniform and Random, for handling of the distribution of the attribute.
If you are using nodes to drive transformations in your instances, make sure you set the Scale / Stretch / Offset and / or Rotation tabs to Uniform.
Scale Tab
Allows for varying the size of the instances. At the top of this tab are two functions that need additional explanation.
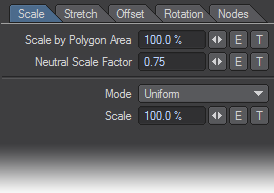
- Scale by Polygon Area - This compares the size of the polygons that will be used to position instances with the size of the original object being instanced. It also controls the amount of influence the original object’s scaling has on the Neutral Scale Factor. For instance, if the actual area of the polygon is 0.1, then the instance will be scaled by 0.1, and so on
- Neutral Scale Factor - This factors what size your instances will be for the polygon area they are being instanced on. Hence a Neutral Scale Factor of 2 will mean that two instances will fit inside the area of the polygon, the instances will be half size.
- Use Deformed Size - If you use the Scale by Polygon Area setting above, you can have instance size changes as the host mesh deforms with this enabled
These settings function in conjunction with the other scaling and stretching options available to you, increasing the flexibility available.
Mode :
- Uniform - All instances will be scaled at the same size.
- Scale - Sets the size by percentage.
- Random - Creates instances at varying scales based on the min/max settings.
- Min - Smallest size for an instance, as a percentage.
- Max - Largest size for an instance, as a percentage.
Stretch Tab
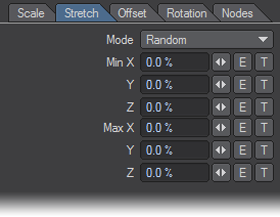
Allows for varying the proportions of the instances along each axis (X/Y/Z).Mode:
- Uniform - All instances will have identical proportions.
- Stretch X/Y/Z - Settings for the percentage of change to make in each axis.
- Random - Creates instances at varying proportions based on the min/max settings.
- Min X/Y/Z - Sets a minimum size in each axis.
- Max X/Y/Z - Sets a maximum size in each axis.
Offset Tab
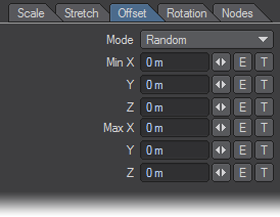
Allows for an offset from the initial position the instance was created.Modes :
- Uniform - All instances are offset the same distance on each axis.
- Offset X/Y/Z - Settings for the offset distance for each axis.
- Random - Instances are offset at varying distances based on the min/max settings.
- Min X/Y/Z - Sets the minimum value for the distance of the offset.
- Max X/Y/Z - Sets the maximum value for the distance of the offset.
Rotation Tab
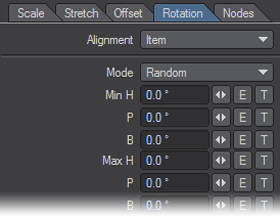
Allows for controlling the rotations of the instances in a variety of ways. Some of these options will be determined by the type of instance generation used.
Alignment (Dependent on generation type):
- Item (Pivot):
- Item - Instances align with the host item.
- Points:
- Item - Instances align with the host item.
- Normals - Each instance aligns with the normal of its associated point.
- Polygons:
- Item - Instances align with the host item.
- Normals - Each instance aligns with the normal of its associated polygon.
Edge Aligned - Rotates an instance so its Z axis points at the center of the shortest edge of the polygon it’s generated on.
Be careful with aligning to Normal. If the polygons concerned rotate, the Instancer will need to determine where the normal should be and may not be consistent. Try Edge Aligned if you are having problems with Normal alignment,
- Particles:
- Particles - Each instance aligns with its associated particle.
- Surface:
- Item - Instances align with the host item.
- Normals - Each instance aligns with the normal of the surface at its location.
- Rectangular Array:
- Item - Instances align with the host item.
- Radial Array:
- Item - Instances align with the host item.
- Rim - All instances are oriented to the pivot point of the host item.
- Motion Path:
- Motion Item - Instances align with the motion item.
- Path - Instances align heading to the direction of travel along the path.
Mode :
- Uniform - All instances have the same orientation.
- Rotation H/P/B - Entry fields to set Heading, Pitch and Bank.
- Random:
- Min H/P/B - Set minimum rotations for Heading, Pitch and Bank.
- Max H/P/B - Set maximum rotations for Heading, Pitch and Bank.
- Target Item - Instances orient to the pivot point of a target item.
- Target Item - Pick the target from the list of scene items, including lights and cameras.
- Target Mode - Changes how targeting is calculated.
- Look At - Instances all look at the pivot point of the target item.
- Axis Aligned - Instances all align with an axis of the target item.
- Axis X/Y/Z - Active when Axis Aligned is the target mode; selects the axis of the target object to align the instances with.
Nodes Tab
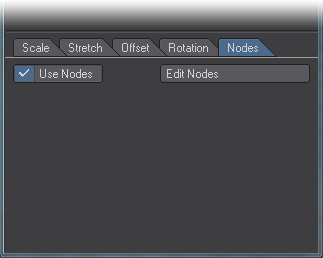
Access to the Node Editor for controlling the transformation and weighting of instances using nodes. Node flows can also be turned on/off without needing to delete or hook them.
- Use Nodes - Toggle on/off.
- Edit Nodes - Allows the user to access the Instance Generator Node and control instancing and attributes using a node flow.
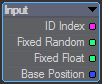
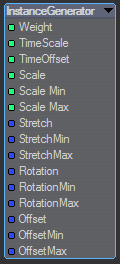
Instance Generator Node
This works in conjunction with the settings in the transformation tabs on the panel, and allows node-based control of these items, as well as of the weighting of the instanced items. Any settings not controlled by nodes will use the panel settings, this allows you to mix node-based control with those on the main instance generator panel.Each of the inputs correspond to their equivalents in the main interface:
The node transformation inputs are affected by whatever mode you have chosen in the main panel for the corresponding transformation. For example, if you had a node flow controlling Scale Min/Scale Max, but in the instance generator panel you have the Scale Mode set to Uniform then the node flow will not influence anything as you have chosen a different Scale Mode to that which the node flow is controlling.
TimeScale and TimeOffset on the destination node now work in World, Local and Parent modes. The Input node now has a Fixed Float output.
This spits out a number from 0.0 to 1.0 , where 0 is the first instance and 1 is the last. 0.5 would be the instance halfway between, etc.
Imagine your instancer as a chain stretching from 0-1. You have instances picked out at 0, 0.4 and 0.8. If you increase the number of instances on your chain, you will make the "links" finer, but those positions will still be the same, even if the instance number (link) is increased.
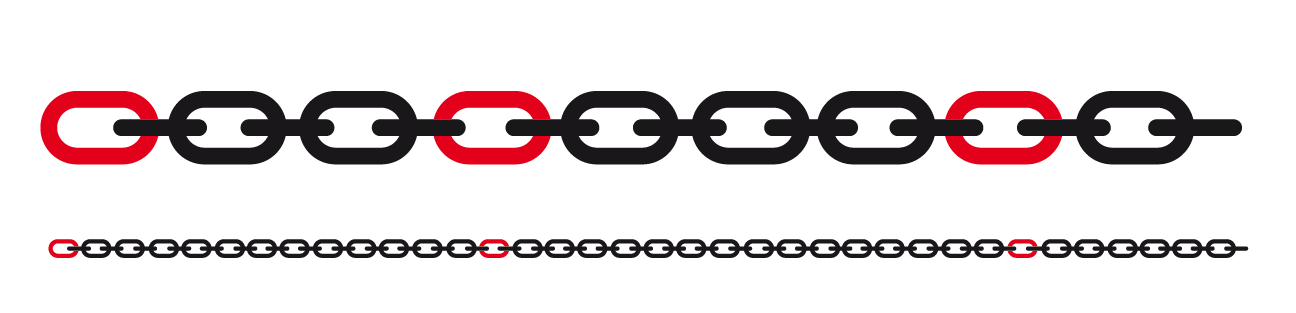
Fixed Float is applied to Offset (which must be set to Uniform). As the number of instances changes, the "staircase" effect stays constant with more or fewer steps.
Changes have been made to Instancing in response to user requests for the ability to have the same object in an instance generator multiple times for different scale, offset, rotation, etc. This new functionality has made loading 2015 and newer instancing into earlier versions not possible.
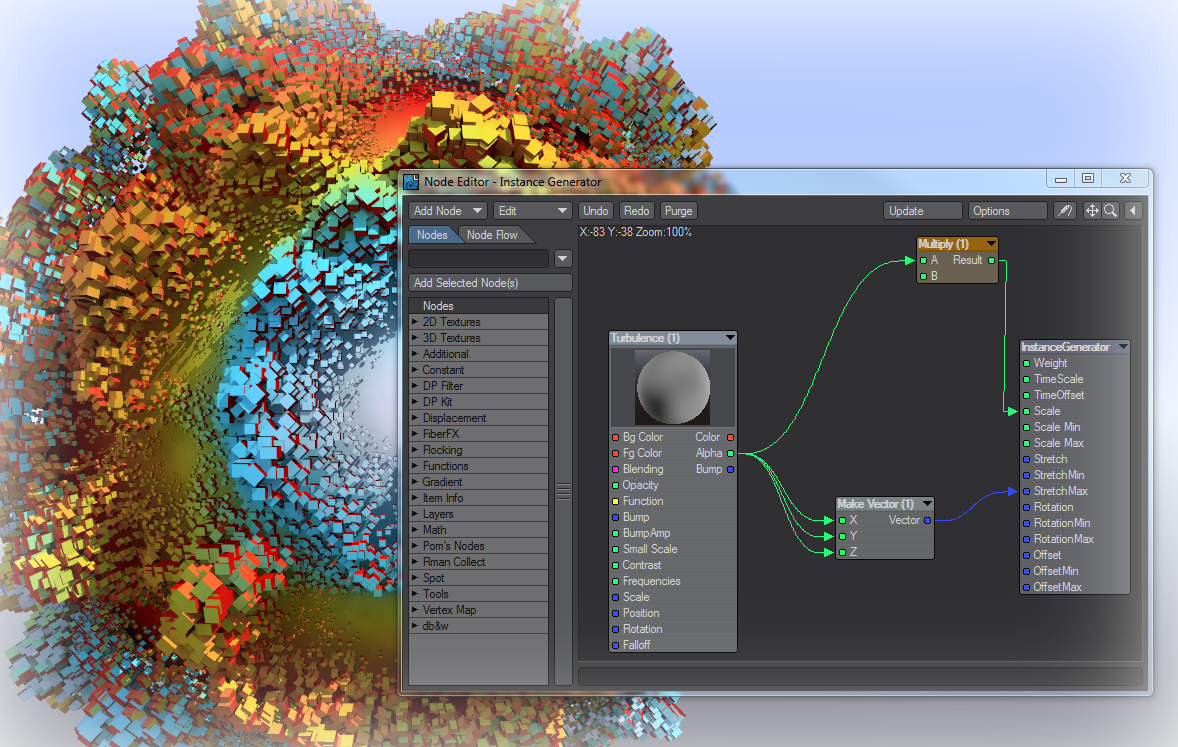
For the animated abstract sphere above, we used a Turbulence procedural texture to drive the uniform Scale of our instanced cubes. We also set the Stretching to be Random and converted the same Alpha output from Turbulence into a Vector to drive the Stretch Max value to exaggerate the effect.
Hiding Instanced Objects
When you have used an object as an instance, it can be irritating to see it in OpenGL and renders still. You have several ways of removing it from view.
- You can untick the Active entry in the Scene Editor. This removes it from VPR and renders, but not OpenGL.
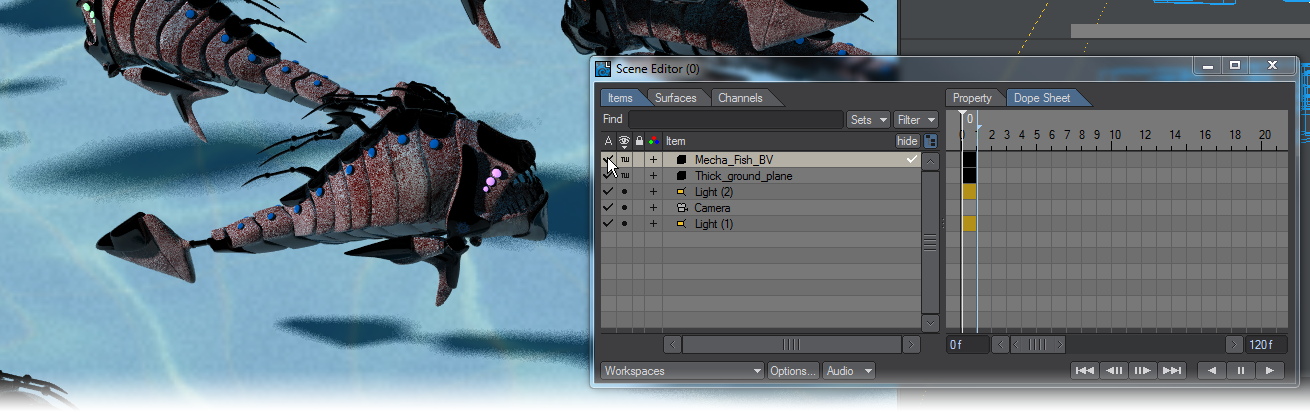
- You can use the Scene Editor’s Maximum Render level to hide the original object.
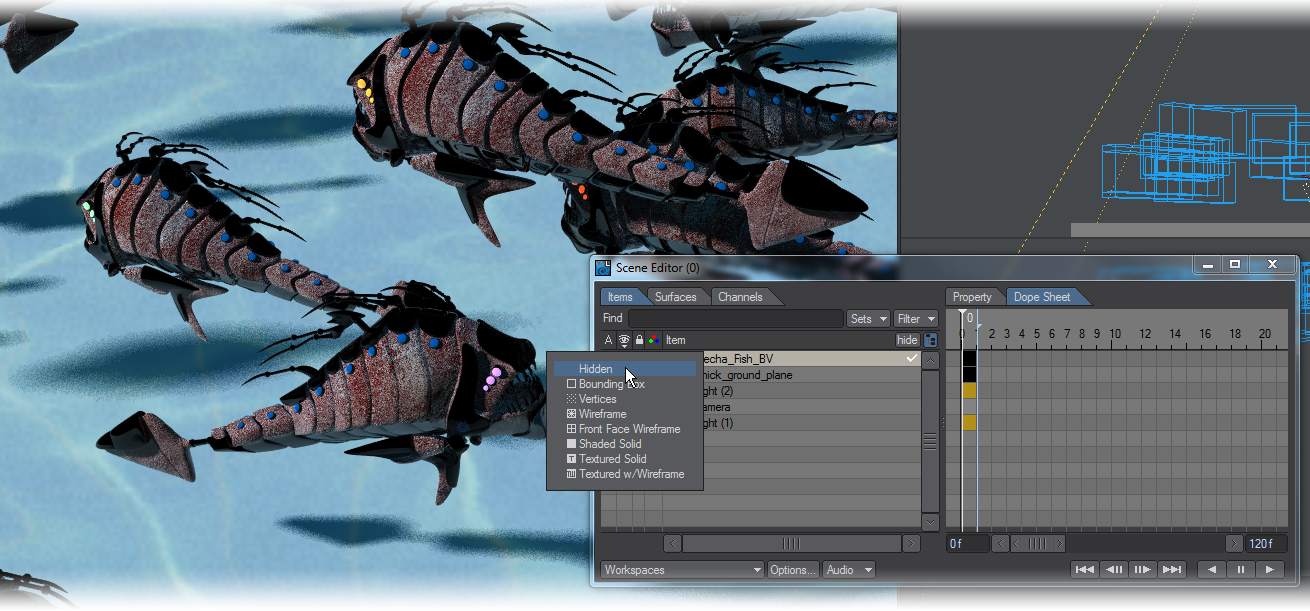
- You can set the Instances of this object to use a Local coordinate system, whereupon you can move the original object out of camera view or position it to swim against the tide, as here.